The button opens Claude’s Add custom connector dialog with the name LeonAI Priority and the server address already filled in. Press Continue, keep the detected options and press Add.
Claude shows a notice that the connector came from an external link. That is expected: check the address is priority-mcp.leonai.io and continue.
The Free plan allows one custom connector.
Already added it? In Claude press +, choose Connectors and switch LeonAI Priority on.
On Claude Team or Enterprise only an Owner adds a connector; then each member presses Connect. Not the Owner? Send them this link:
After Add, LeonAI’s sign-in page opens. Carry on at the step Enter your email.
Using another assistant?
Every assistant signs in the same way: your email, your API key and a code sent by email.
ChatGPT
ChatGPT has no link that fills in a connector. The button copies the address and opens Plugins: press +, choose Add custom MCP server, paste the address, set up the sign-in and press Create as a plugin. Don’t see the option? Ask your workspace admin.
Run the first command in a terminal; it opens the sign-in. If it doesn’t, run the second:
In the Codex app: Settings, MCP servers, Add server, then paste the address.
VS Code · GitHub Copilot
In VS Code open the Command Palette, choose MCP: Add Server, then HTTP, and paste the address:
1
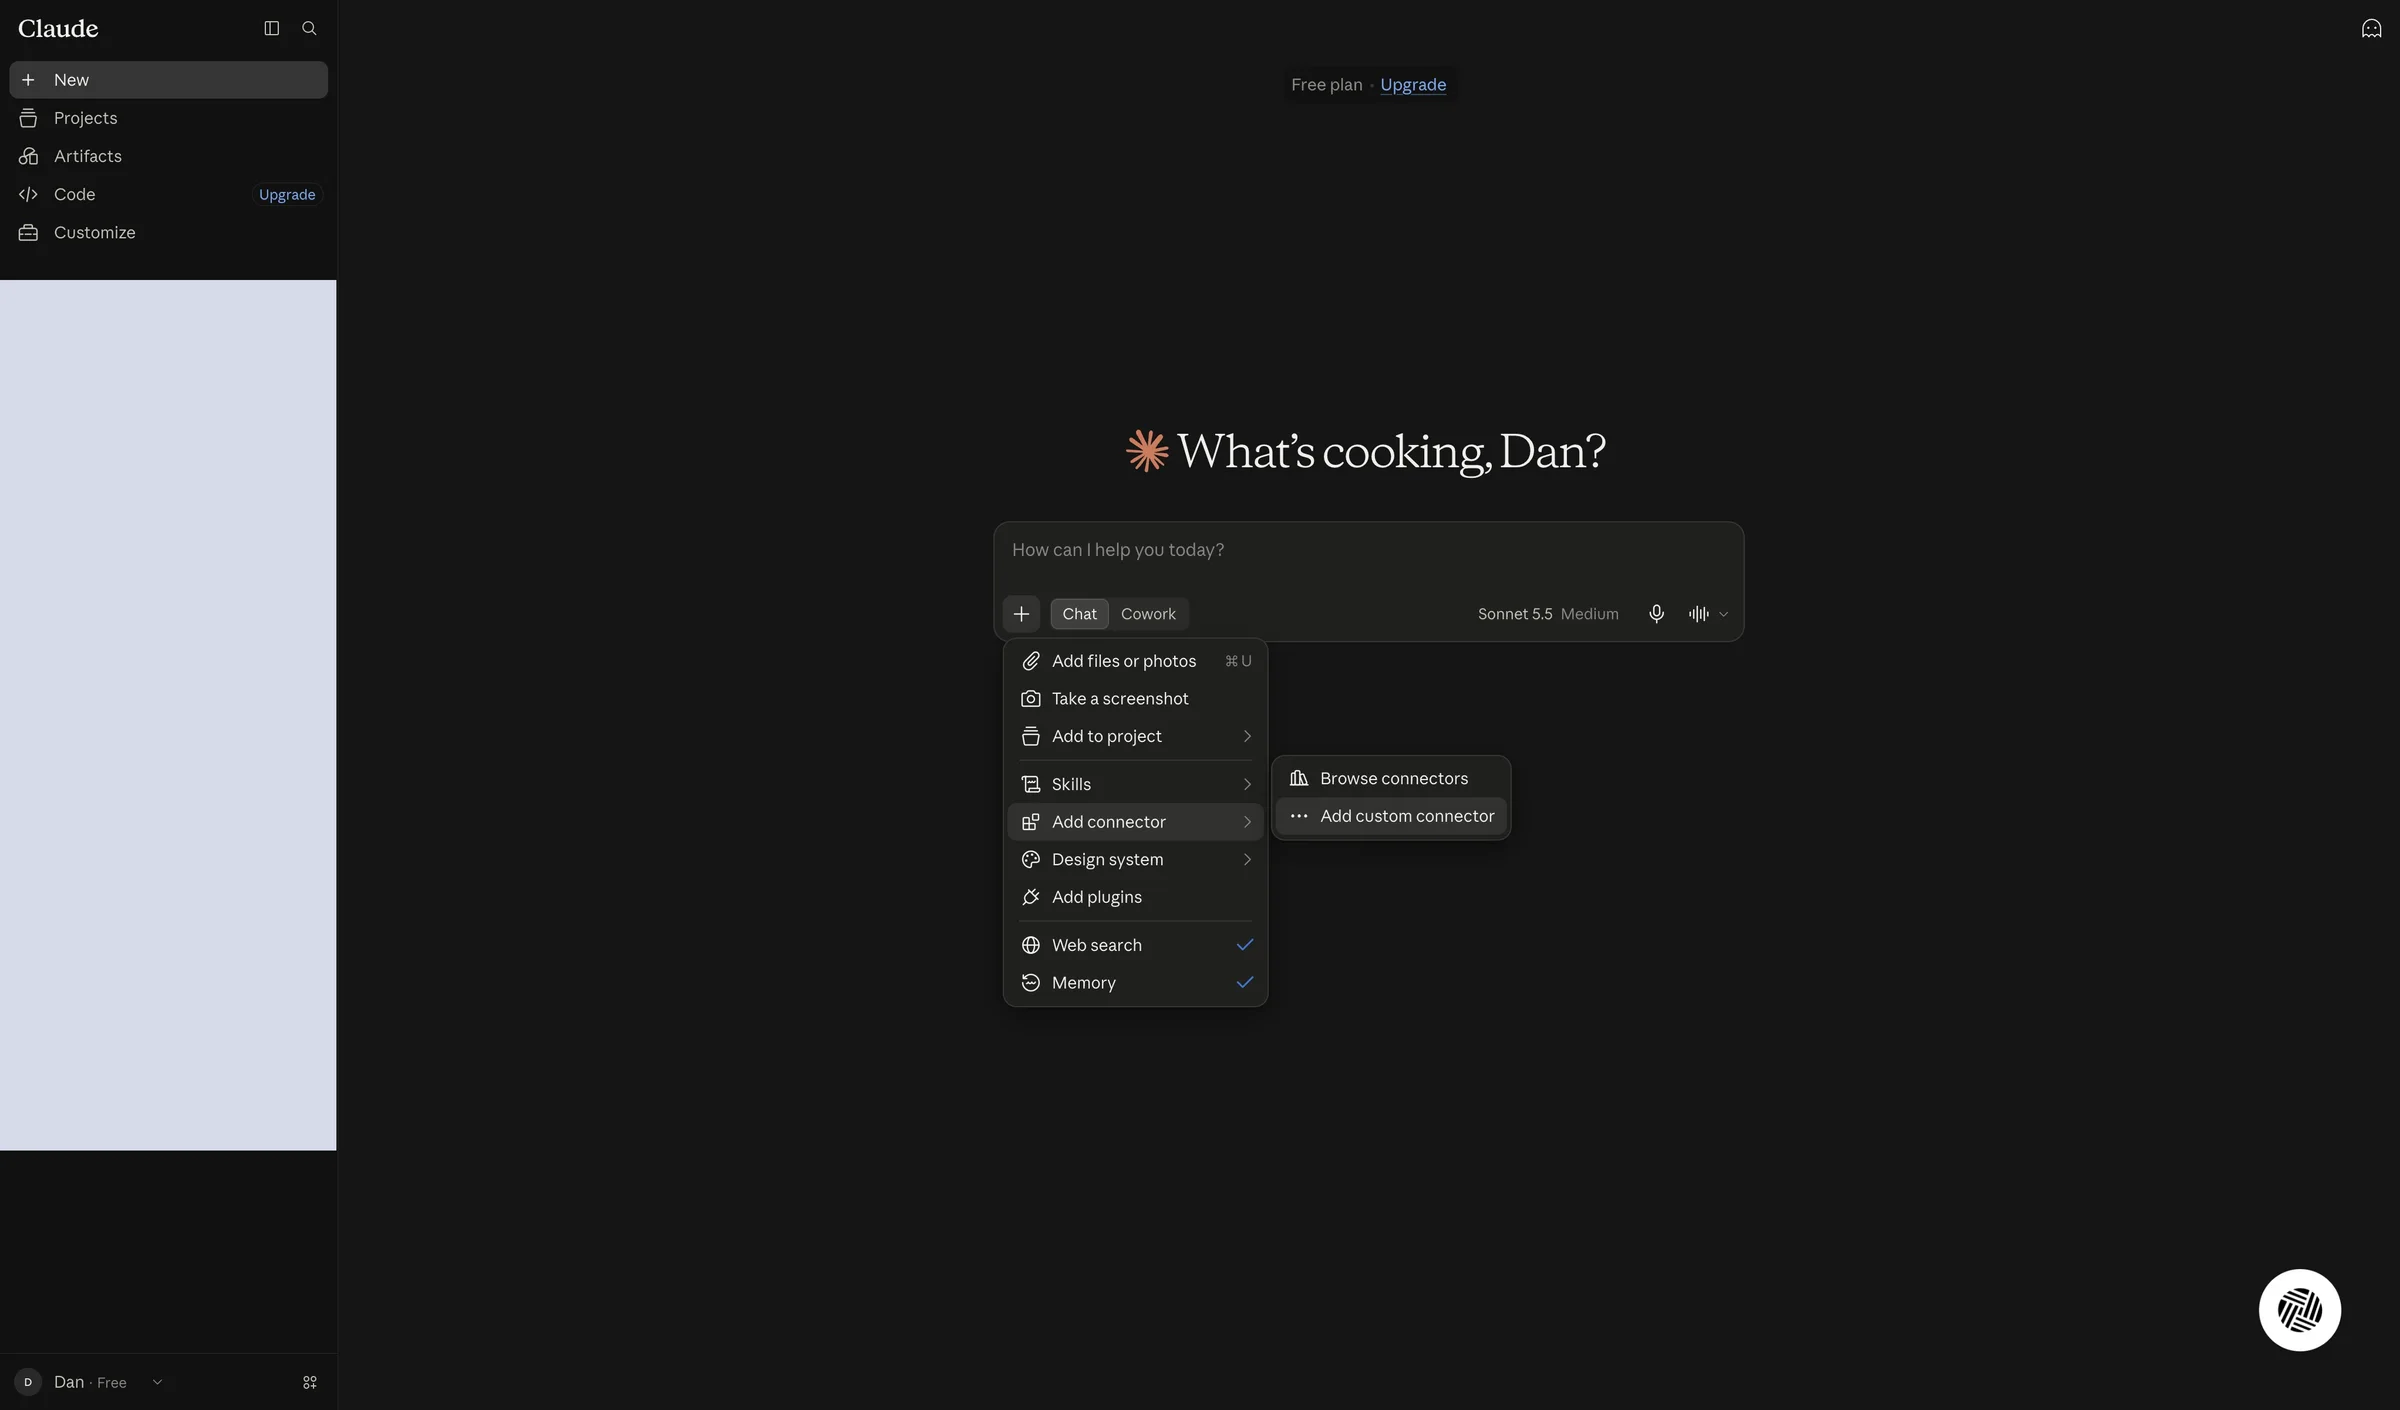
Choose Add custom connector
In Claude, in the chat window, click +, point to Add connector and click Add custom connector.
The LeonAI connector is not in the list of ready-made connectors, so you add it as a custom connector by its server address.
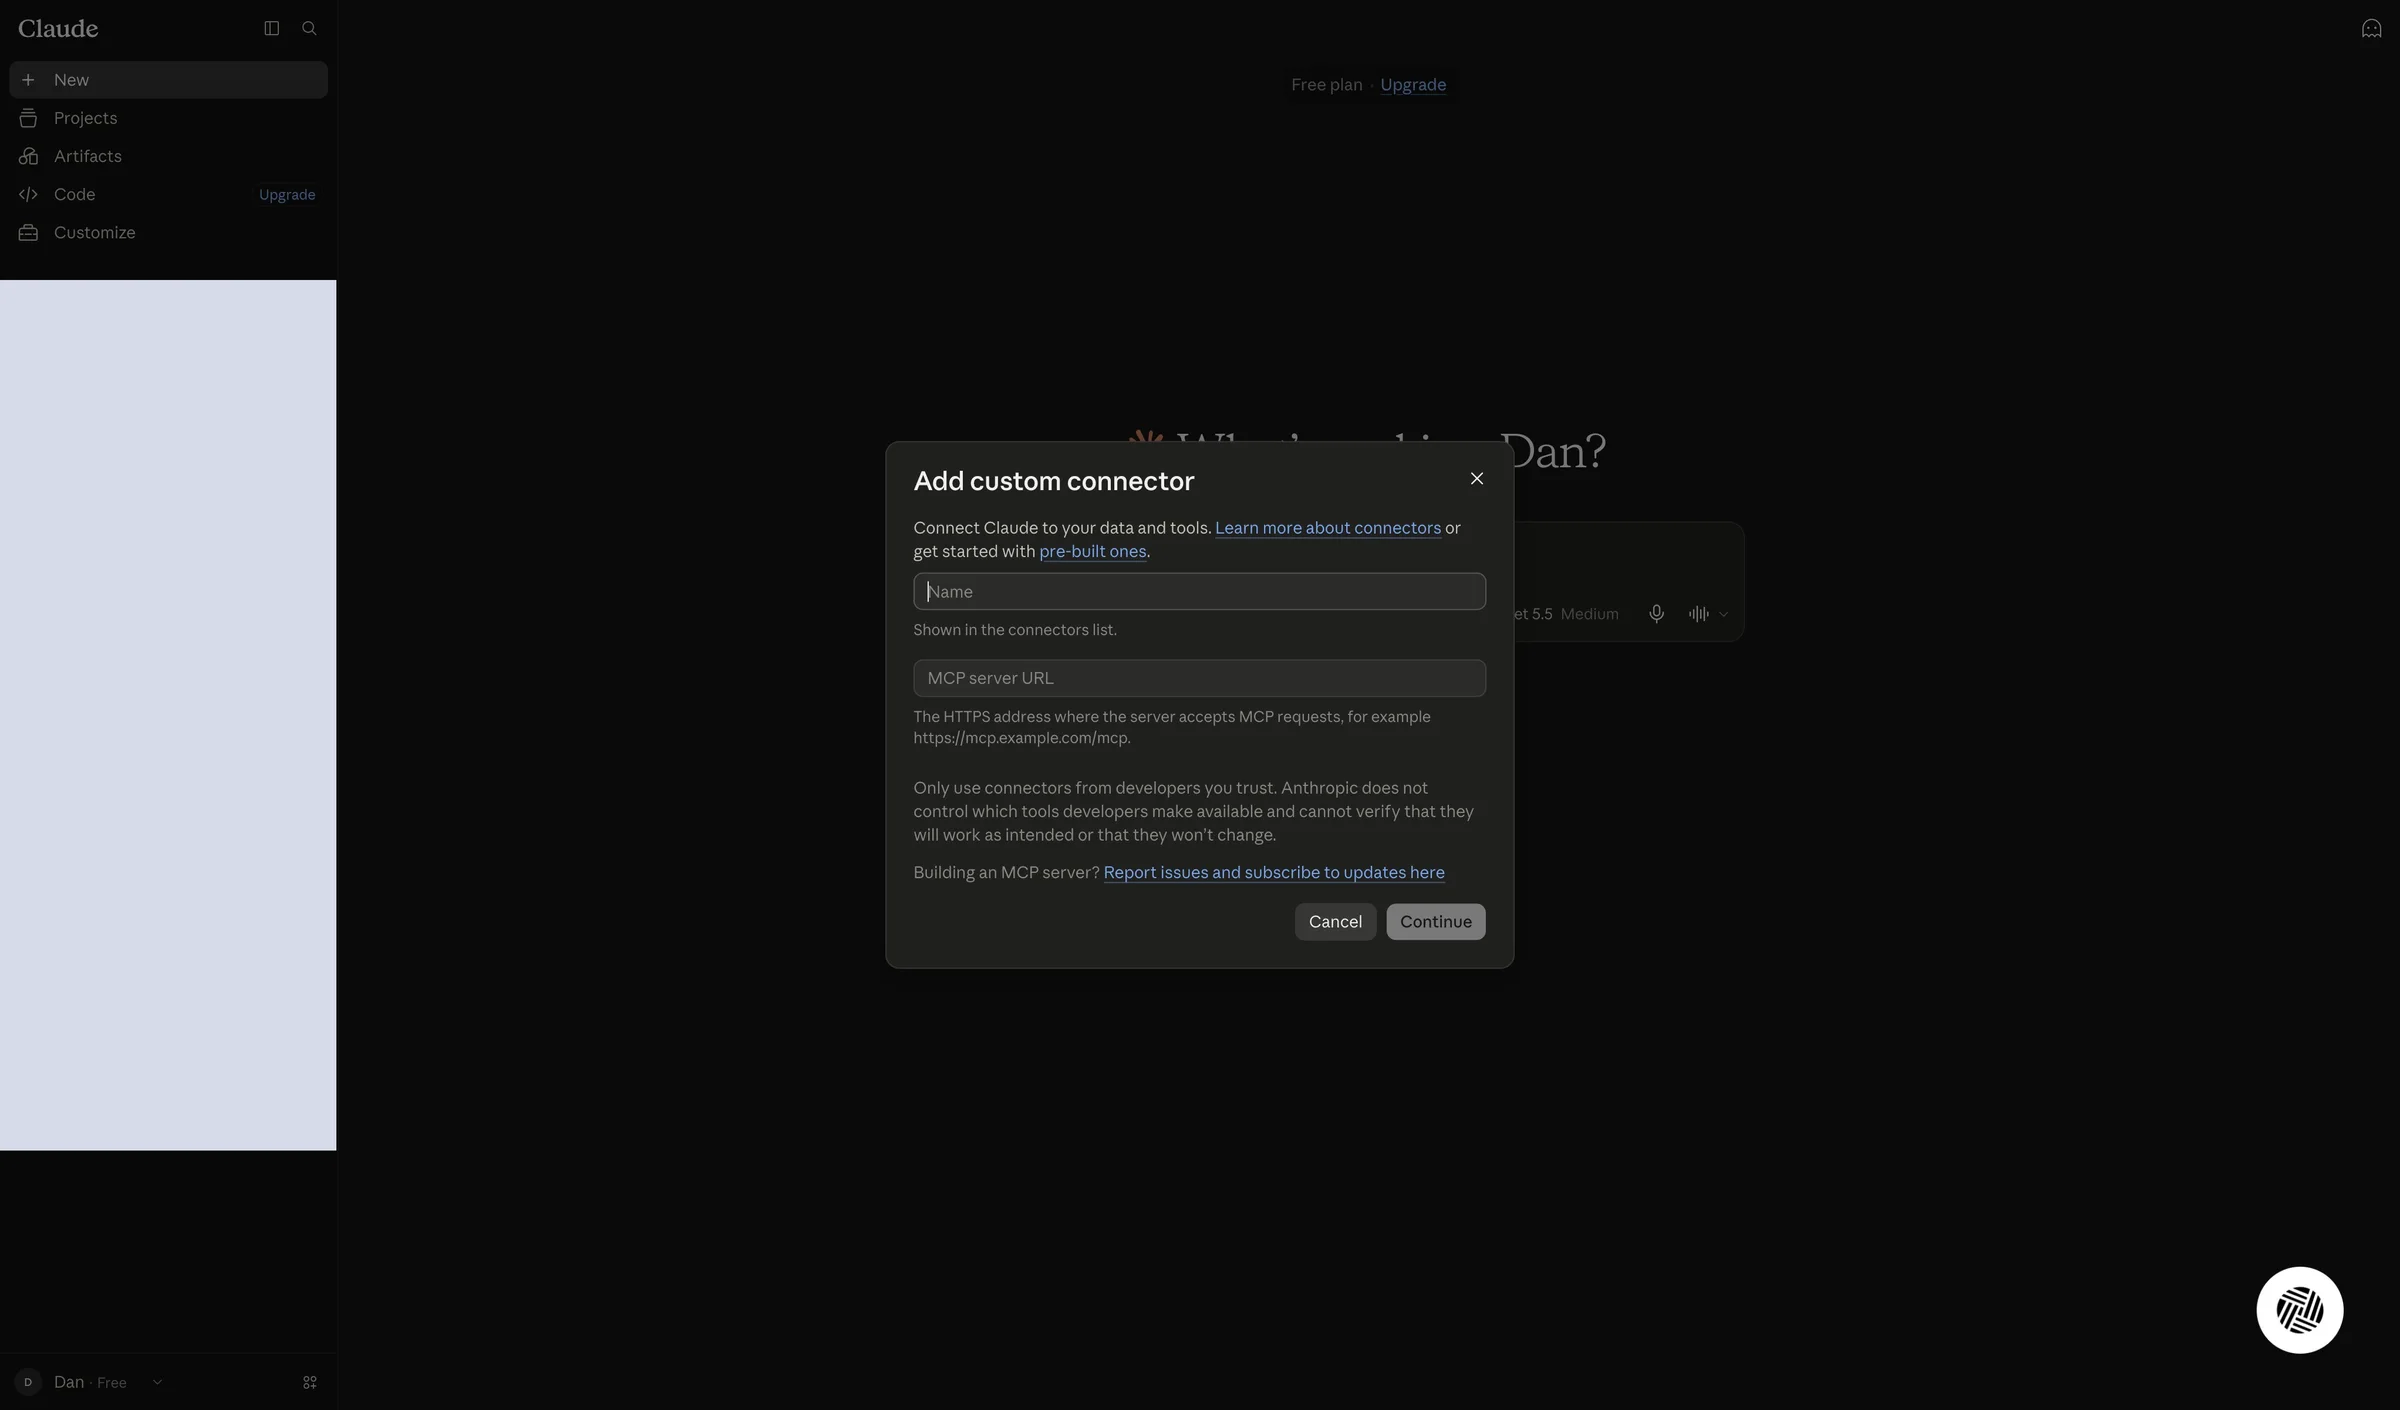
The Add custom connector window opens.
2
Name the connector
Click the Name field and type a name, for example MY PRIORITY MCP.
As the window explains, the name is shown in the connector list, so choose one you will recognize easily.
The name you chose appears in the Name field.
3
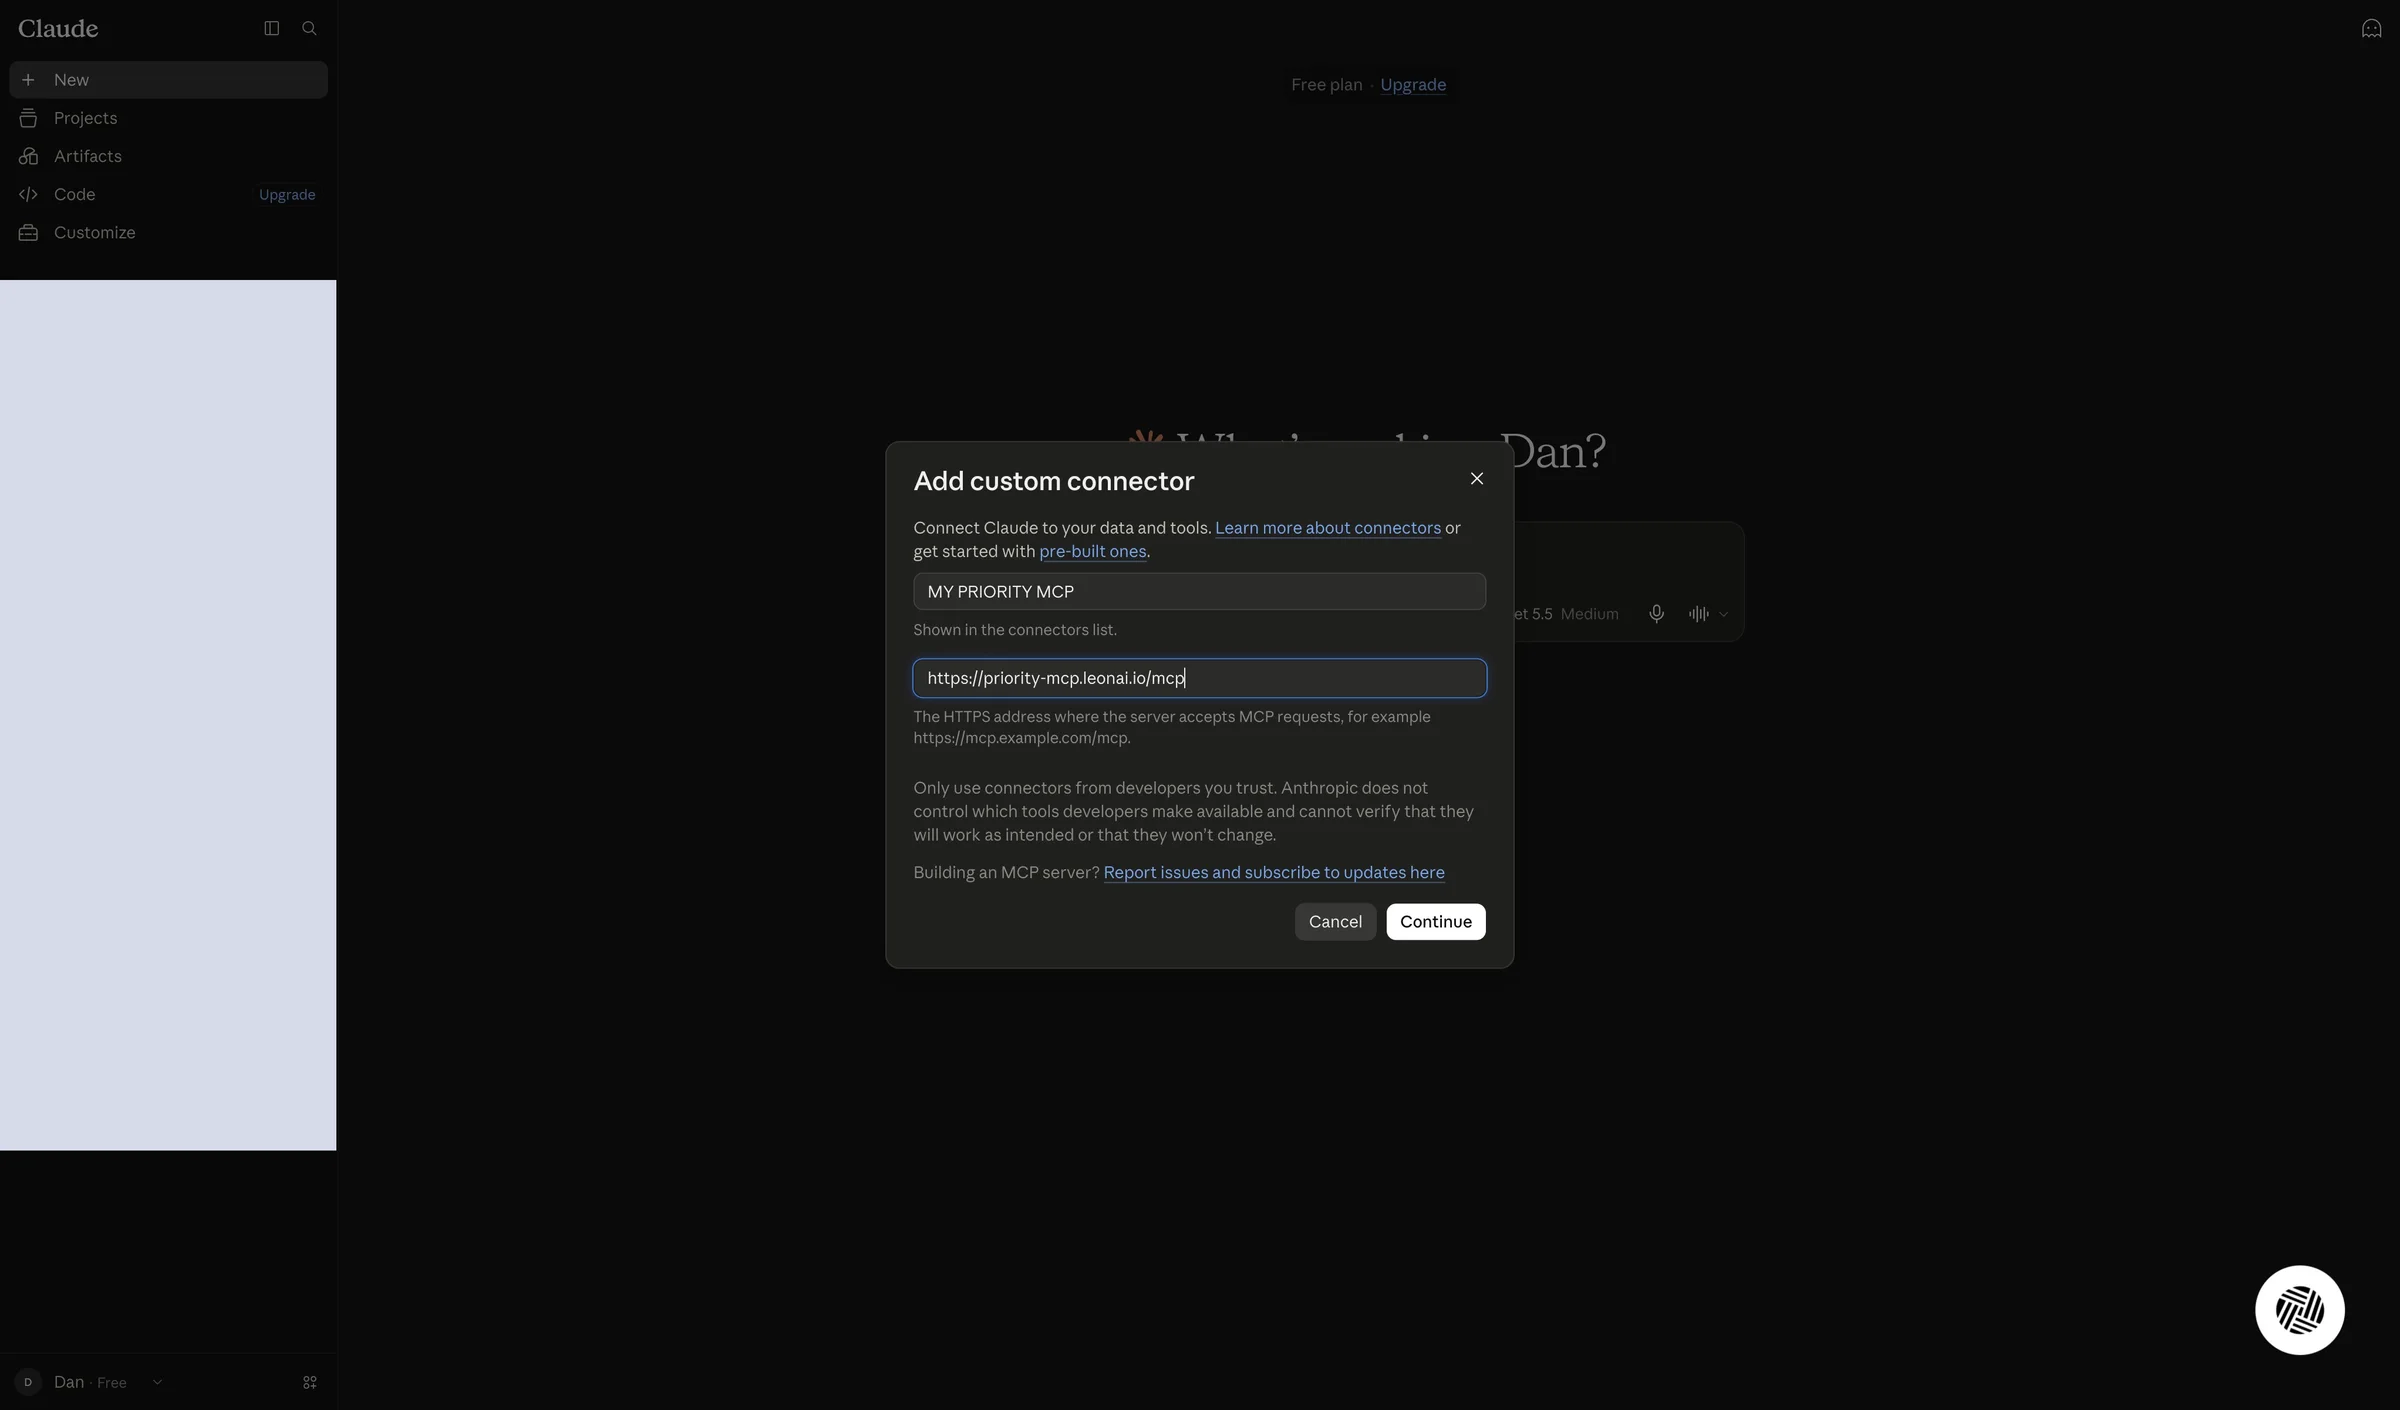
Paste the MCP server address
Click the MCP server URL field and paste the address you saved on the “All set!” screen.
This is the address where the LeonAI server receives MCP requests. Make sure it starts with https and ends with /mcp.
The full address appears in the MCP server URL field.
4
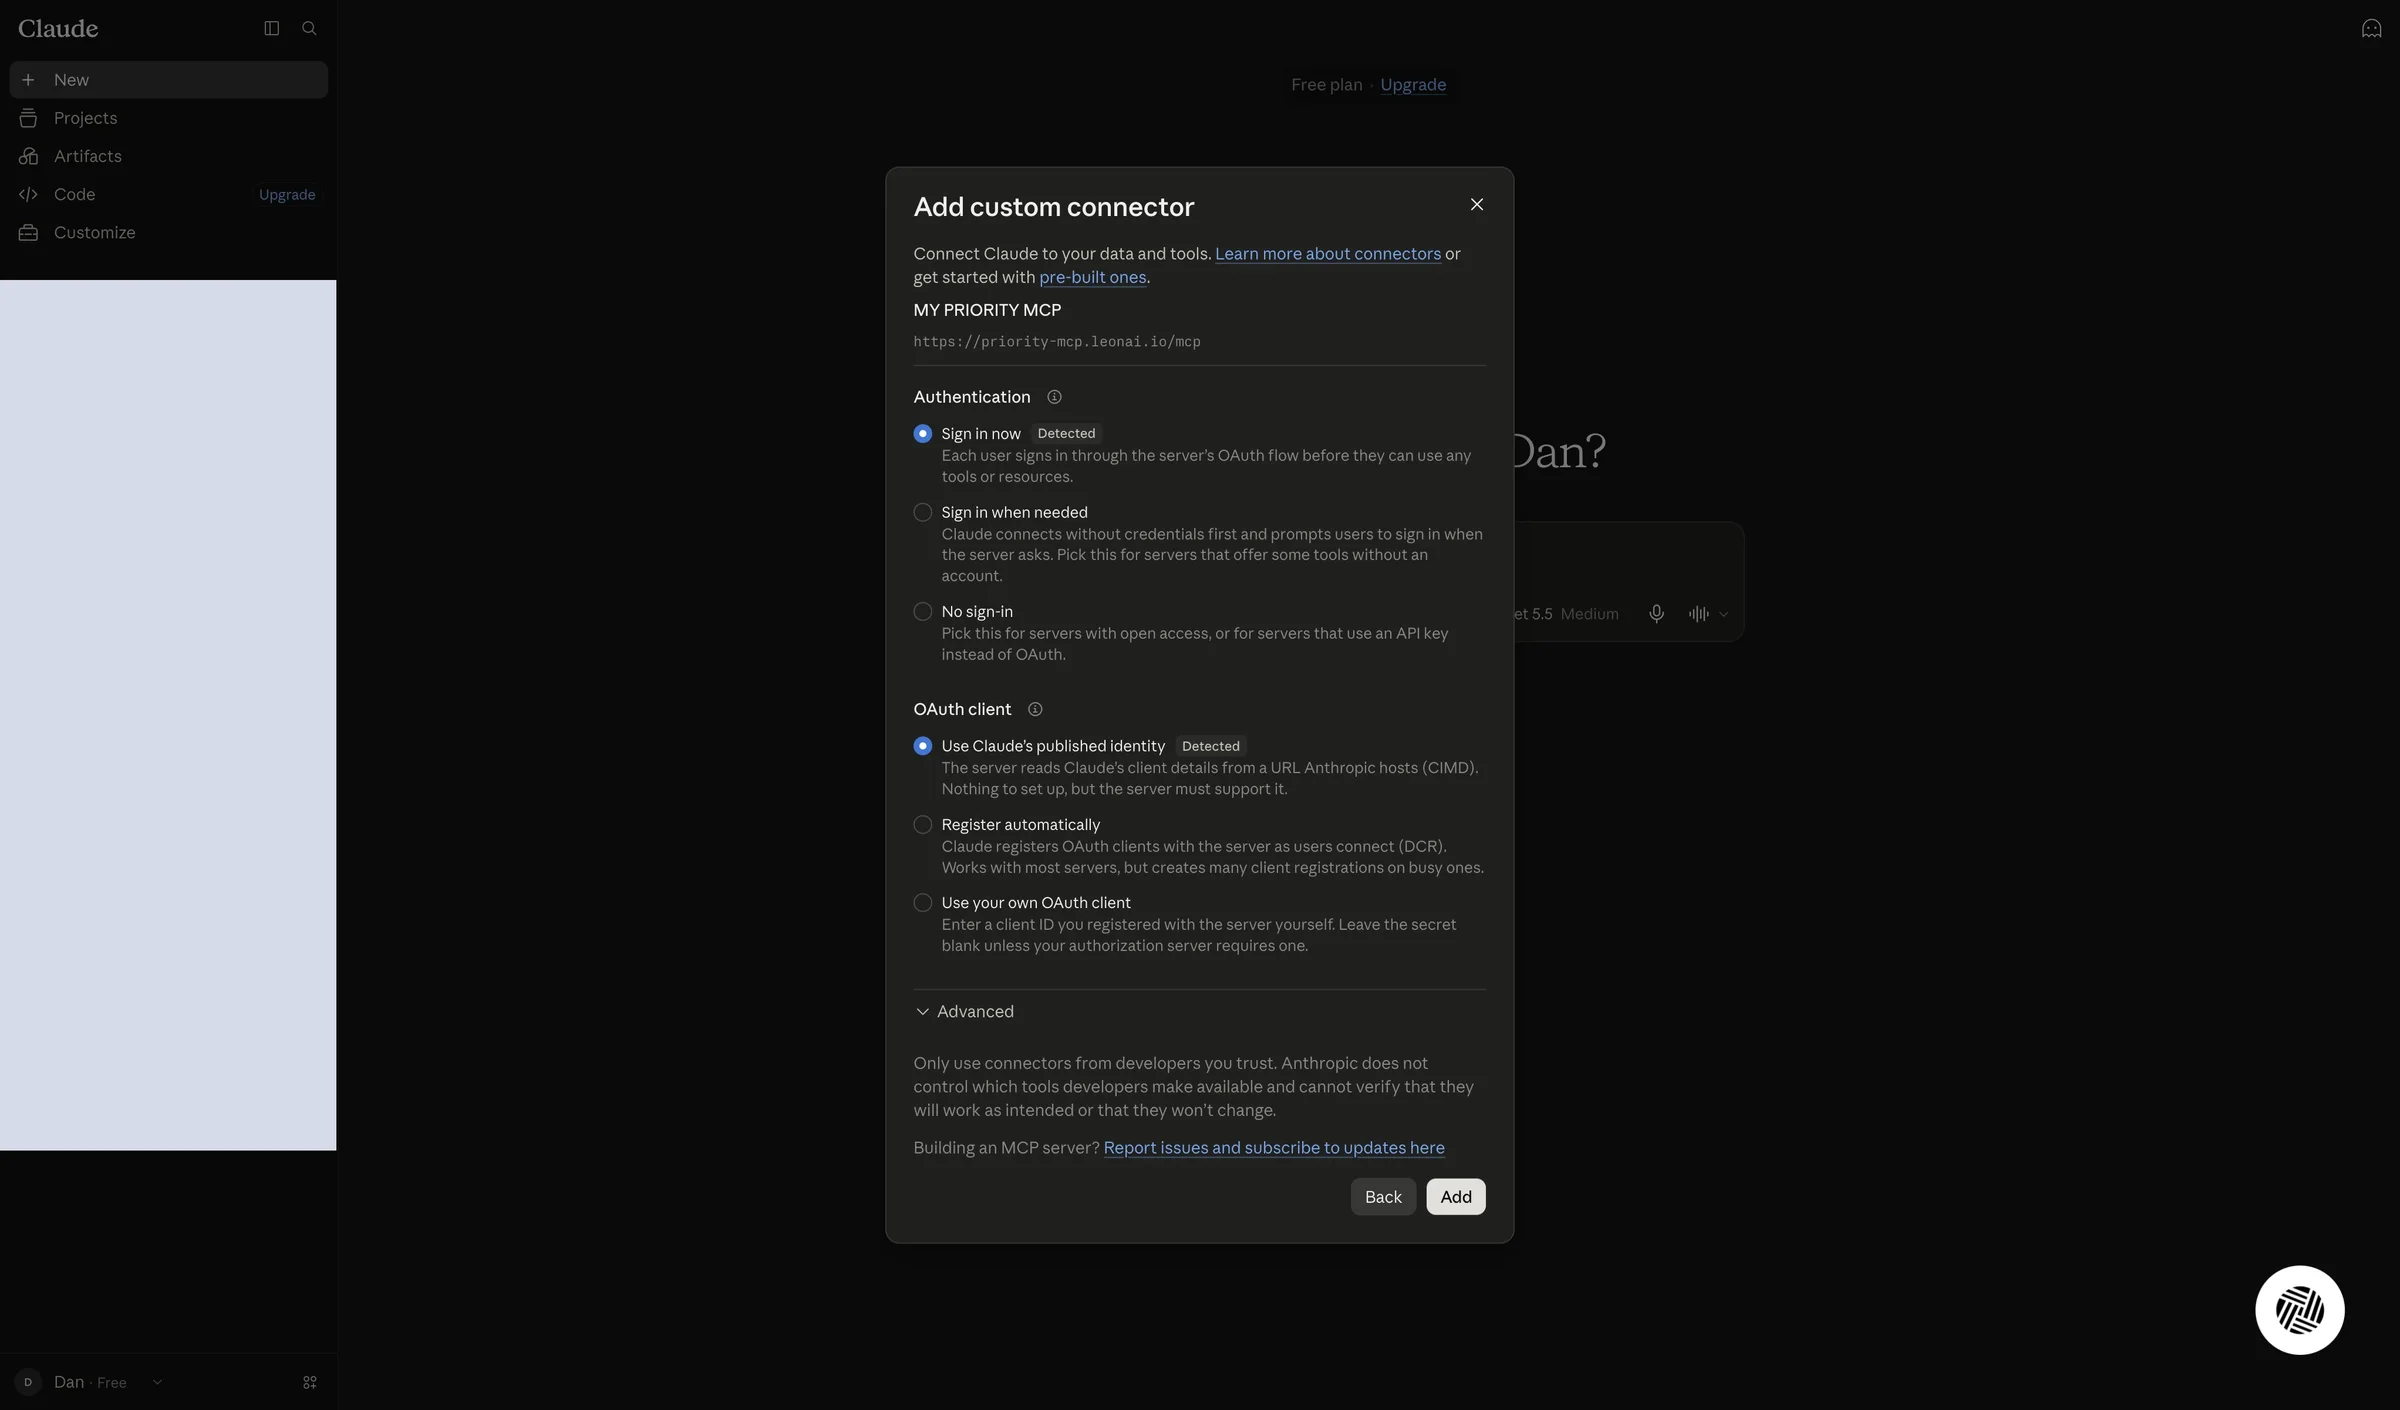
Continue and add the connector
Click Continue. In the next window keep the detected options — Sign in now and Use Claude's published identity, both marked Detected — and click Add.
As the window explains, Sign in now requires every user to sign in through the server's authorization page before using its tools or resources.
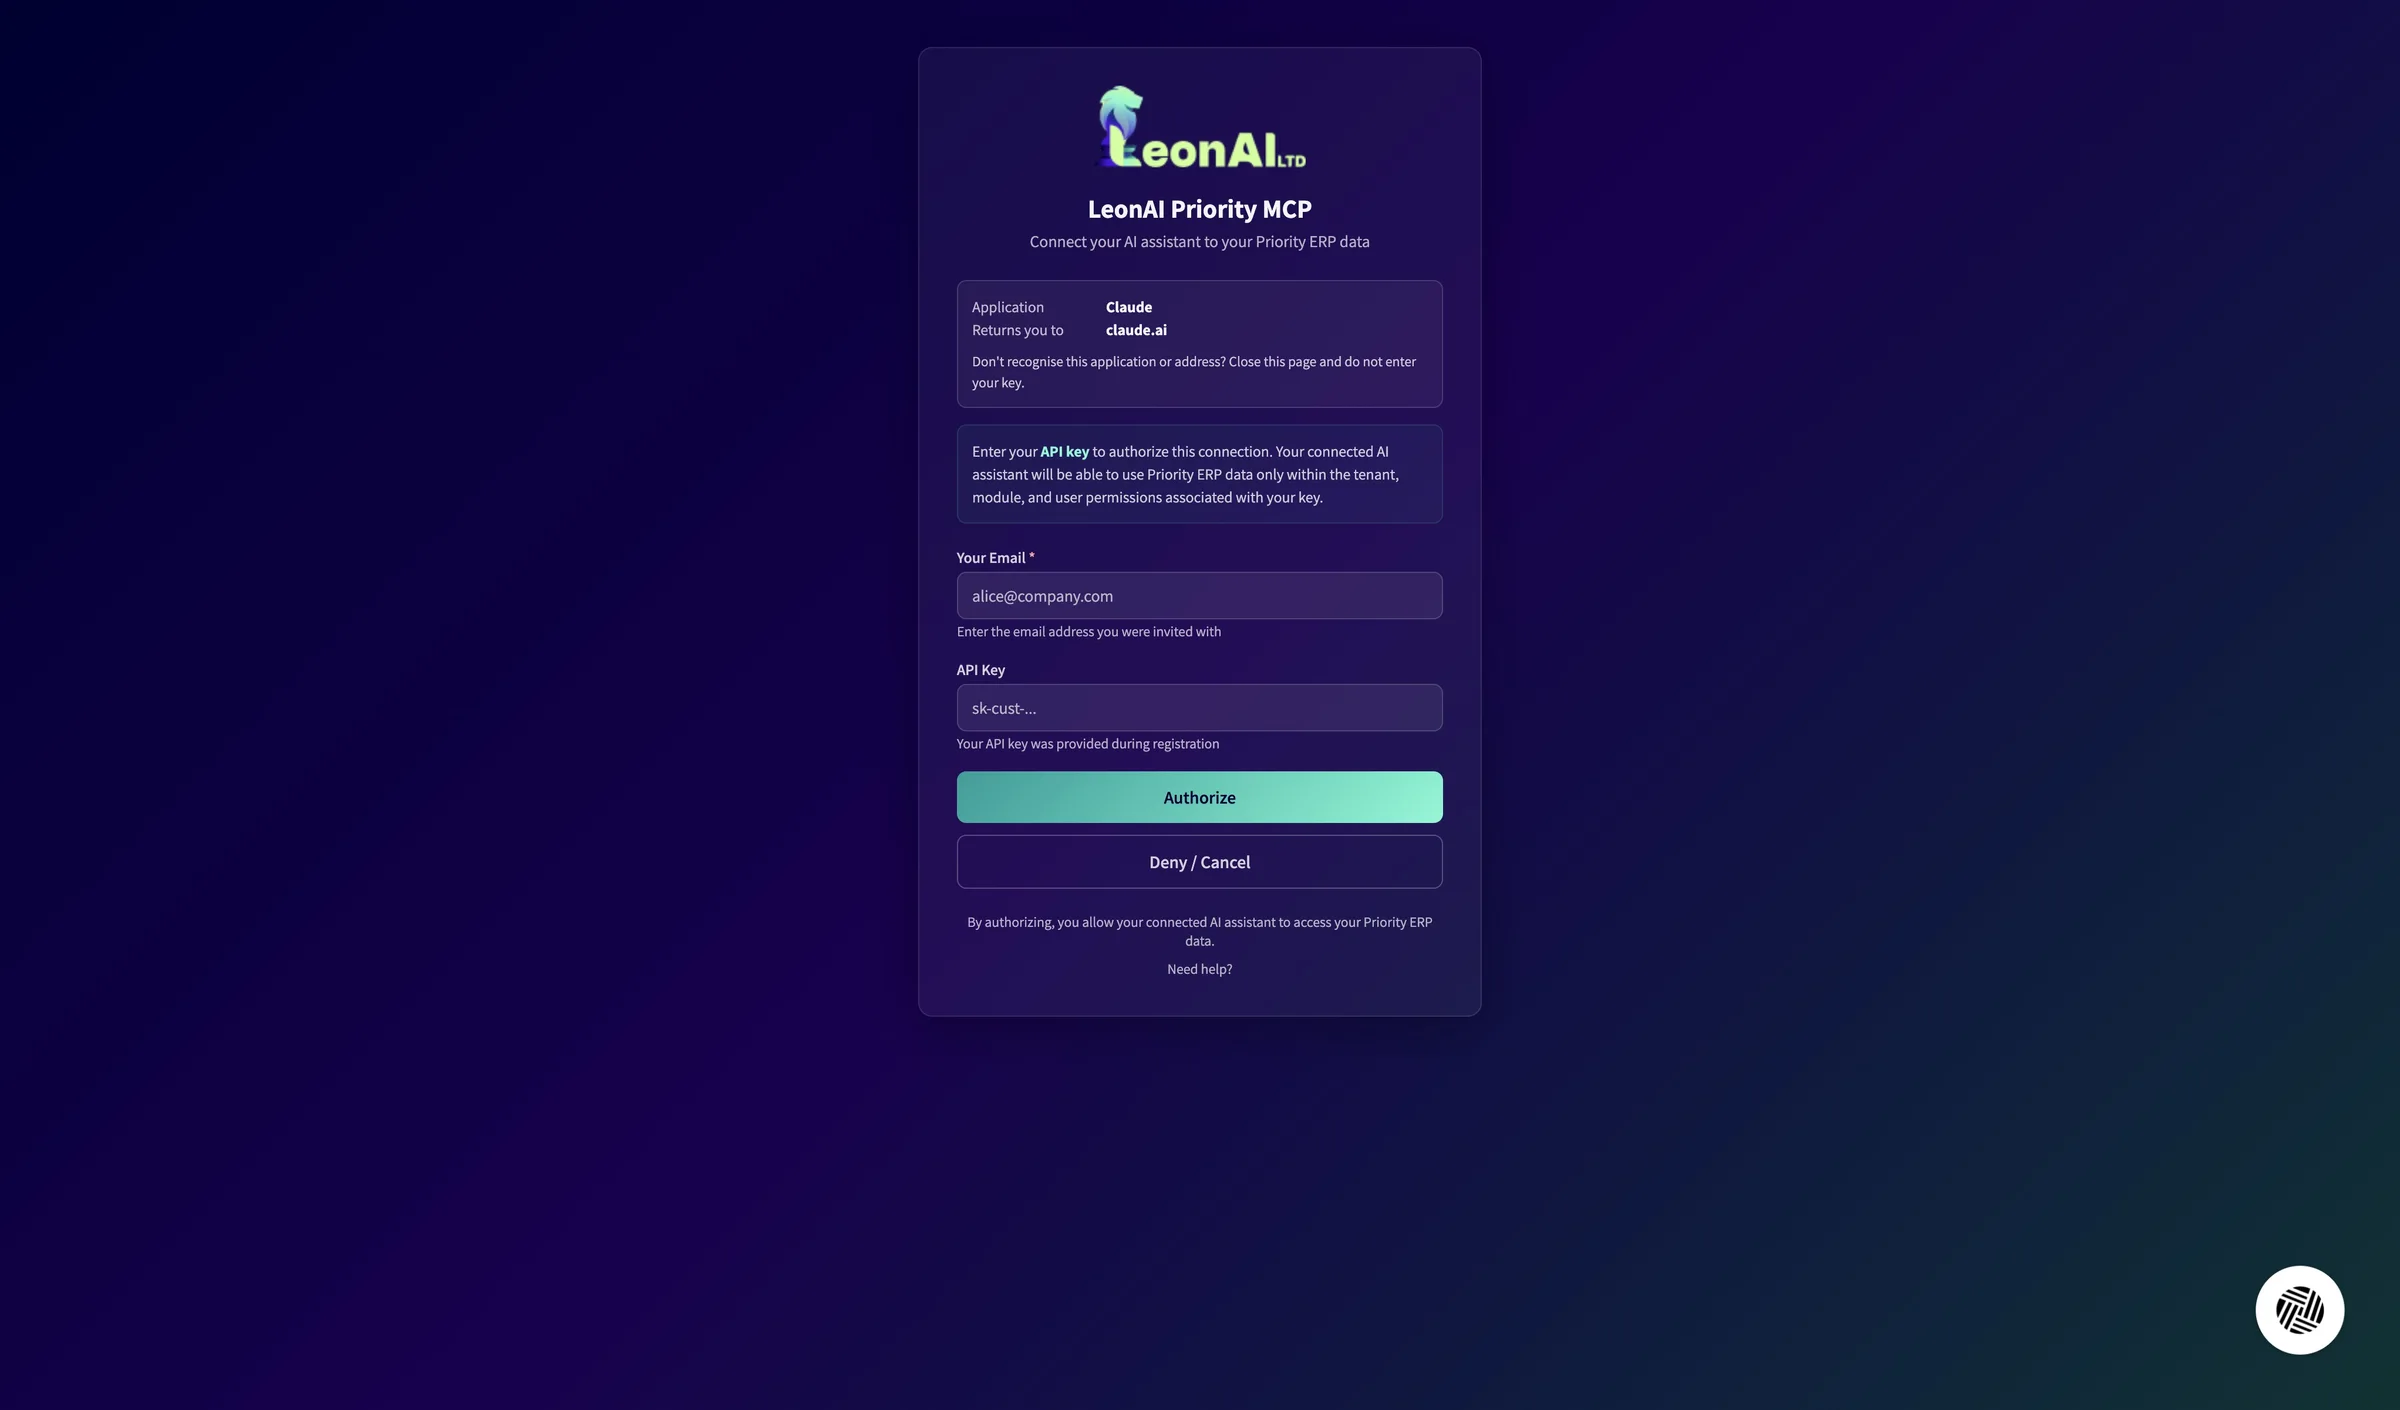
The LeonAI Priority MCP authorization page opens.
5
Enter your email
On the LeonAI authorization page, enter the email you signed up with in the Your Email field.
The top of the page shows which app you are giving access to (Claude) and where you will return (claude.ai). If you do not recognize these details, close the page and do not enter the key.
The email you signed up with is entered in the Your Email field.
6
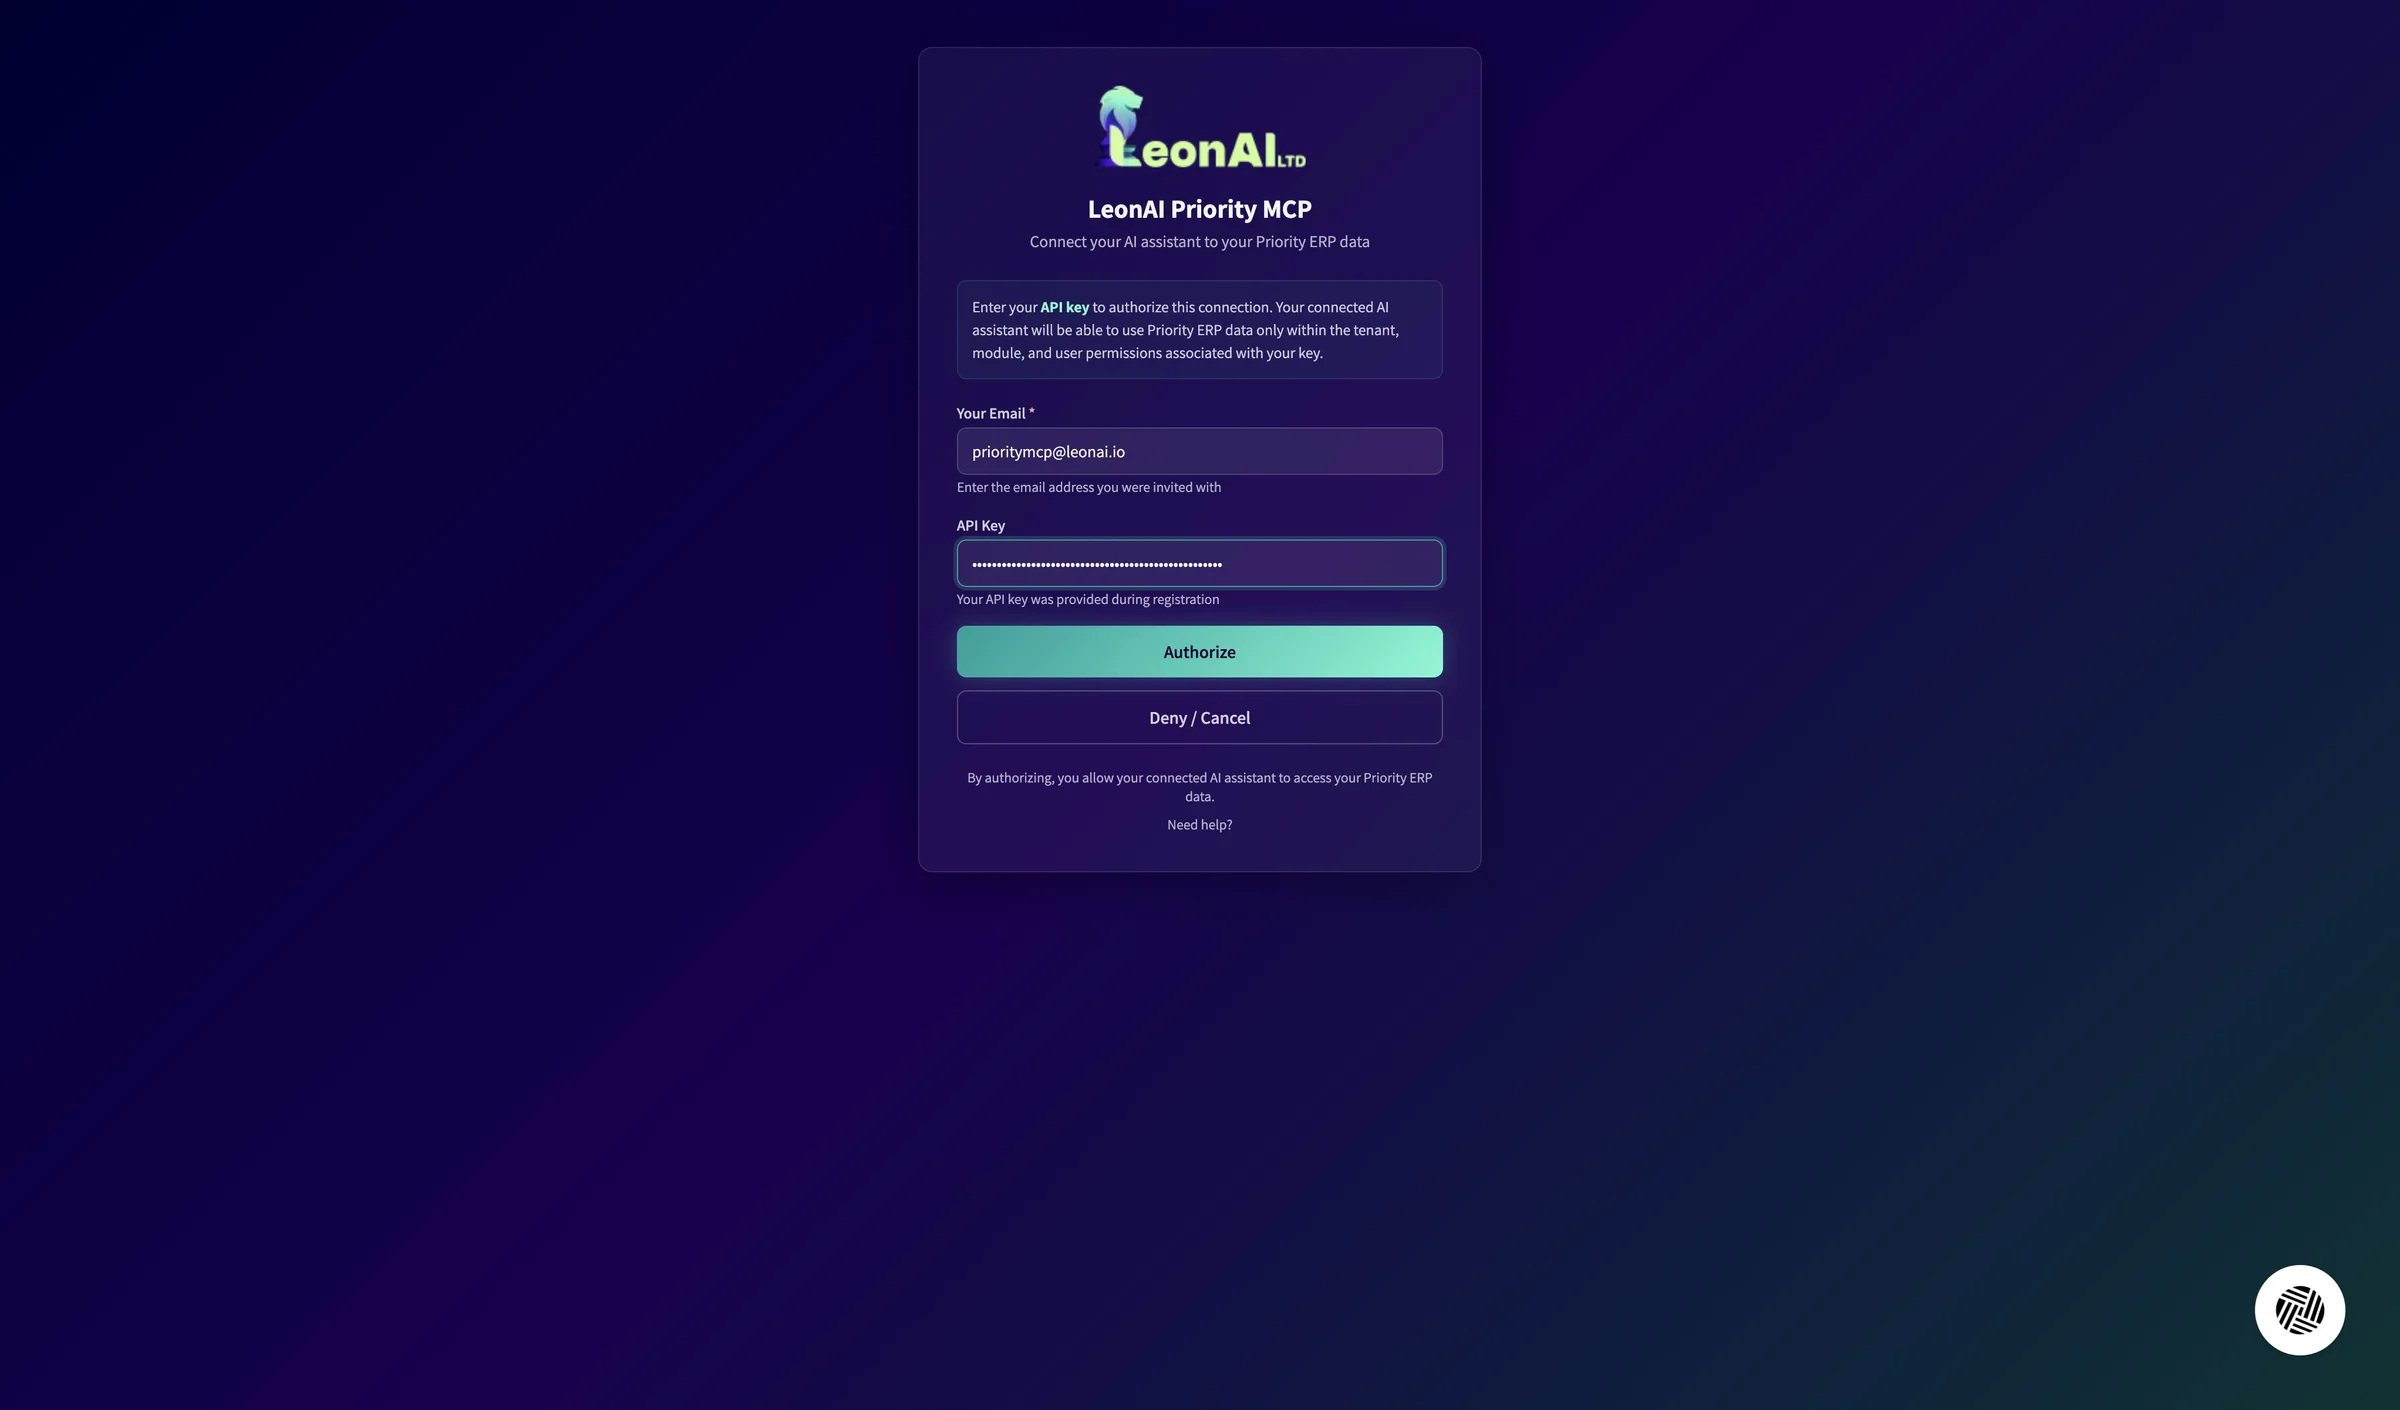
Paste the API key and authorize
Click the API Key field, paste the key you saved and click Authorize.
The key starts with sk-cust and was given to you on the “All set!” screen at the end of sign-up. The field hides the characters after you paste: make sure you pasted the whole key, with no spaces at the start or end.
A message says a verification code was sent to your email.
7
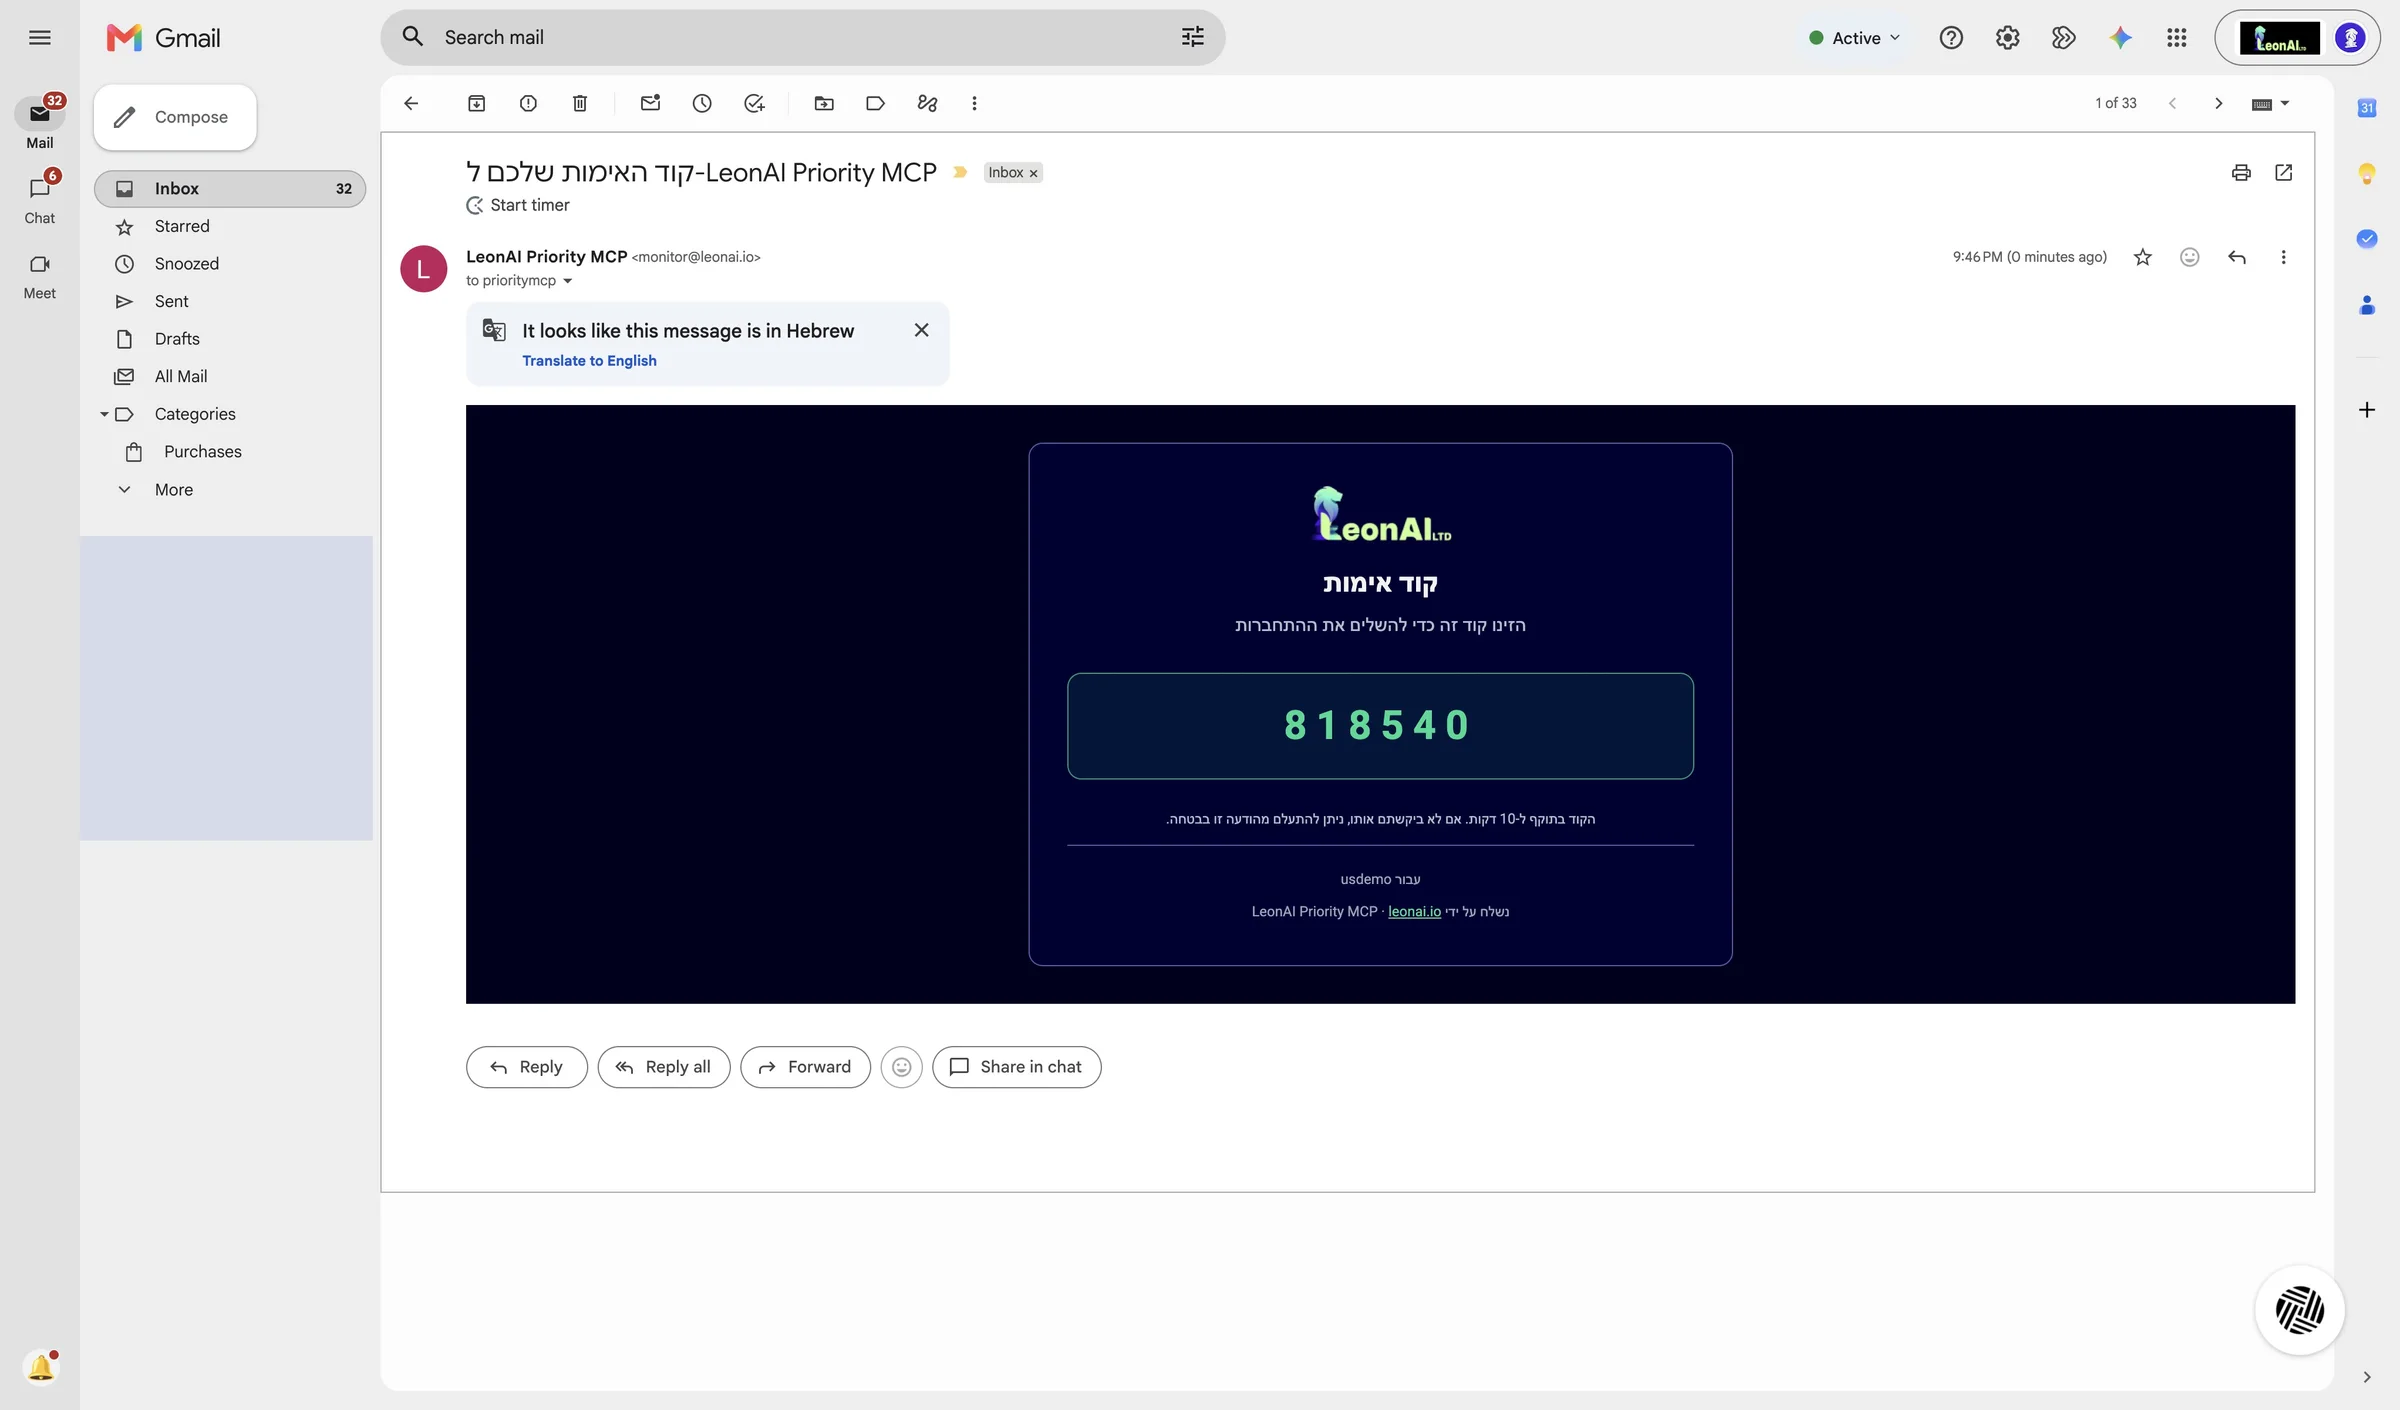
Copy the sign-in code from the email
In your inbox, open the email Your LeonAI Priority MCP verification code, then select and copy the 6-digit code.
This is a new code, separate from the sign-up code, and it is valid for 10 minutes. A “Welcome” email arrives at the same time — you will use it later to sign in to the admin portal.
The sign-in code is on your clipboard.
8
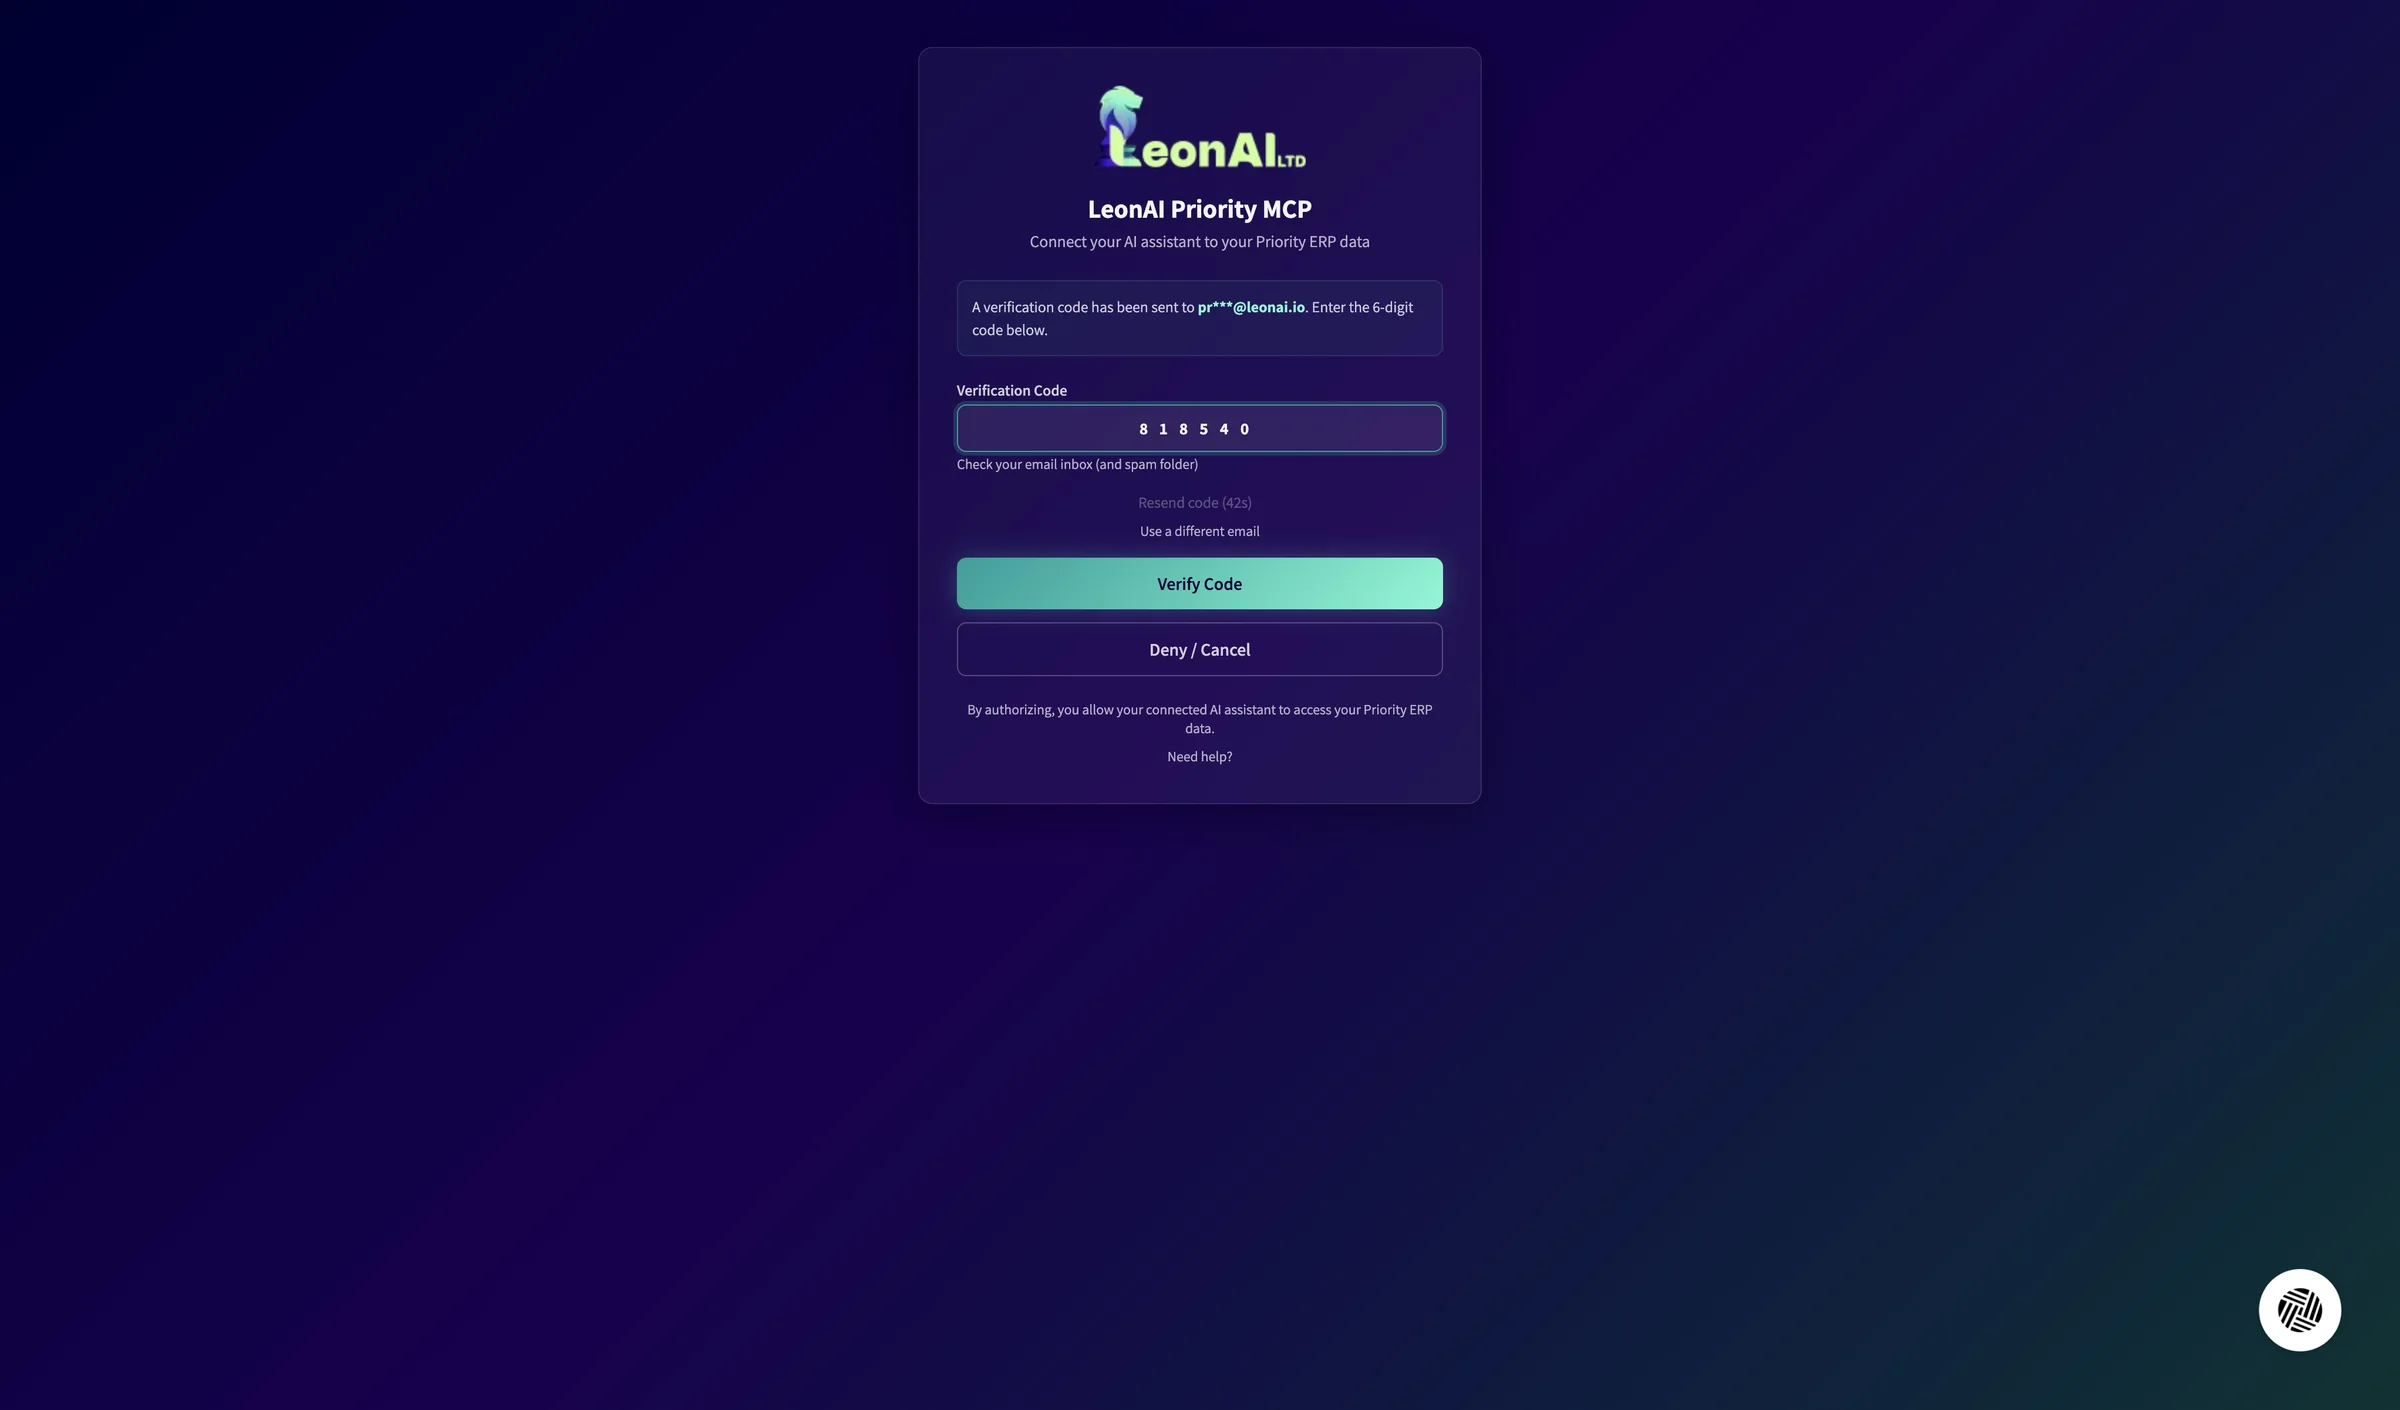
Verify the sign-in code
On the authorization page, click the Verification Code field, paste the code and click Verify Code.
The page shows which address the code was sent to, with part of the address hidden.
You are back in Claude, and the LeonAI connector is connected.
Stuck? 1 known situation at this step
The sign-in code did not arrive
The email is on its way, or went to spam
Check your spam folder, or click Resend code when the countdown ends.
The Use a different email link takes you back to enter a different email.