

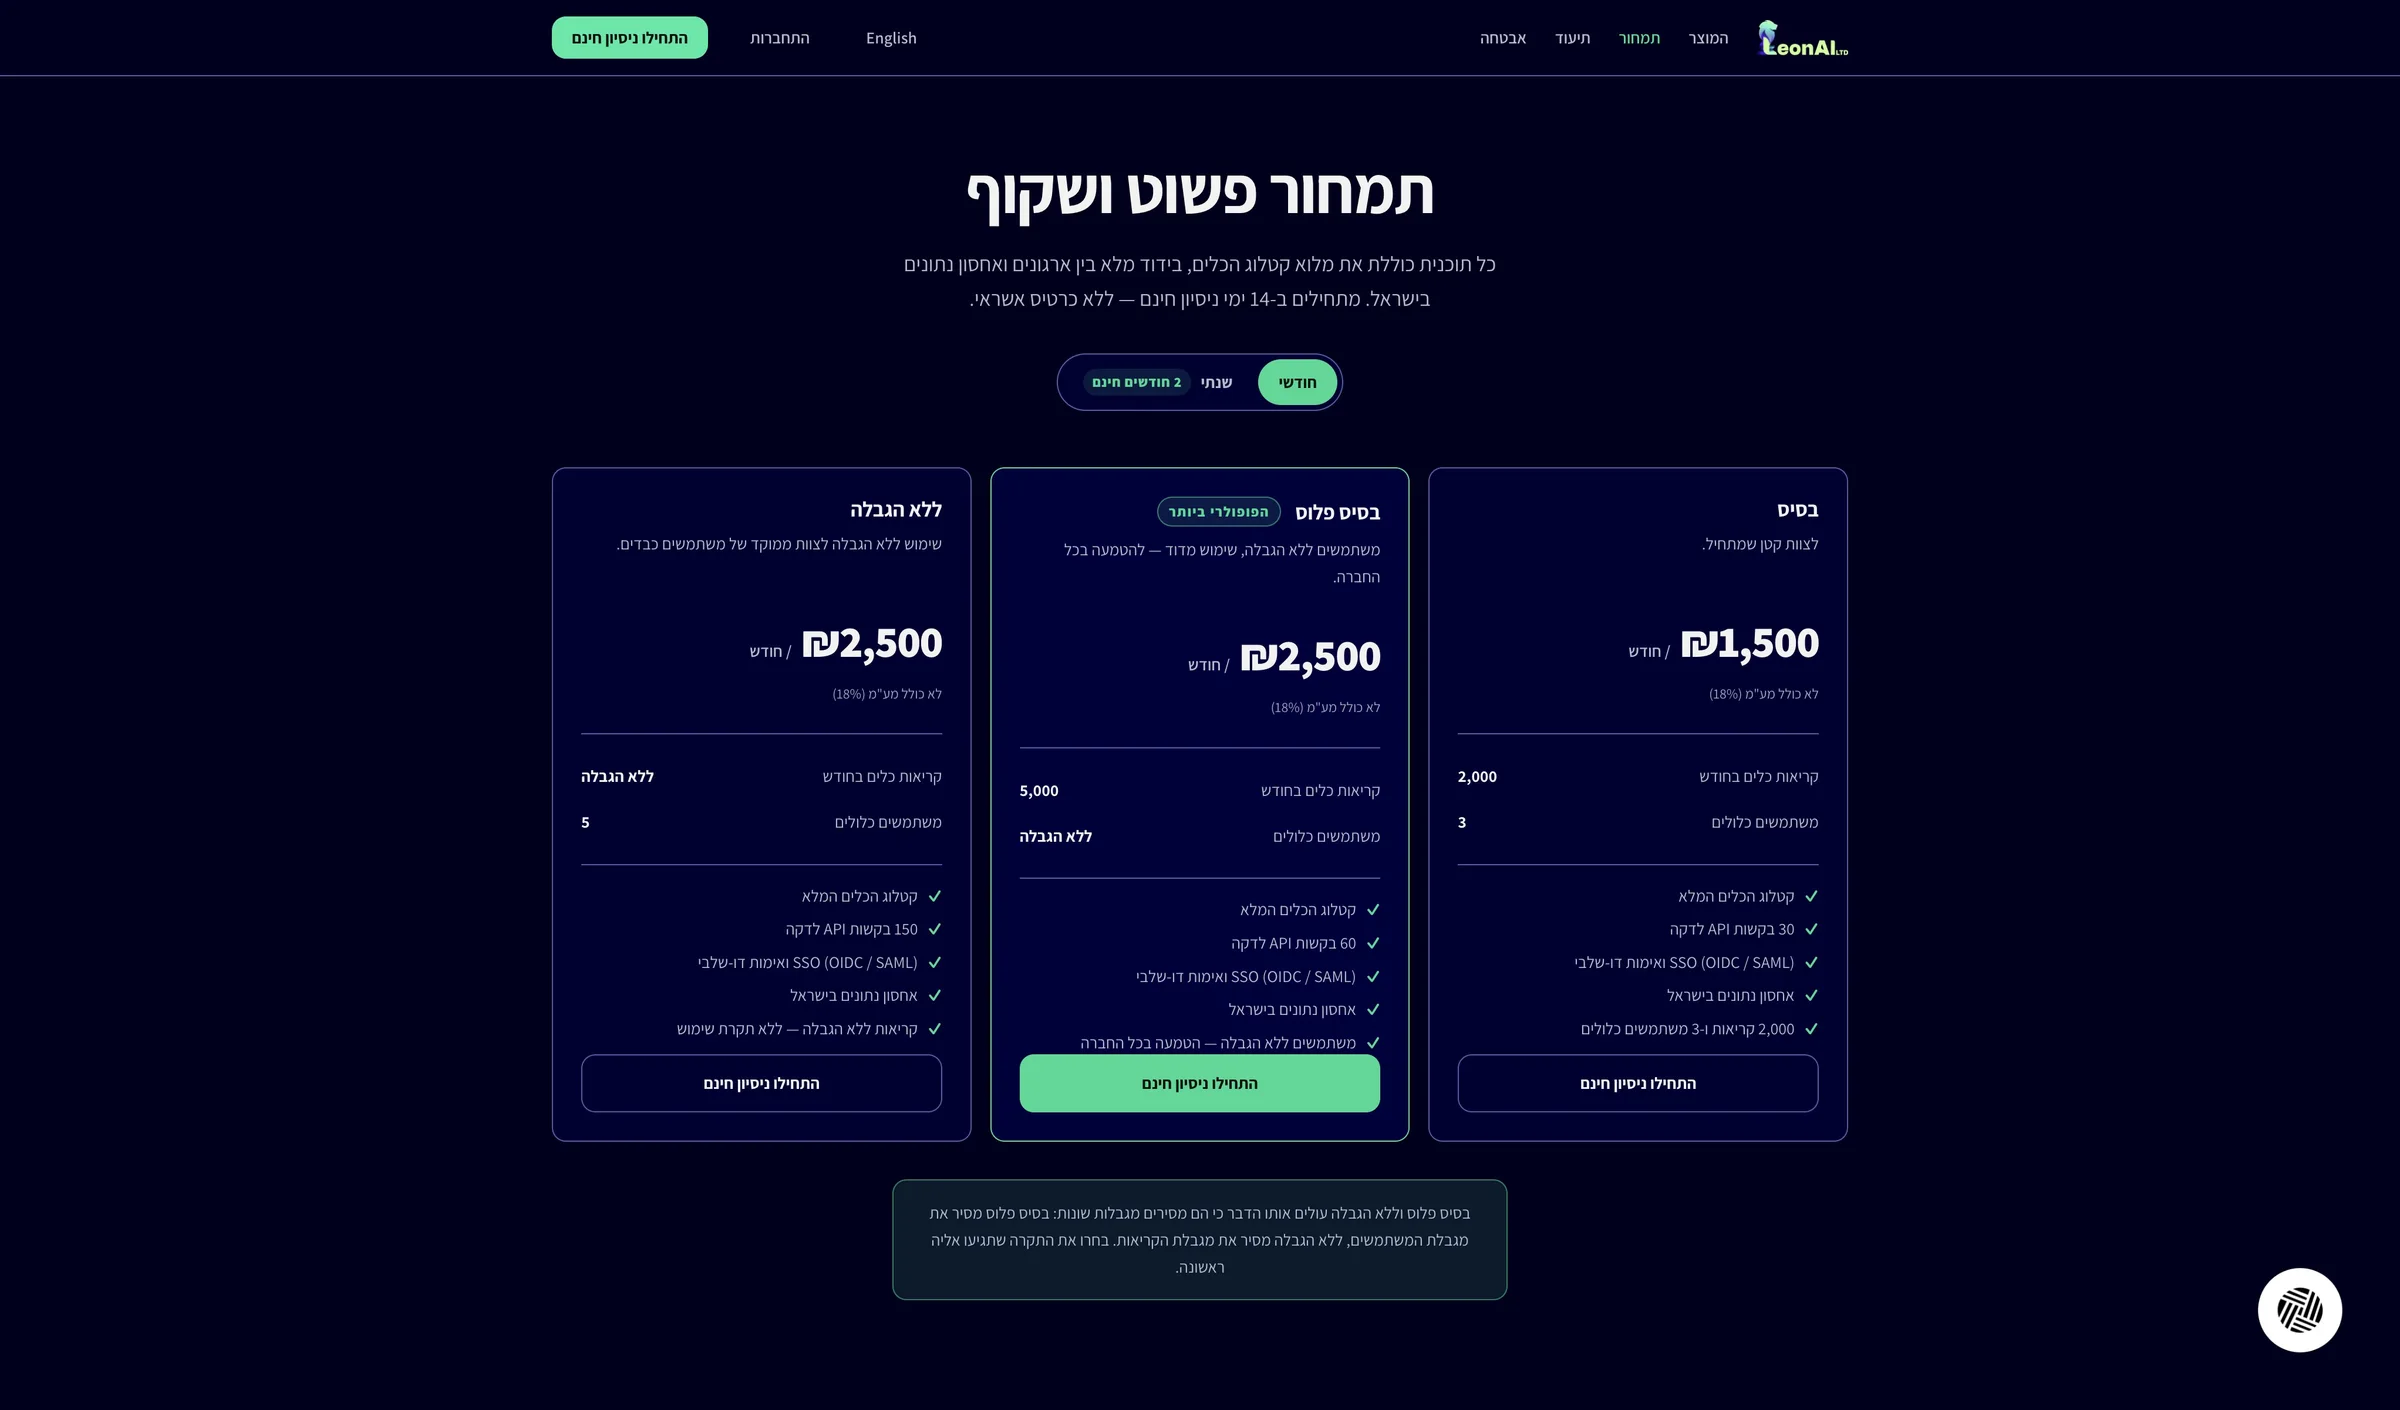
On the pricing page choose a plan and click the sign-up button.
A credit card is required. The current offer and charge terms are shown on the MCP site before you confirm.
The LeonAI Priority MCP sign-up form is open, on step one of two.
Getting-started journey · Claude (MCP)
By the end, Claude answers questions from your Priority data through the LeonAI connector, and you know where to manage your account and plan.
Sign up for LeonAI Priority MCP with your email and a verification code. A credit card is required; the offer and charge terms are shown on the MCP site before you confirm.
On the pricing page choose a plan and click the sign-up button.
A credit card is required. The current offer and charge terms are shown on the MCP site before you confirm.
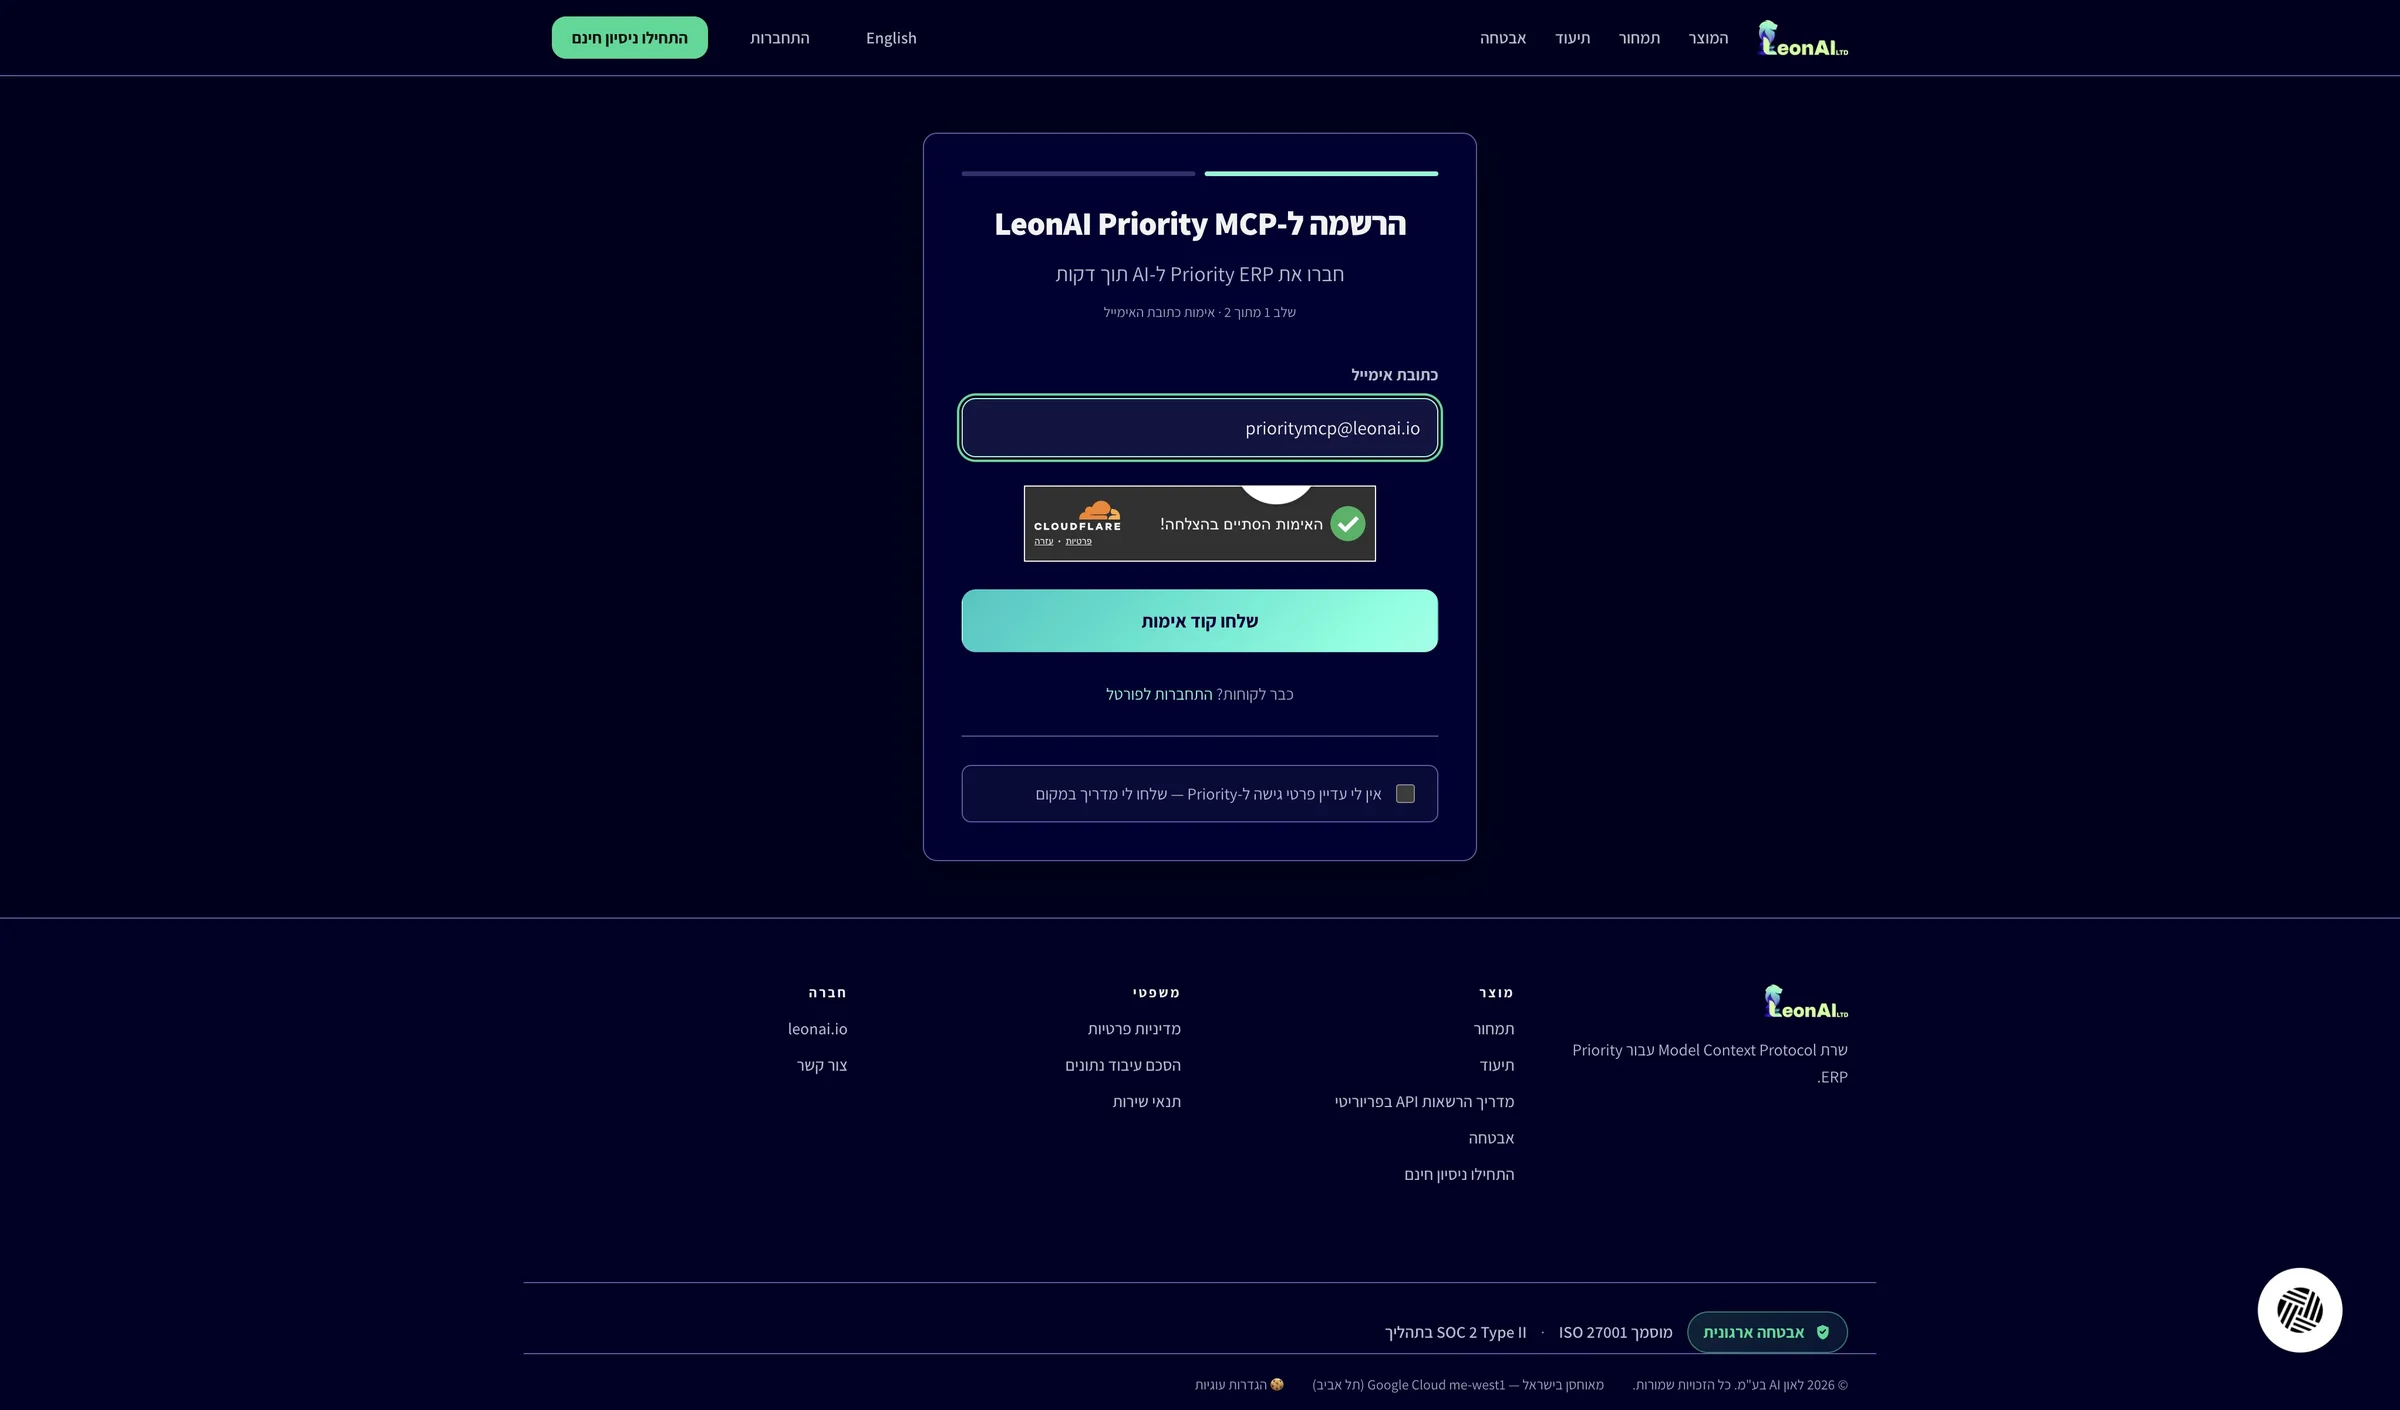
The LeonAI Priority MCP sign-up form is open, on step one of two.
Enter the email address of whoever will manage the account, wait for the Cloudflare check and click Send verification code.
The verification code, the welcome email and later sign-in codes go to this address. If you do not have Priority access details yet, check the option at the bottom of the form to get a guide instead of continuing now.
The Cloudflare check passed, and the code was sent to the address you entered.
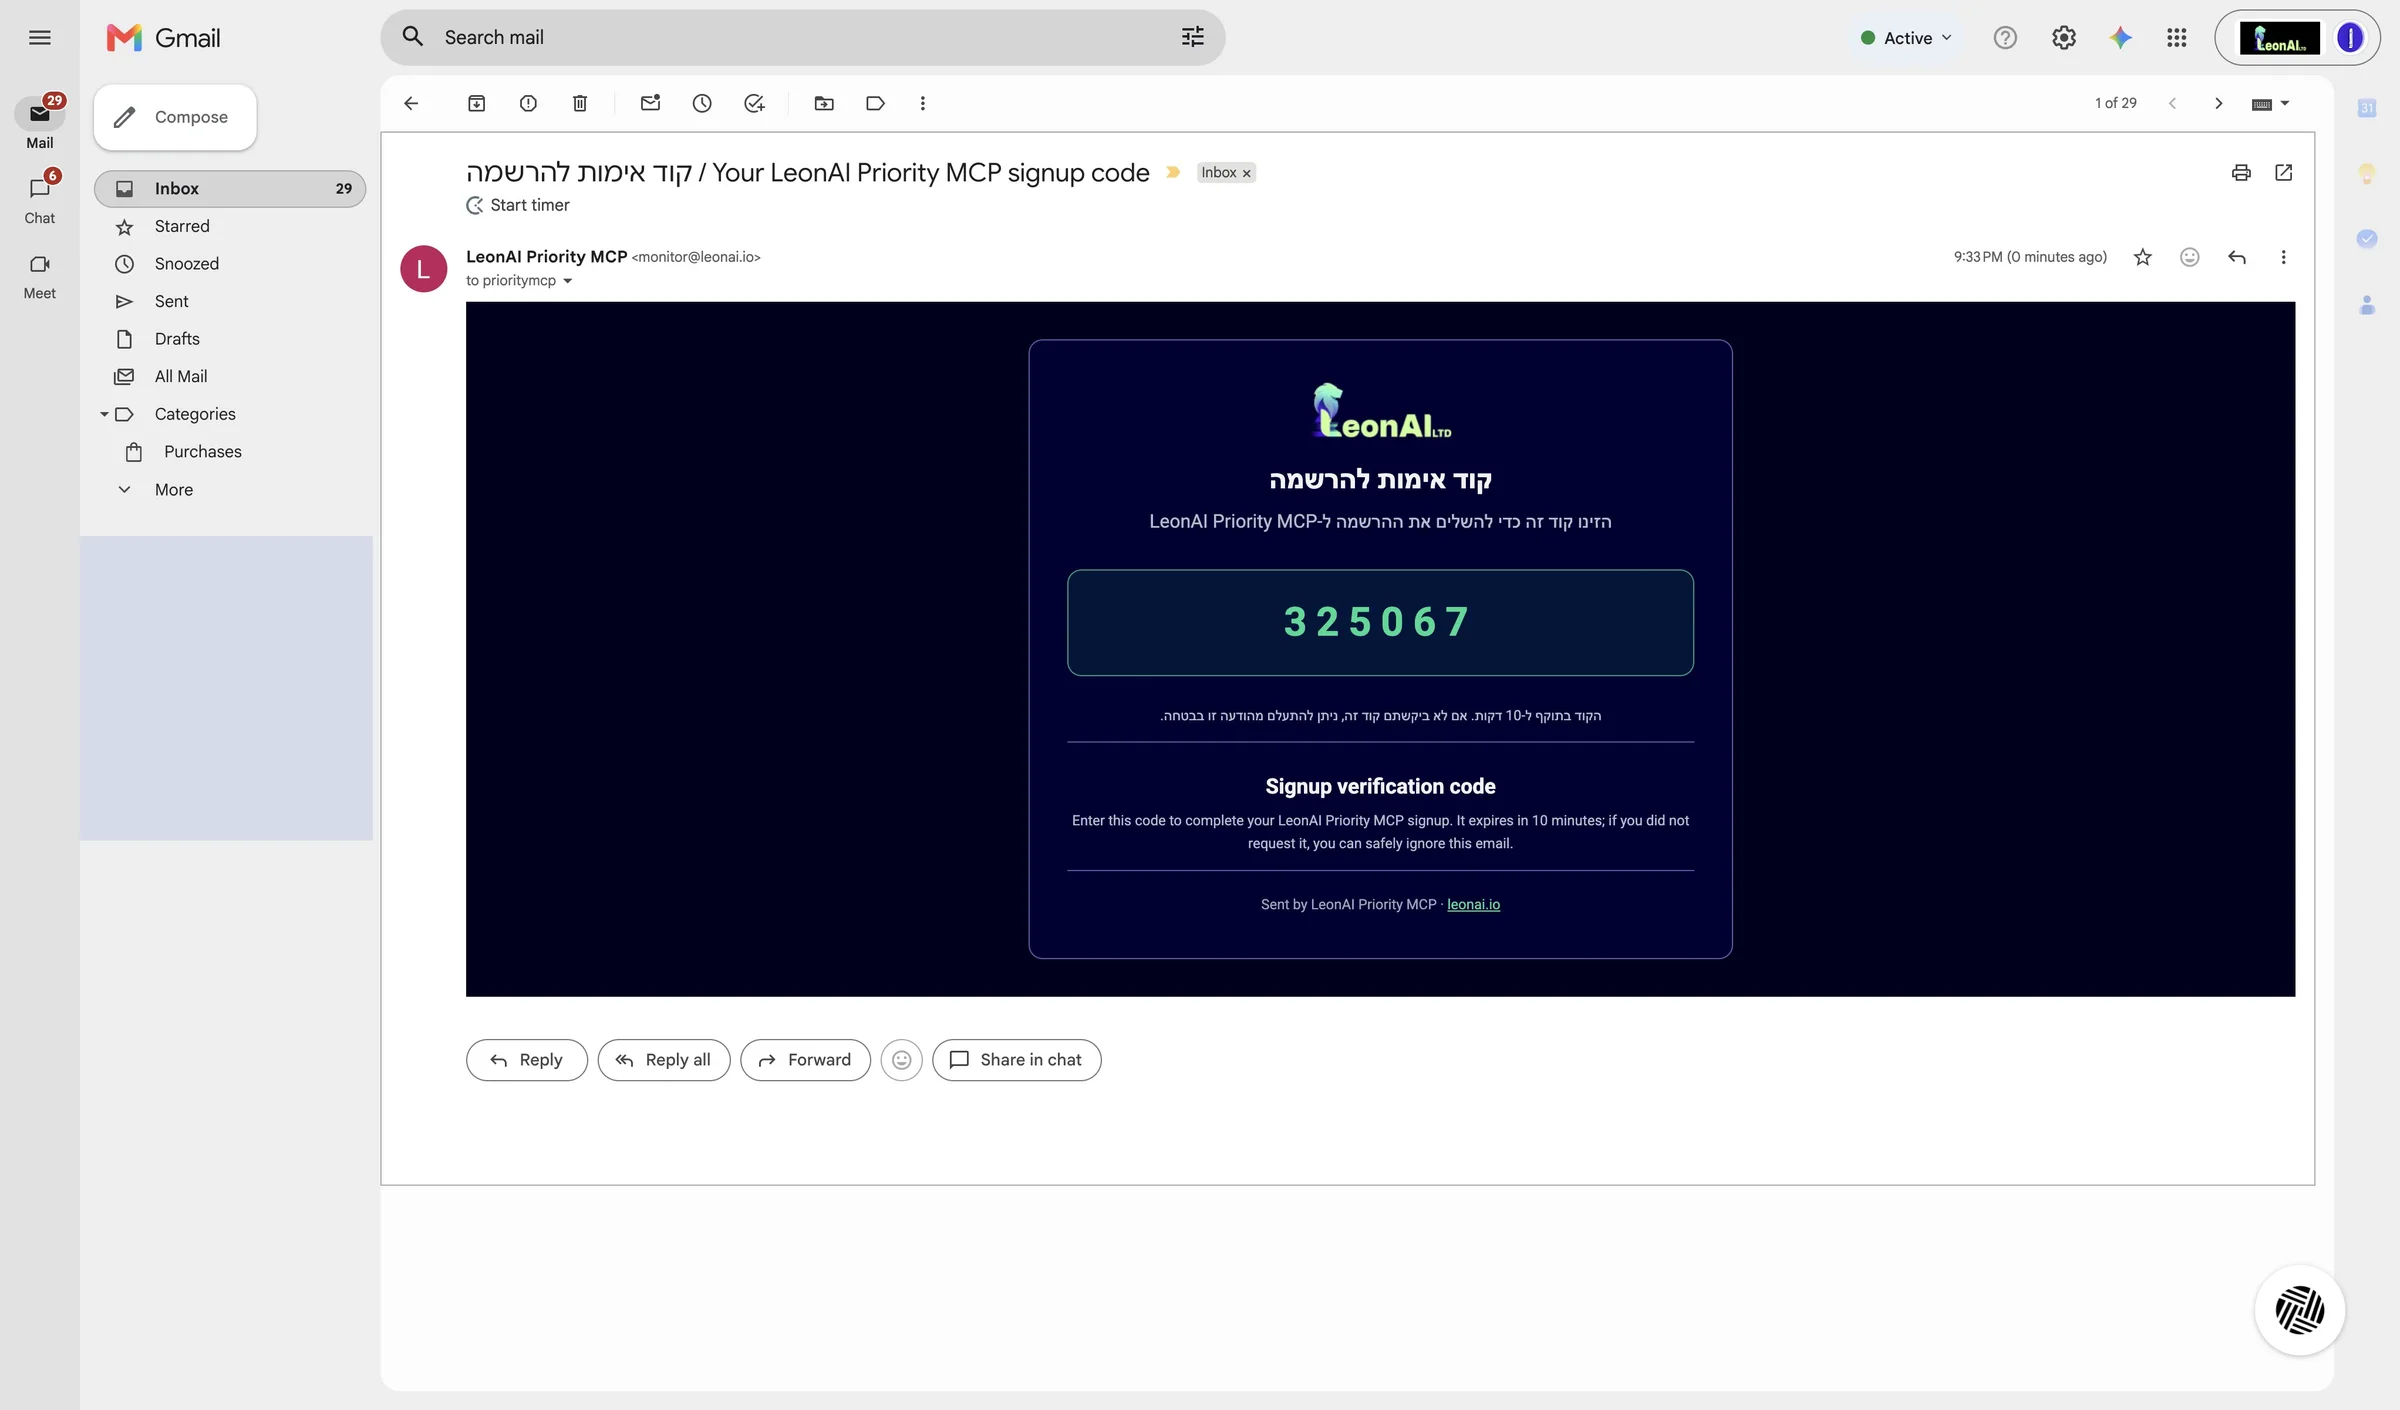
In your inbox, open the email Sign-up verification code from LeonAI Priority MCP, then select and copy the 6-digit code.
The email comes from monitor@leonai.io and usually arrives within a minute. The code is valid for 10 minutes, so paste it into the sign-up form soon.
You have a 6-digit code received in the last few minutes.
Paste the code into the six boxes and click Verify and continue.
This is the second and last step of sign-up.
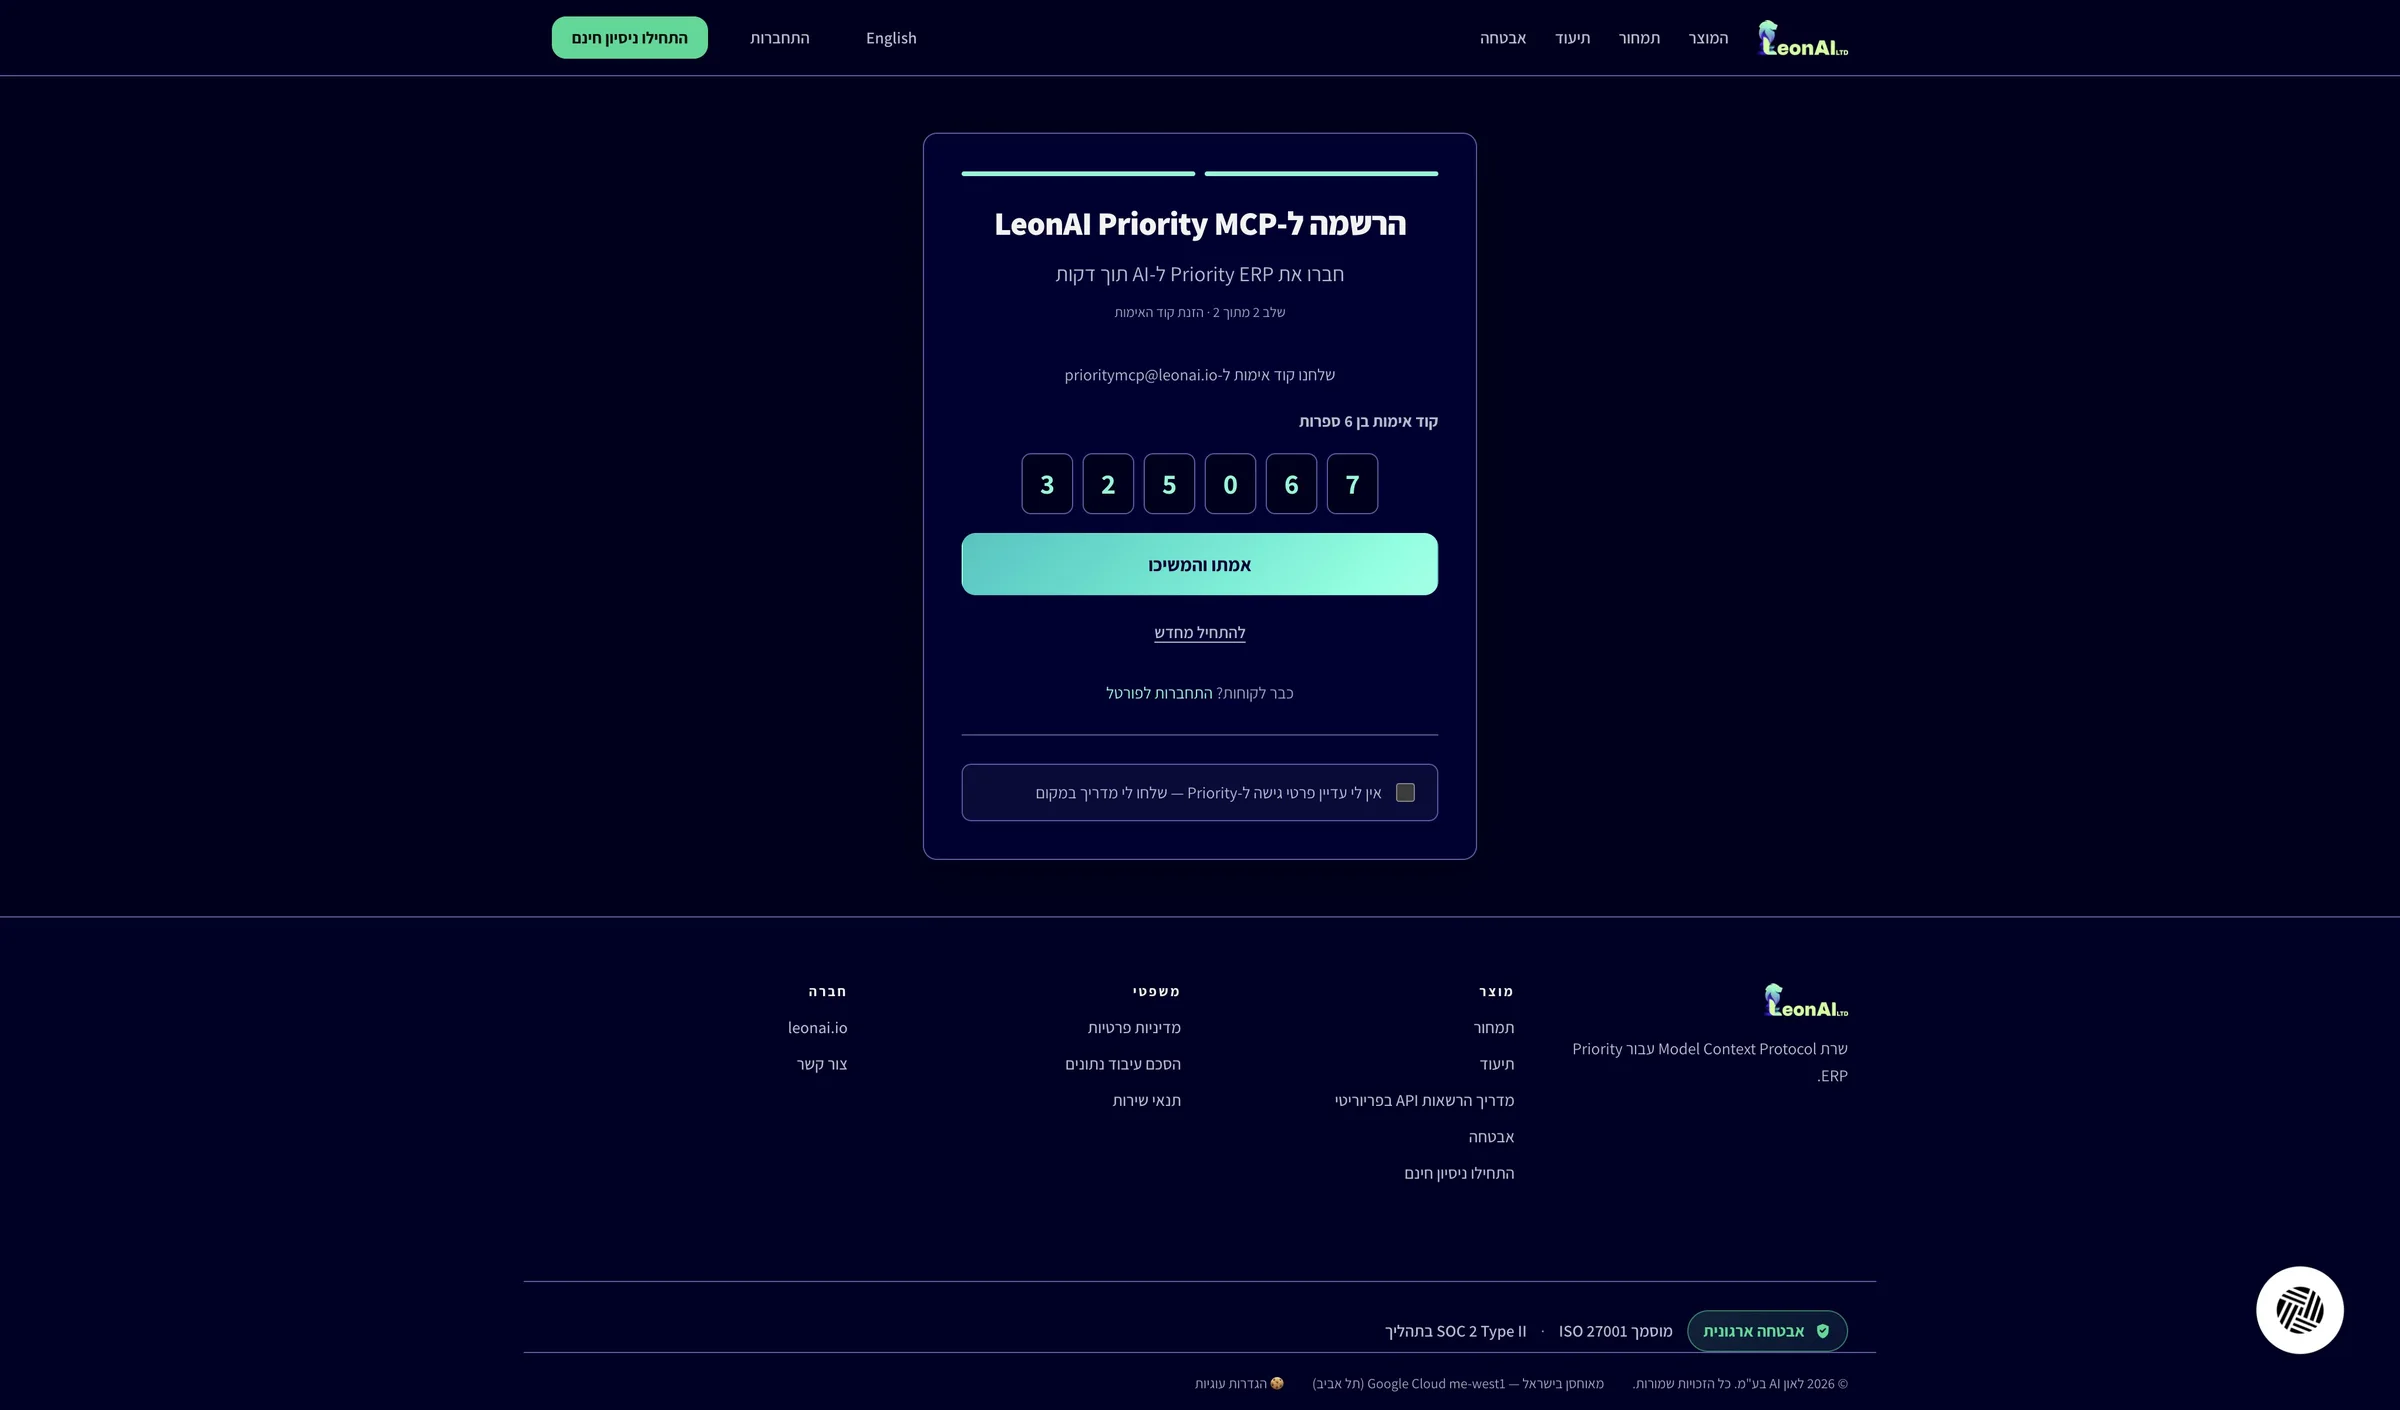
Your email is verified. Keep the LeonAI tab open — you will connect Priority in it next.
The sign-up code email did not arrive
The email comes from monitor@leonai.io and usually arrives within a minute.
The sign-up code has expired
LeonAI works in Priority as one user. That user must have an API licence.
System Management › System Maintenance › Users › Users
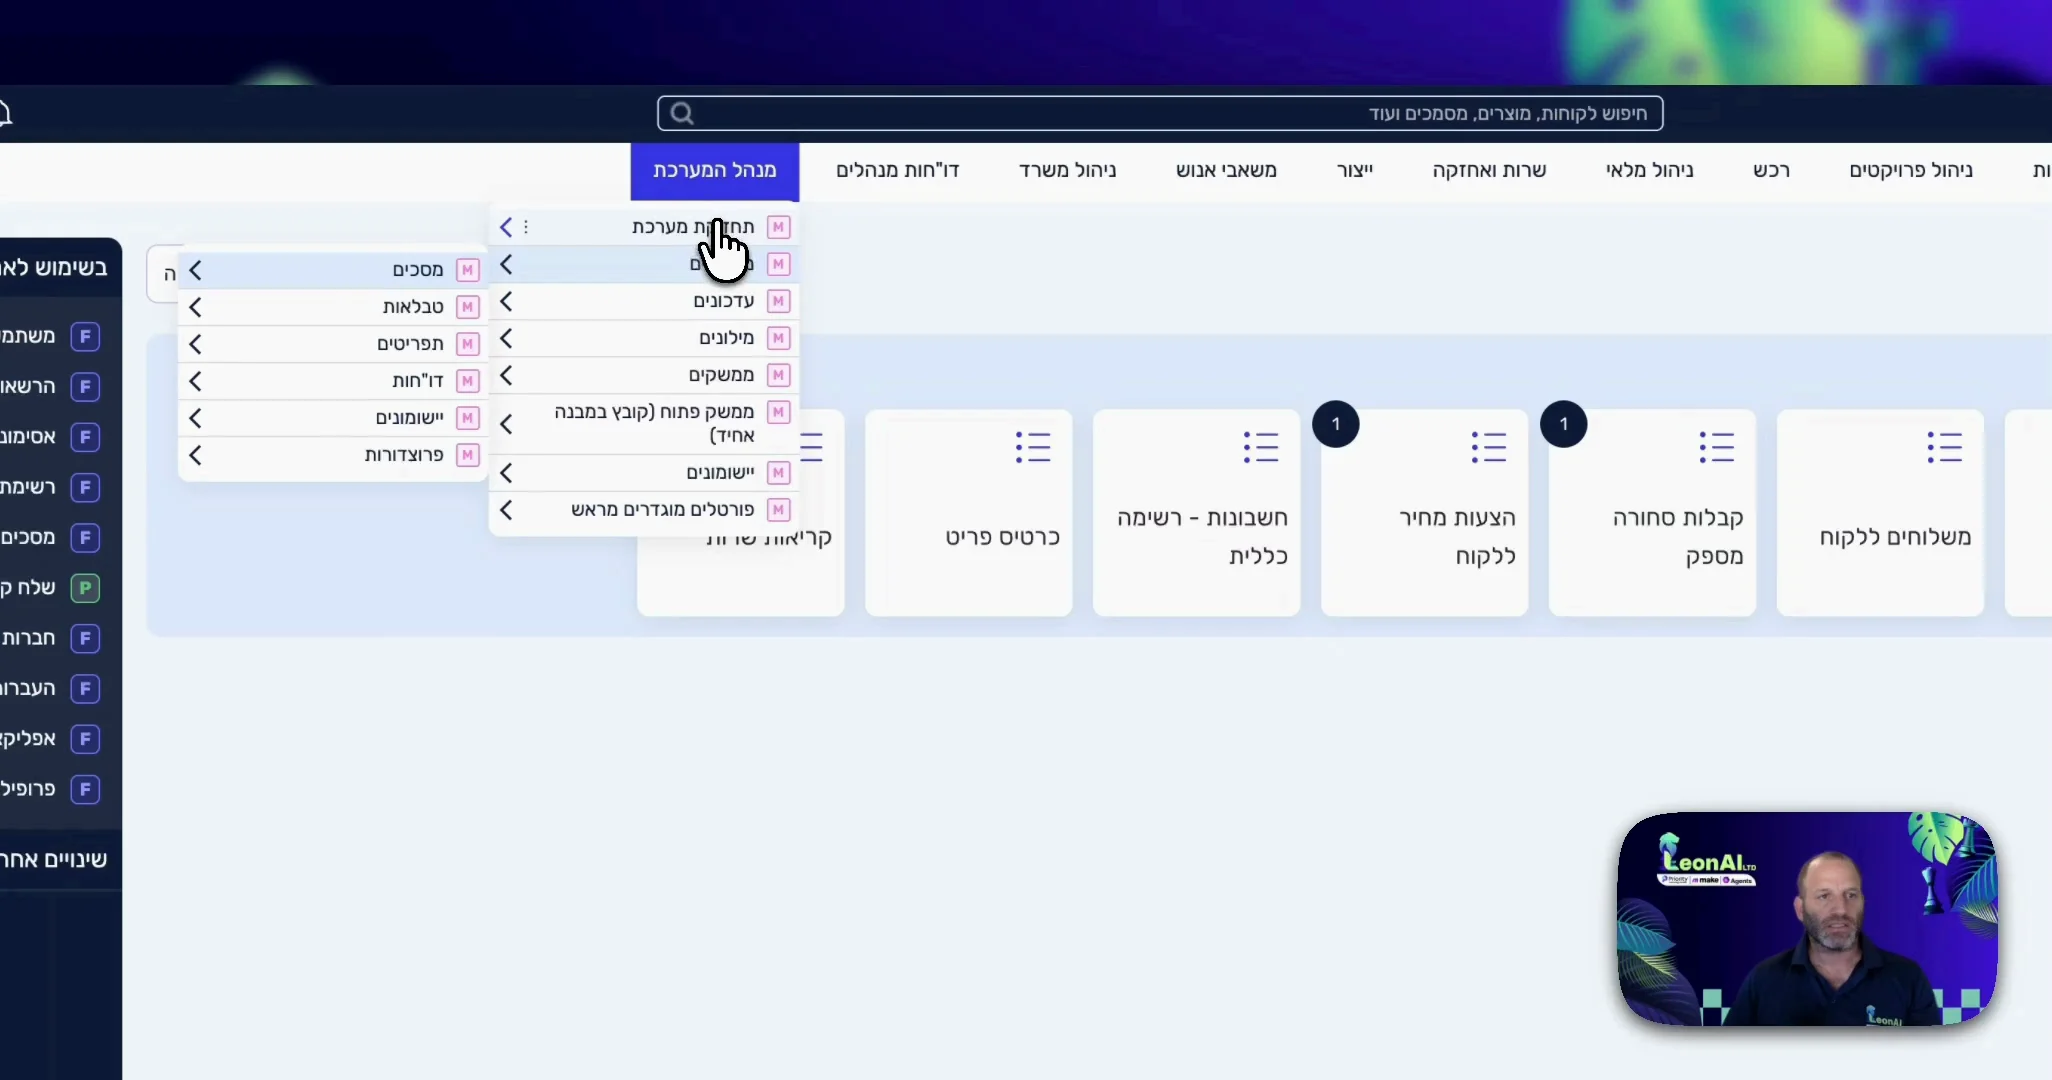
The System Users form is open.
Select the user you will connect and open the User's System Privileges tab.
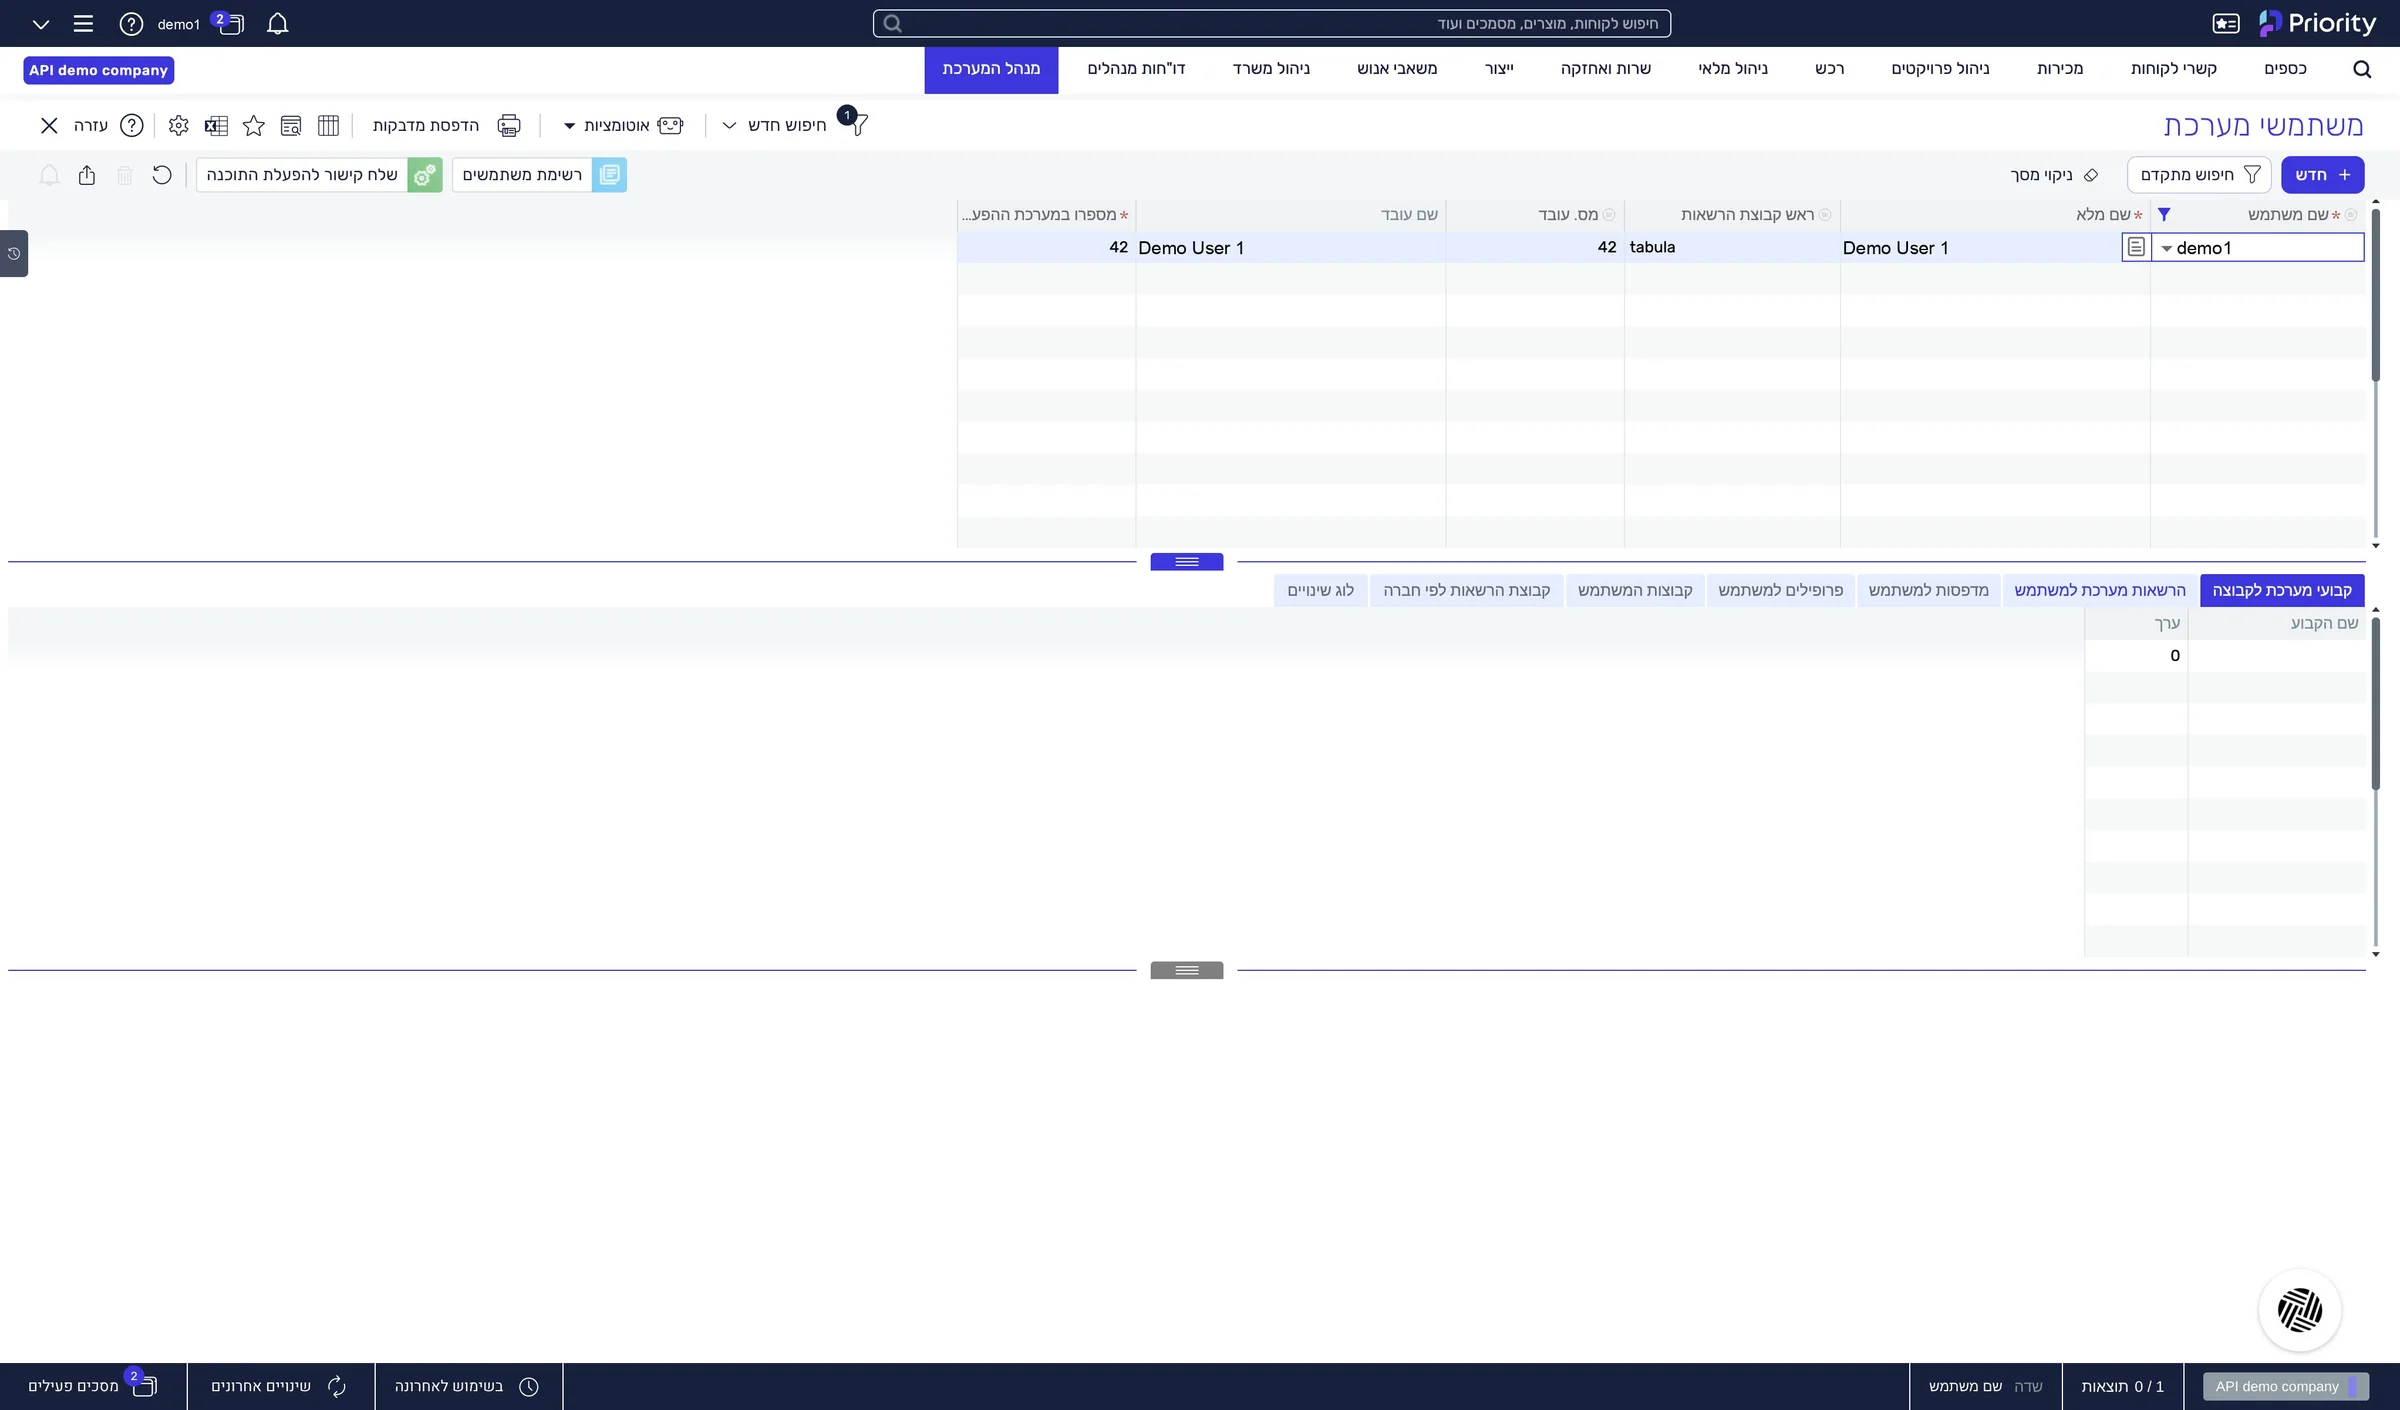
The User's System Privileges tab is open.
Go to License and make sure the API License box is checked.
If the box is not checked, the user cannot be connected. Contact your Priority administrator before you continue.
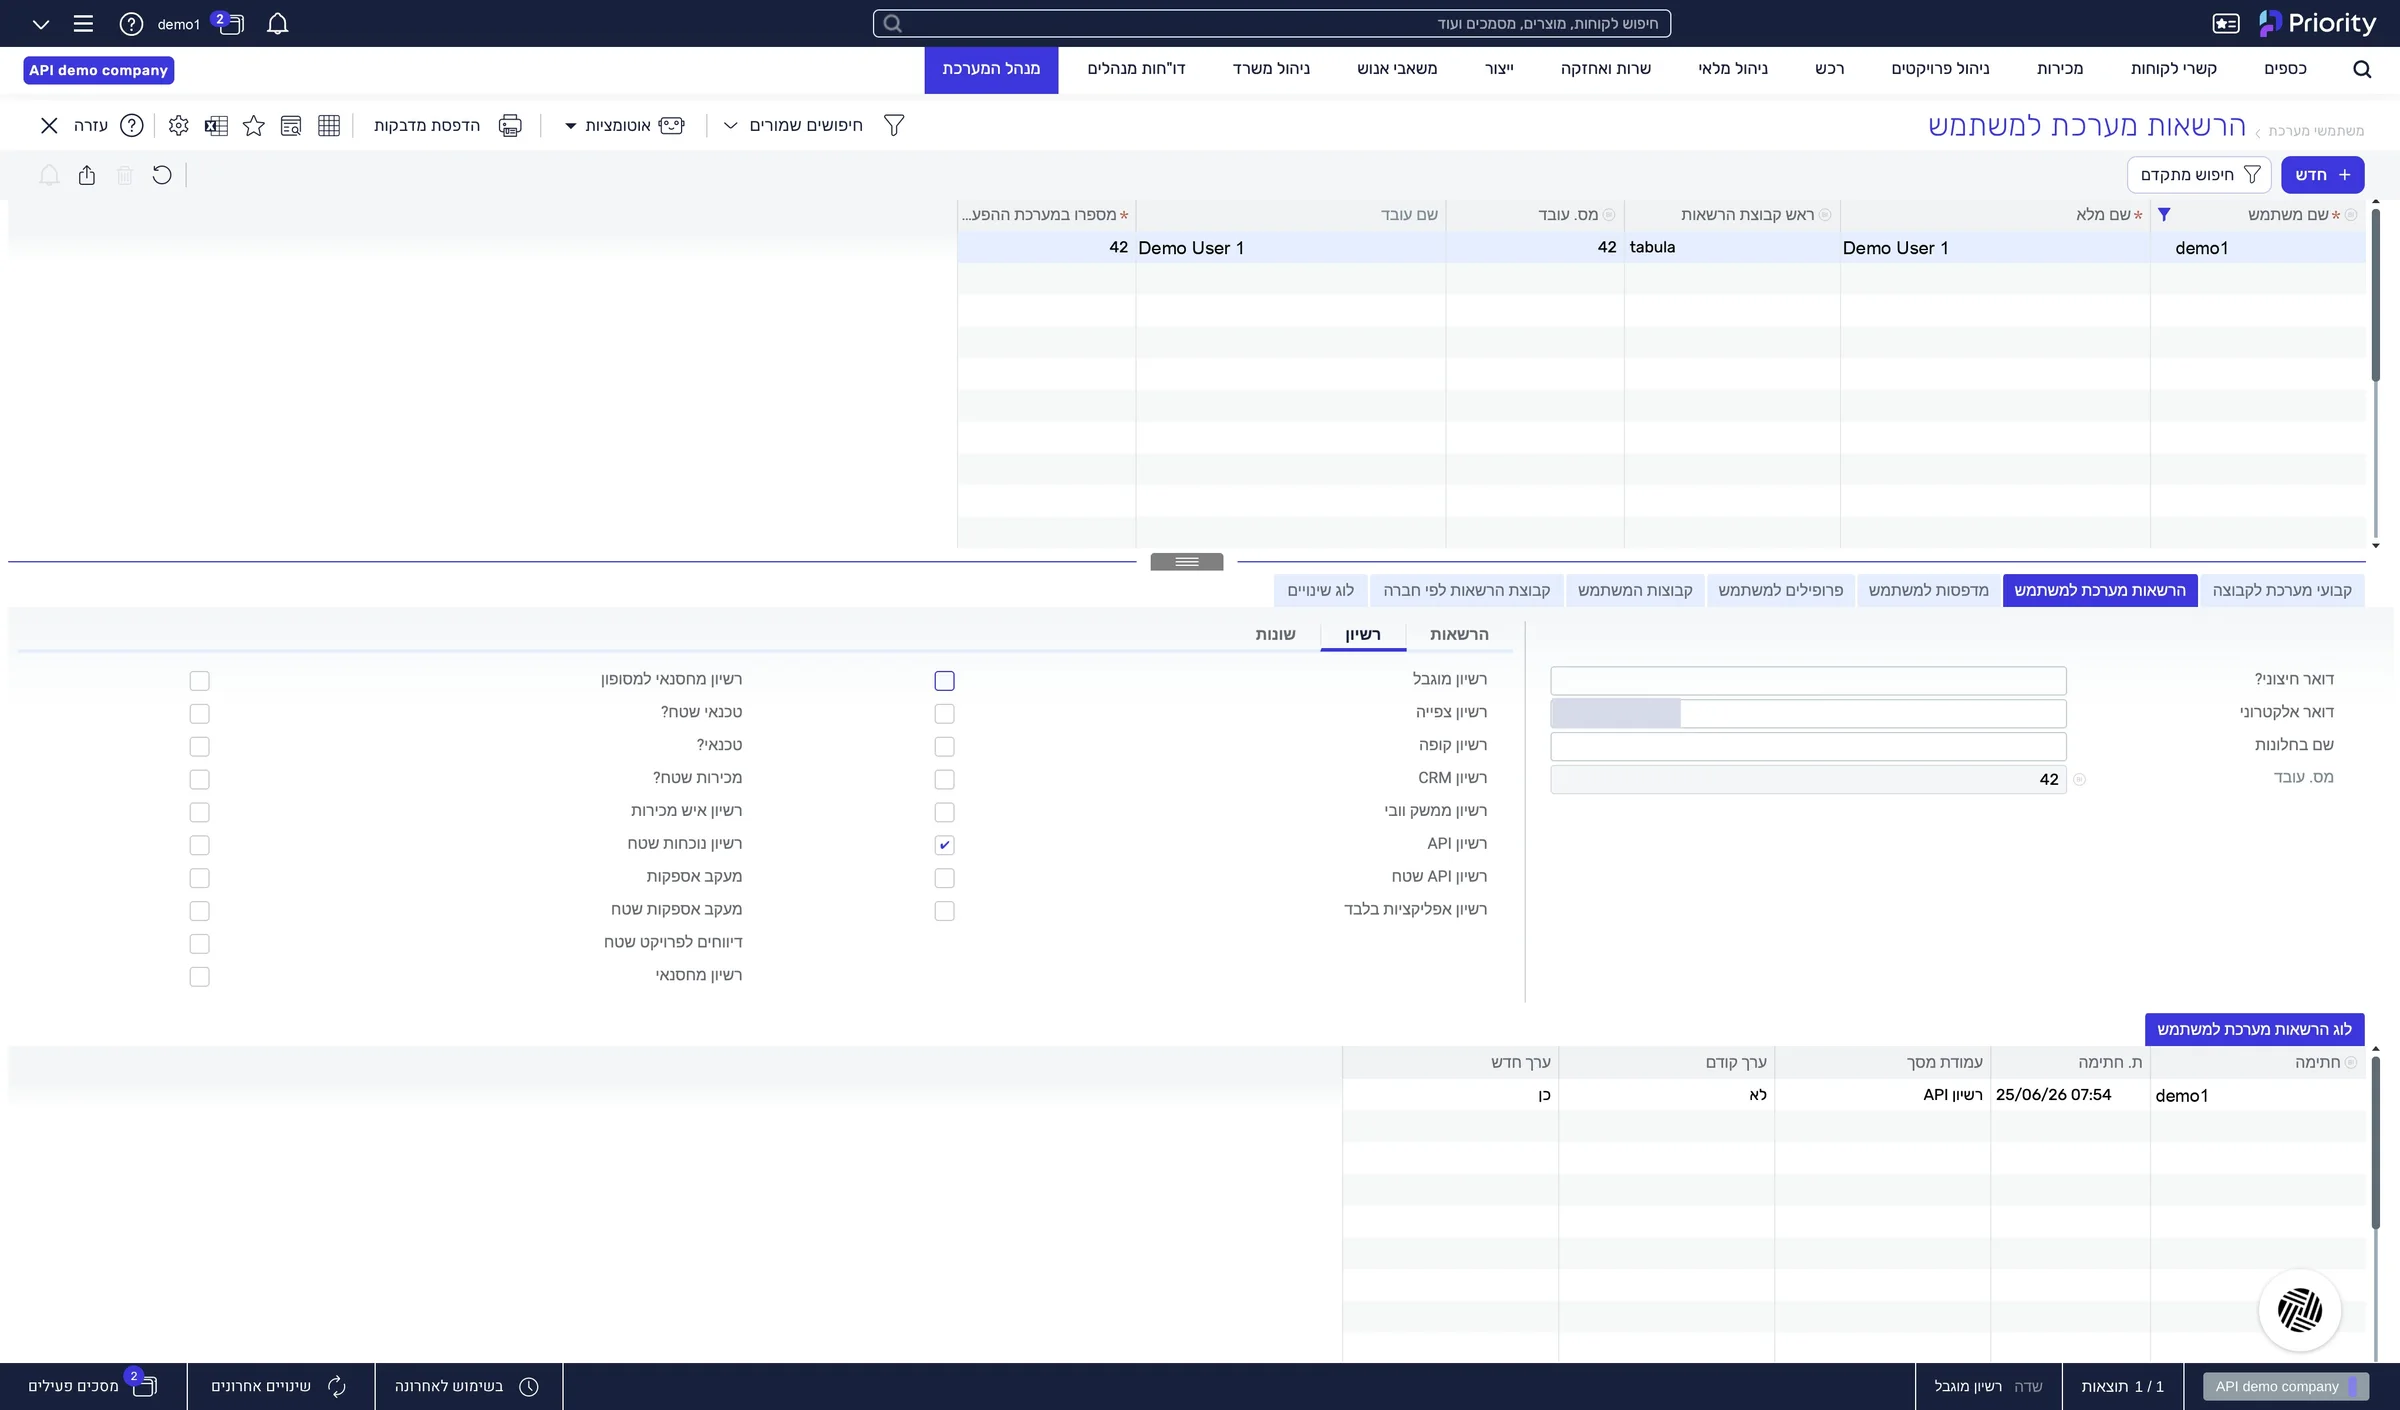
The “API License” box is checked for the user.
One address from Priority, and the three connection values inside it: the server address, the settings file and the company name.
In a new tab, sign in to Priority's web interface with a user who has access to the System Management menu.
To connect Priority you need four details from the system: the API address, the company name, the settings file name and a personal access token. You get all of them from the System Management menu.
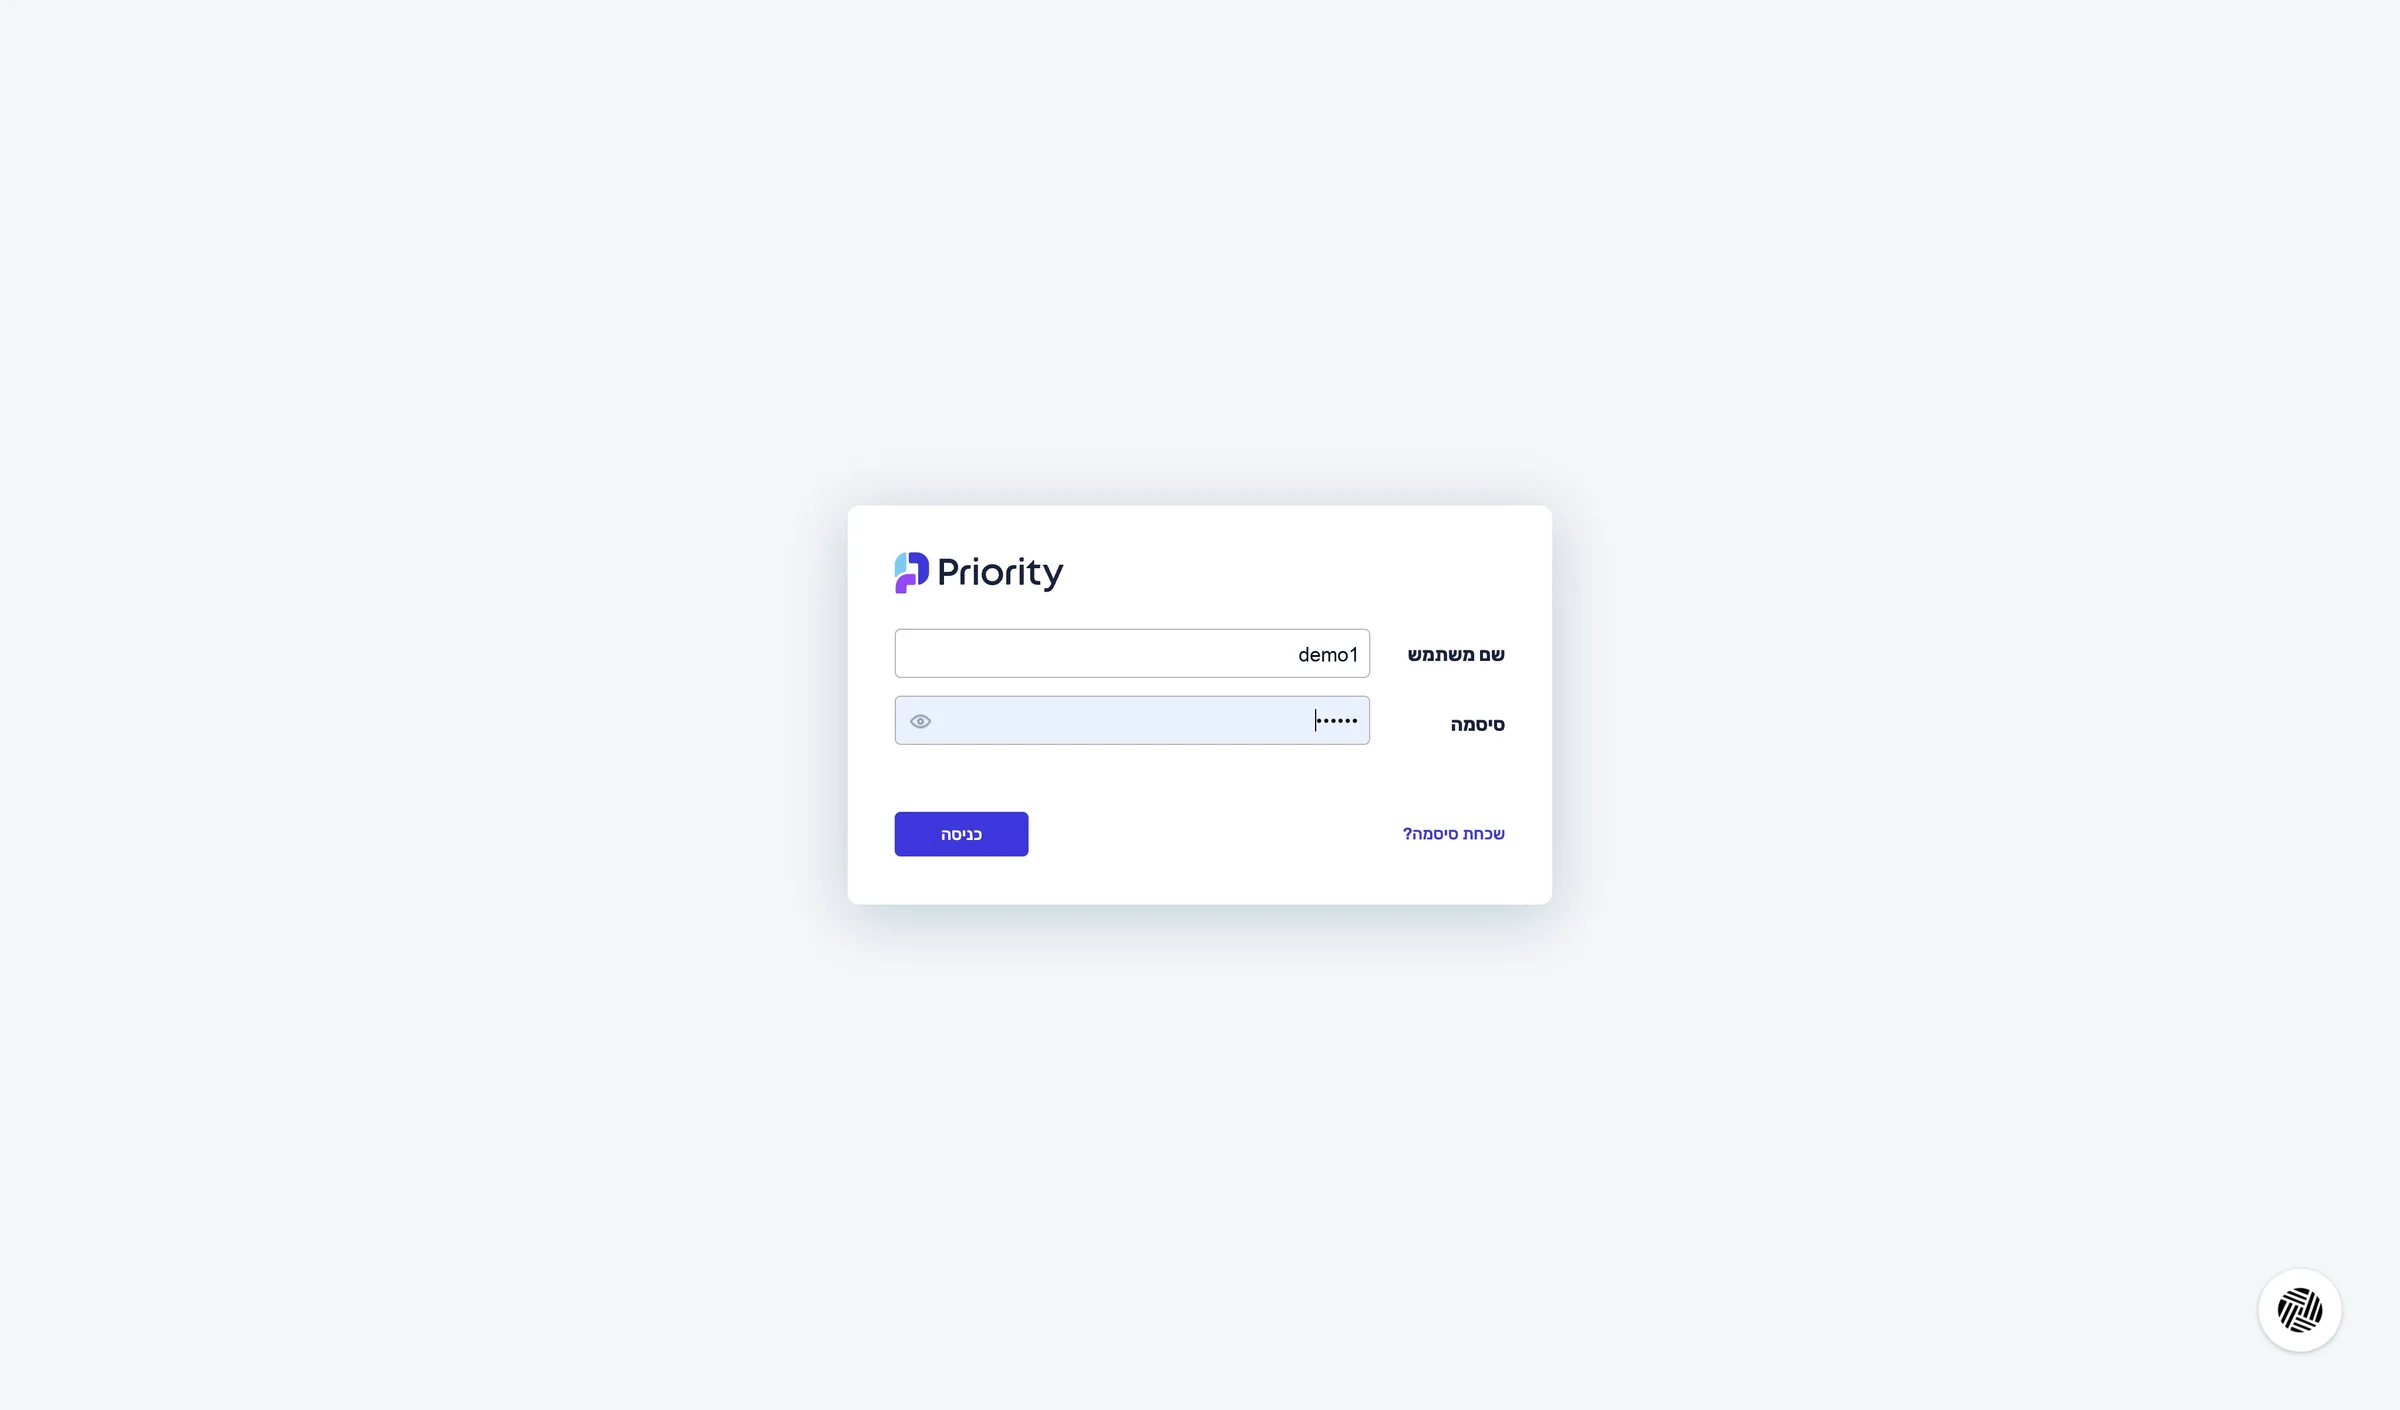
You are signed in to Priority and see System Management in the top menu.
In Priority's top menu, click System Management.
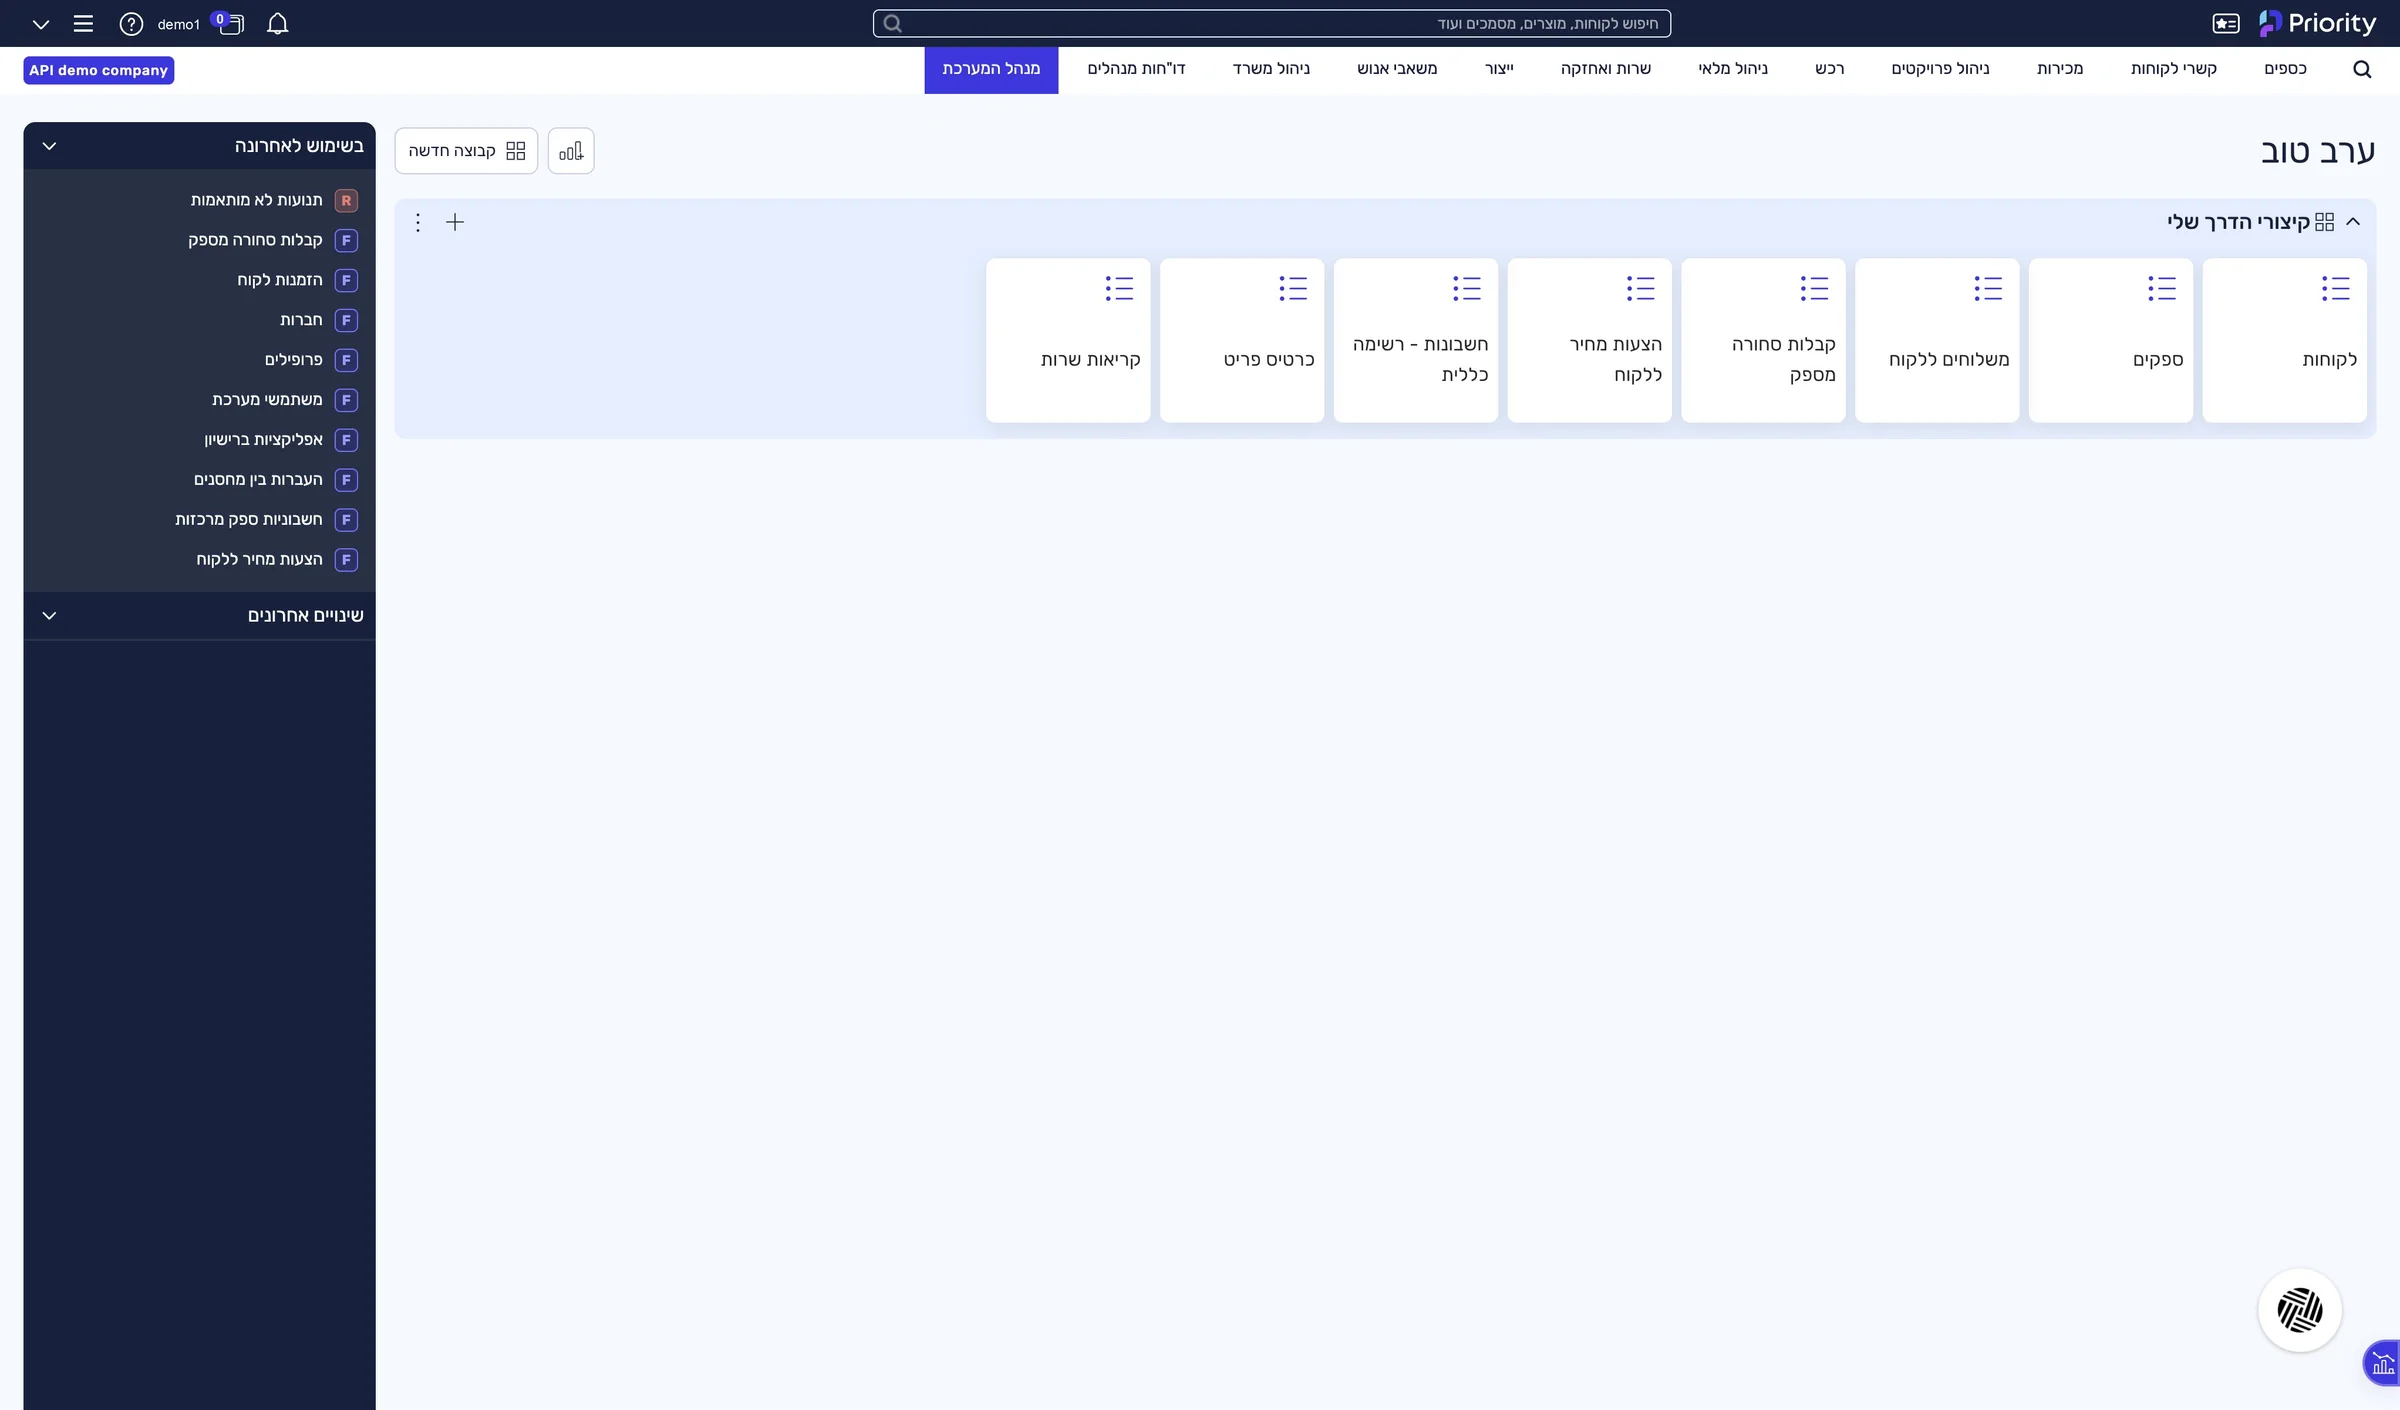
The System Management menu is open.
System Maintenance › Users › Send Link to Activate Software
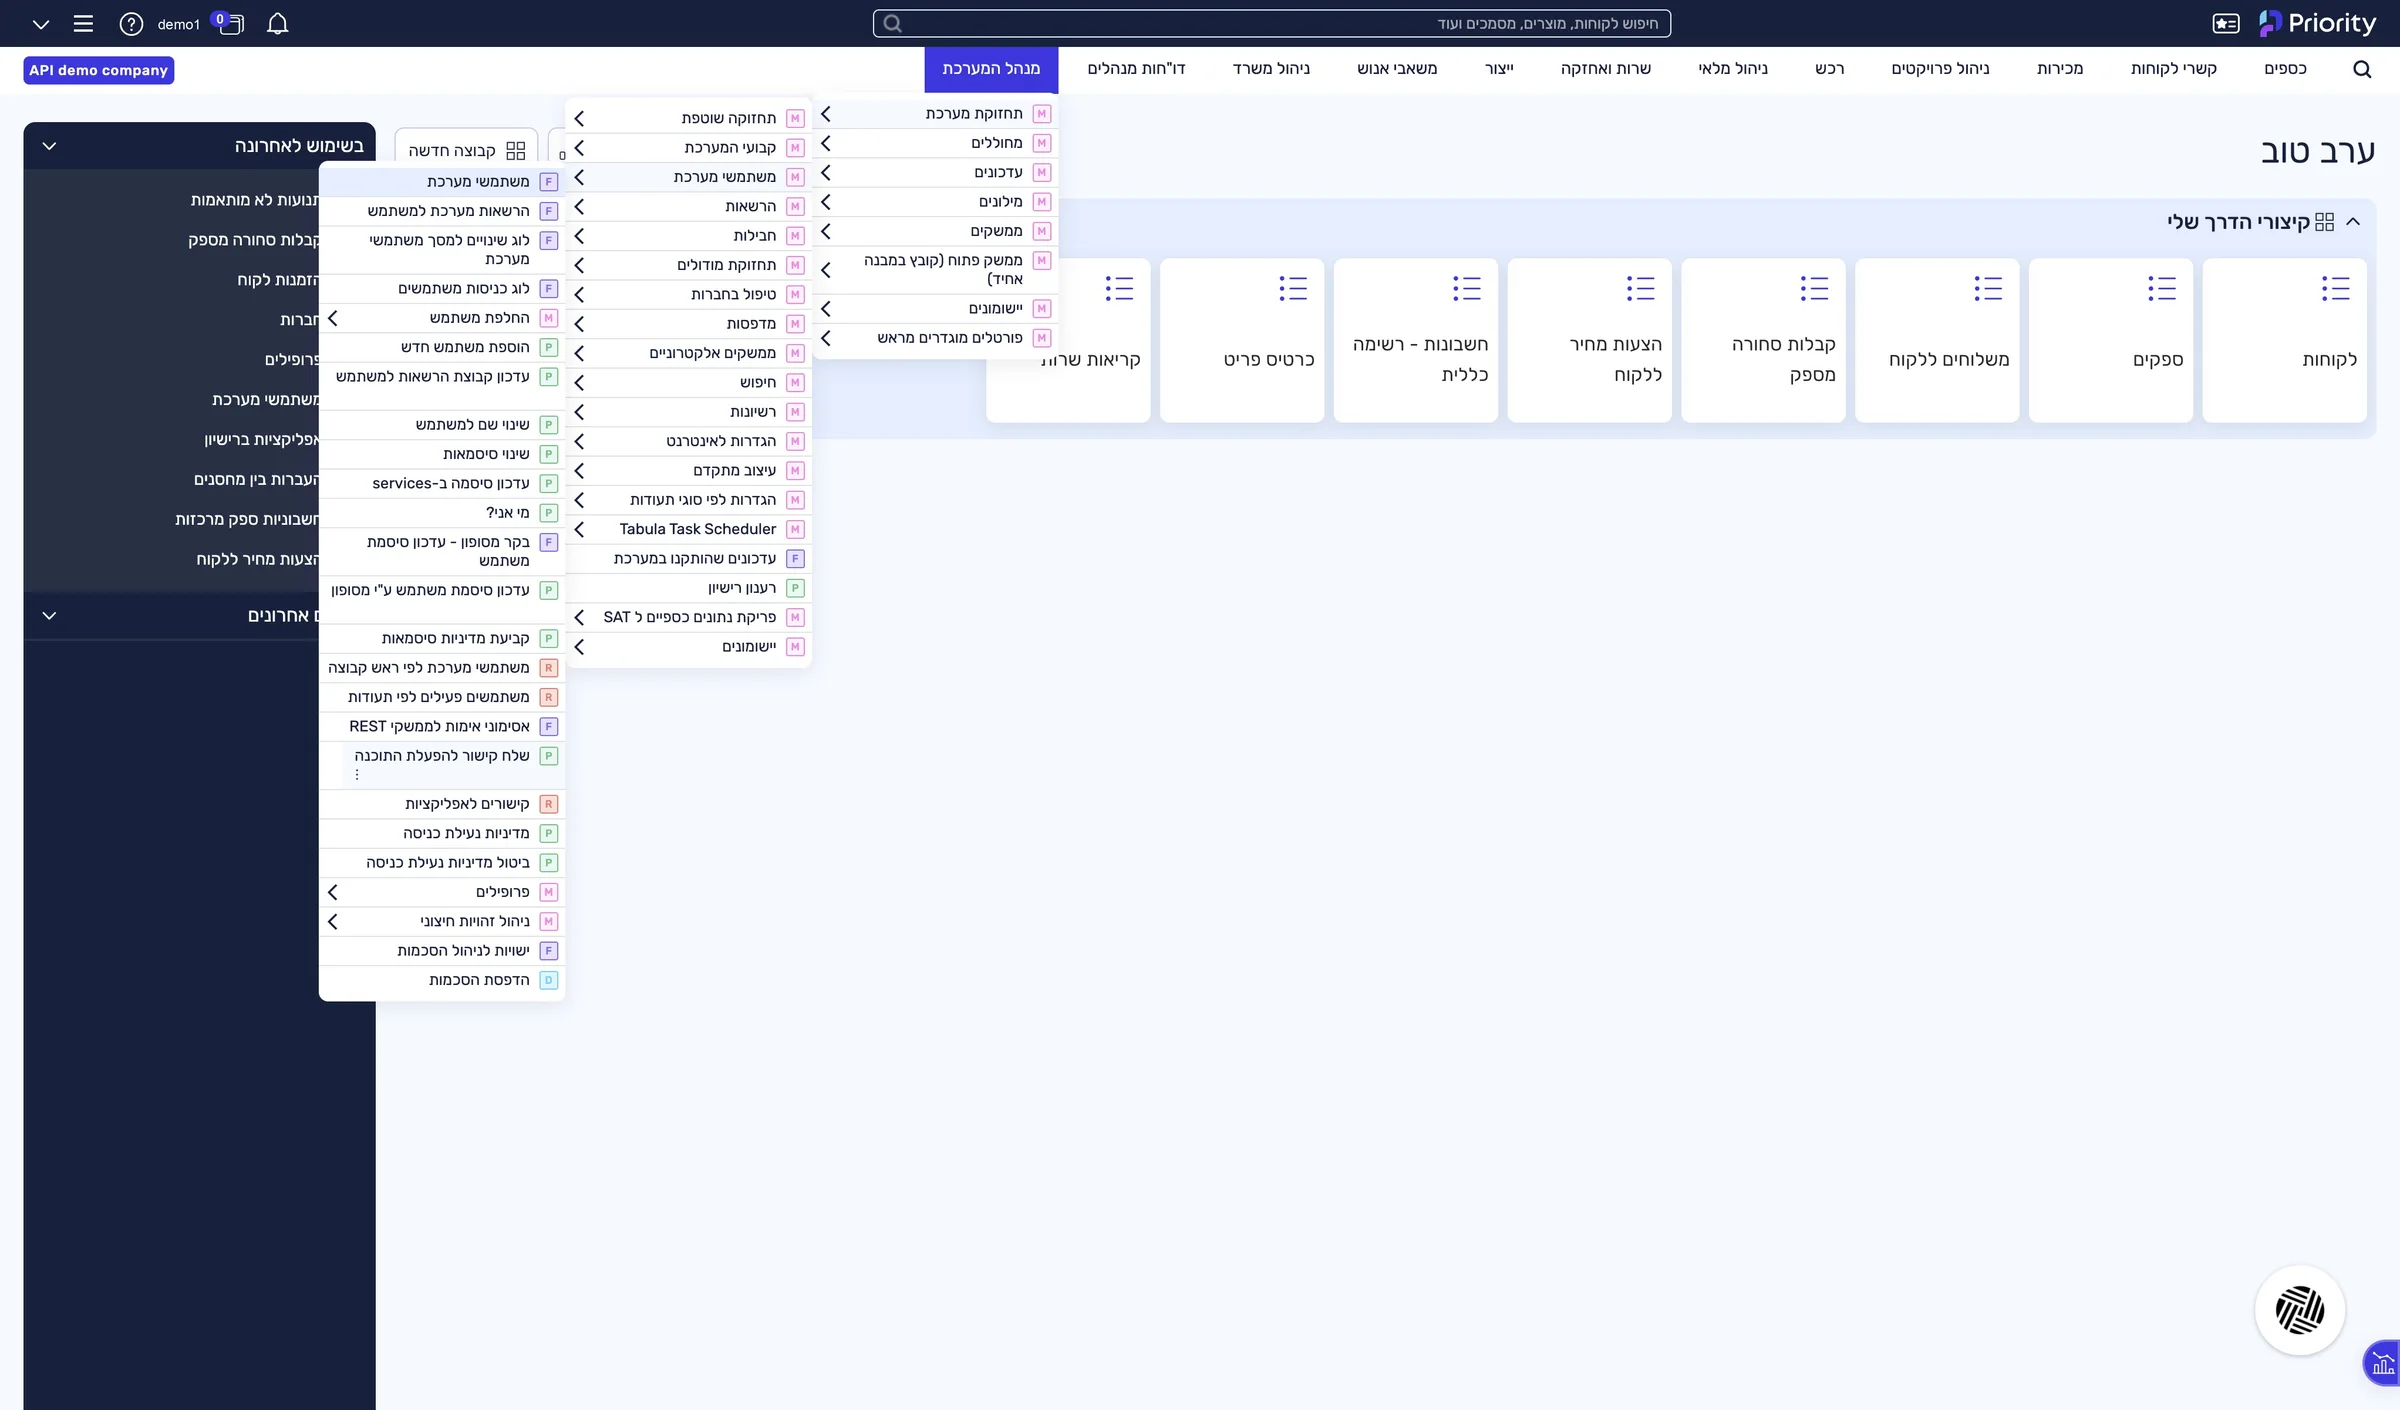
A “Request Type” window opens.
Check API and click OK.
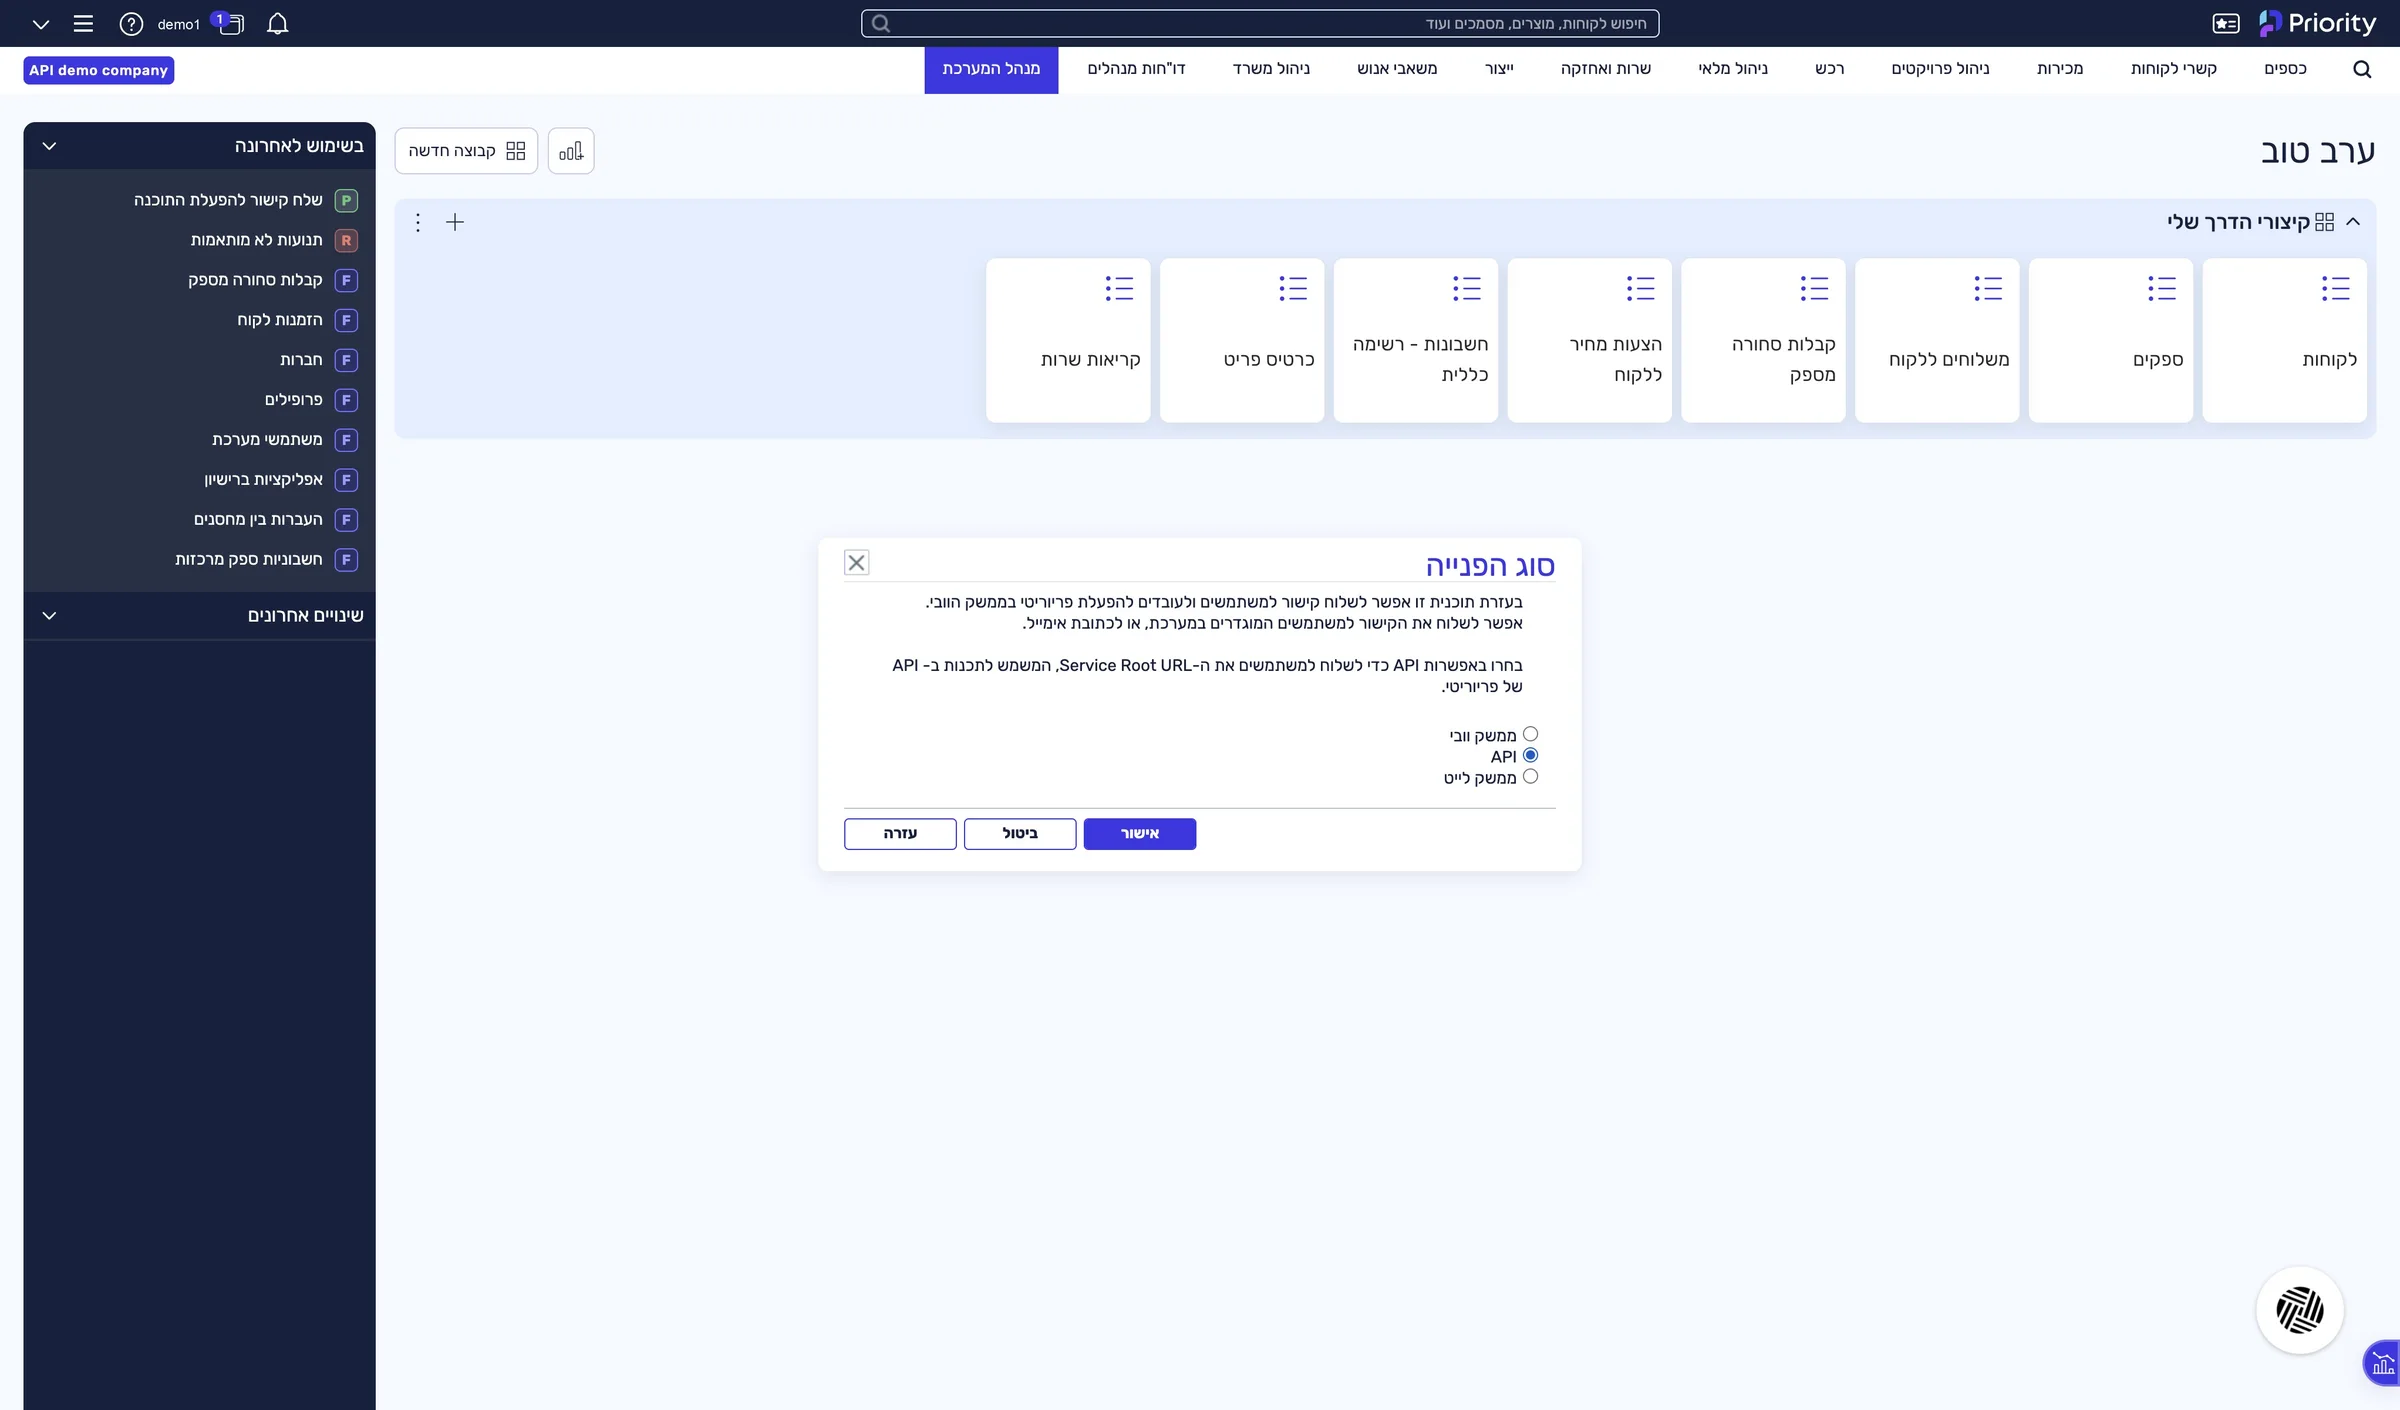
A “Parameter Input” window opens.
Check Display link and click OK.
A window with the address opens.
Select the full address and copy it (Ctrl+C).
The last two parts of the address are the settings file name and the company name — you will use them in a moment. The address breaks over two lines in the window: copy it as one piece, with no space.
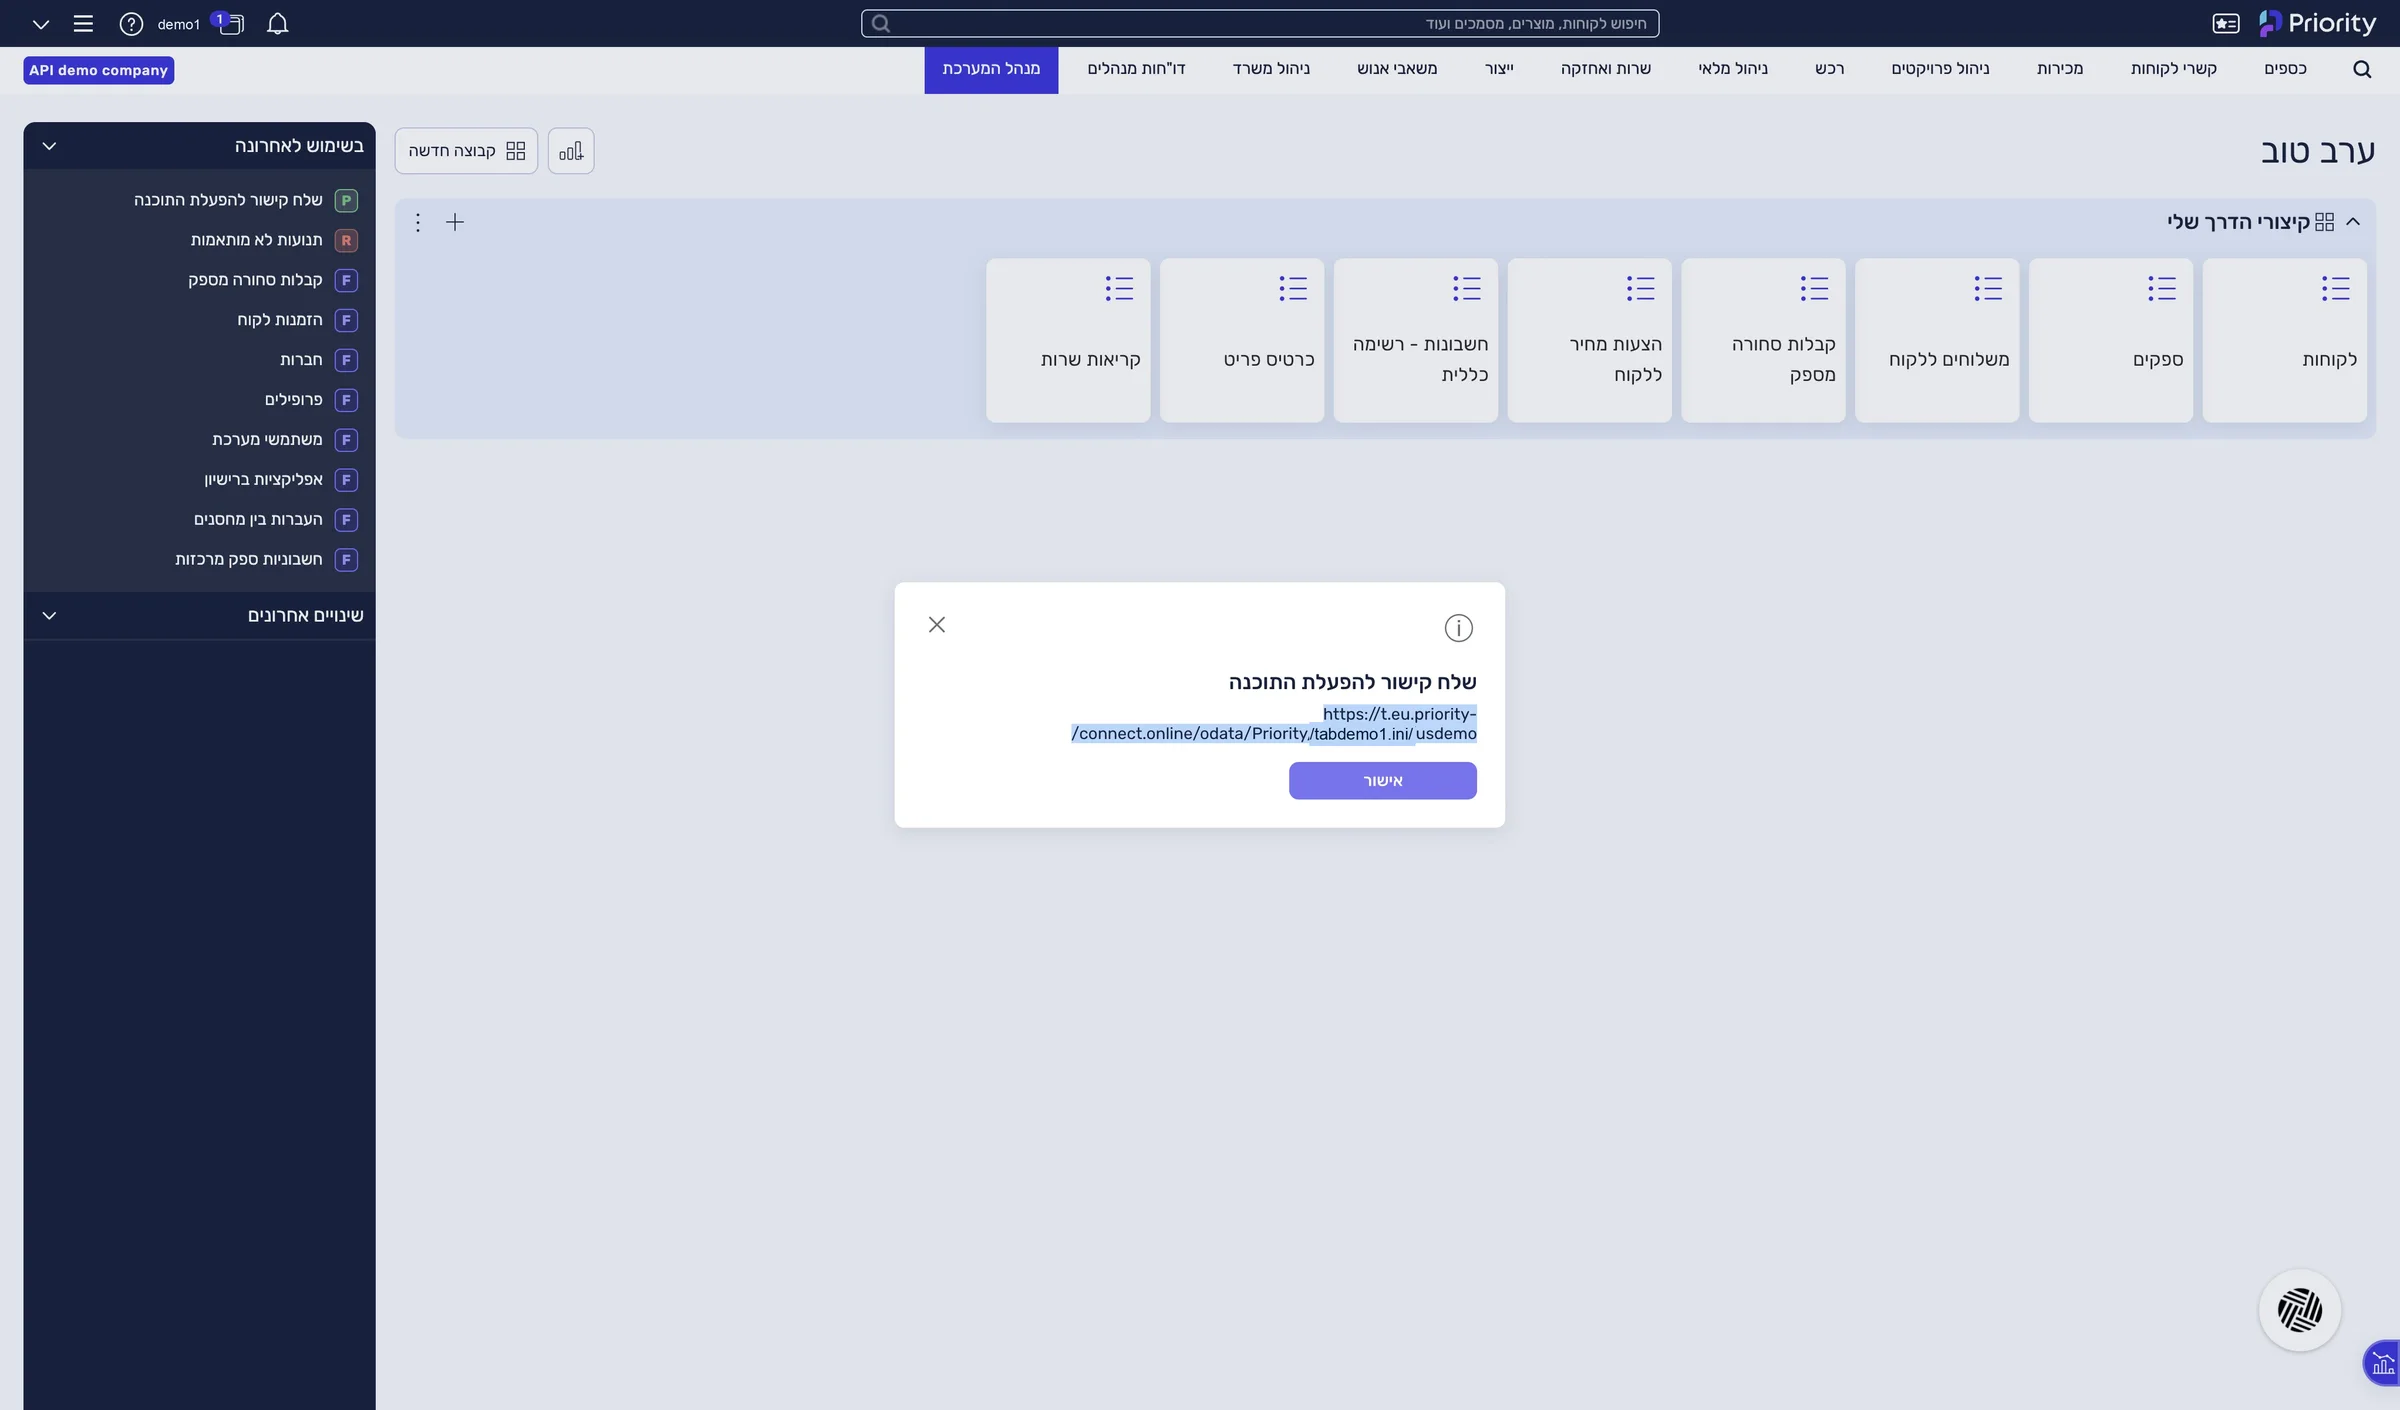
The full address, ending in the company name, is on your clipboard.
The address you copied splits into three values you need for the connection:
https://p.priority-connect.online/odata/Priority/tabdemo1.ini/usdemoPaste your address into the address checker — it splits it for you →
The URL points to a private network — a public https address is required.
In Priority's window the address spans two lines, and pasting adds an extra character to it.
Not found: check the company name and the tabula.ini file name.
These two values are the last two parts of the API address. In Priority Cloud the settings file is never tabula.ini.
Priority URL must start with https://
The address was copied without the https:// at its start.
Could not reach the server: check the URL, and that the firewall allows the IPs in the prerequisites.
Either the address is wrong, or your organization's firewall is blocking LeonAI's IP addresses.
A token that lets LeonAI act in Priority as the user with the API licence.
System Management › System Maintenance › Users › REST Interface Authentication Tokens
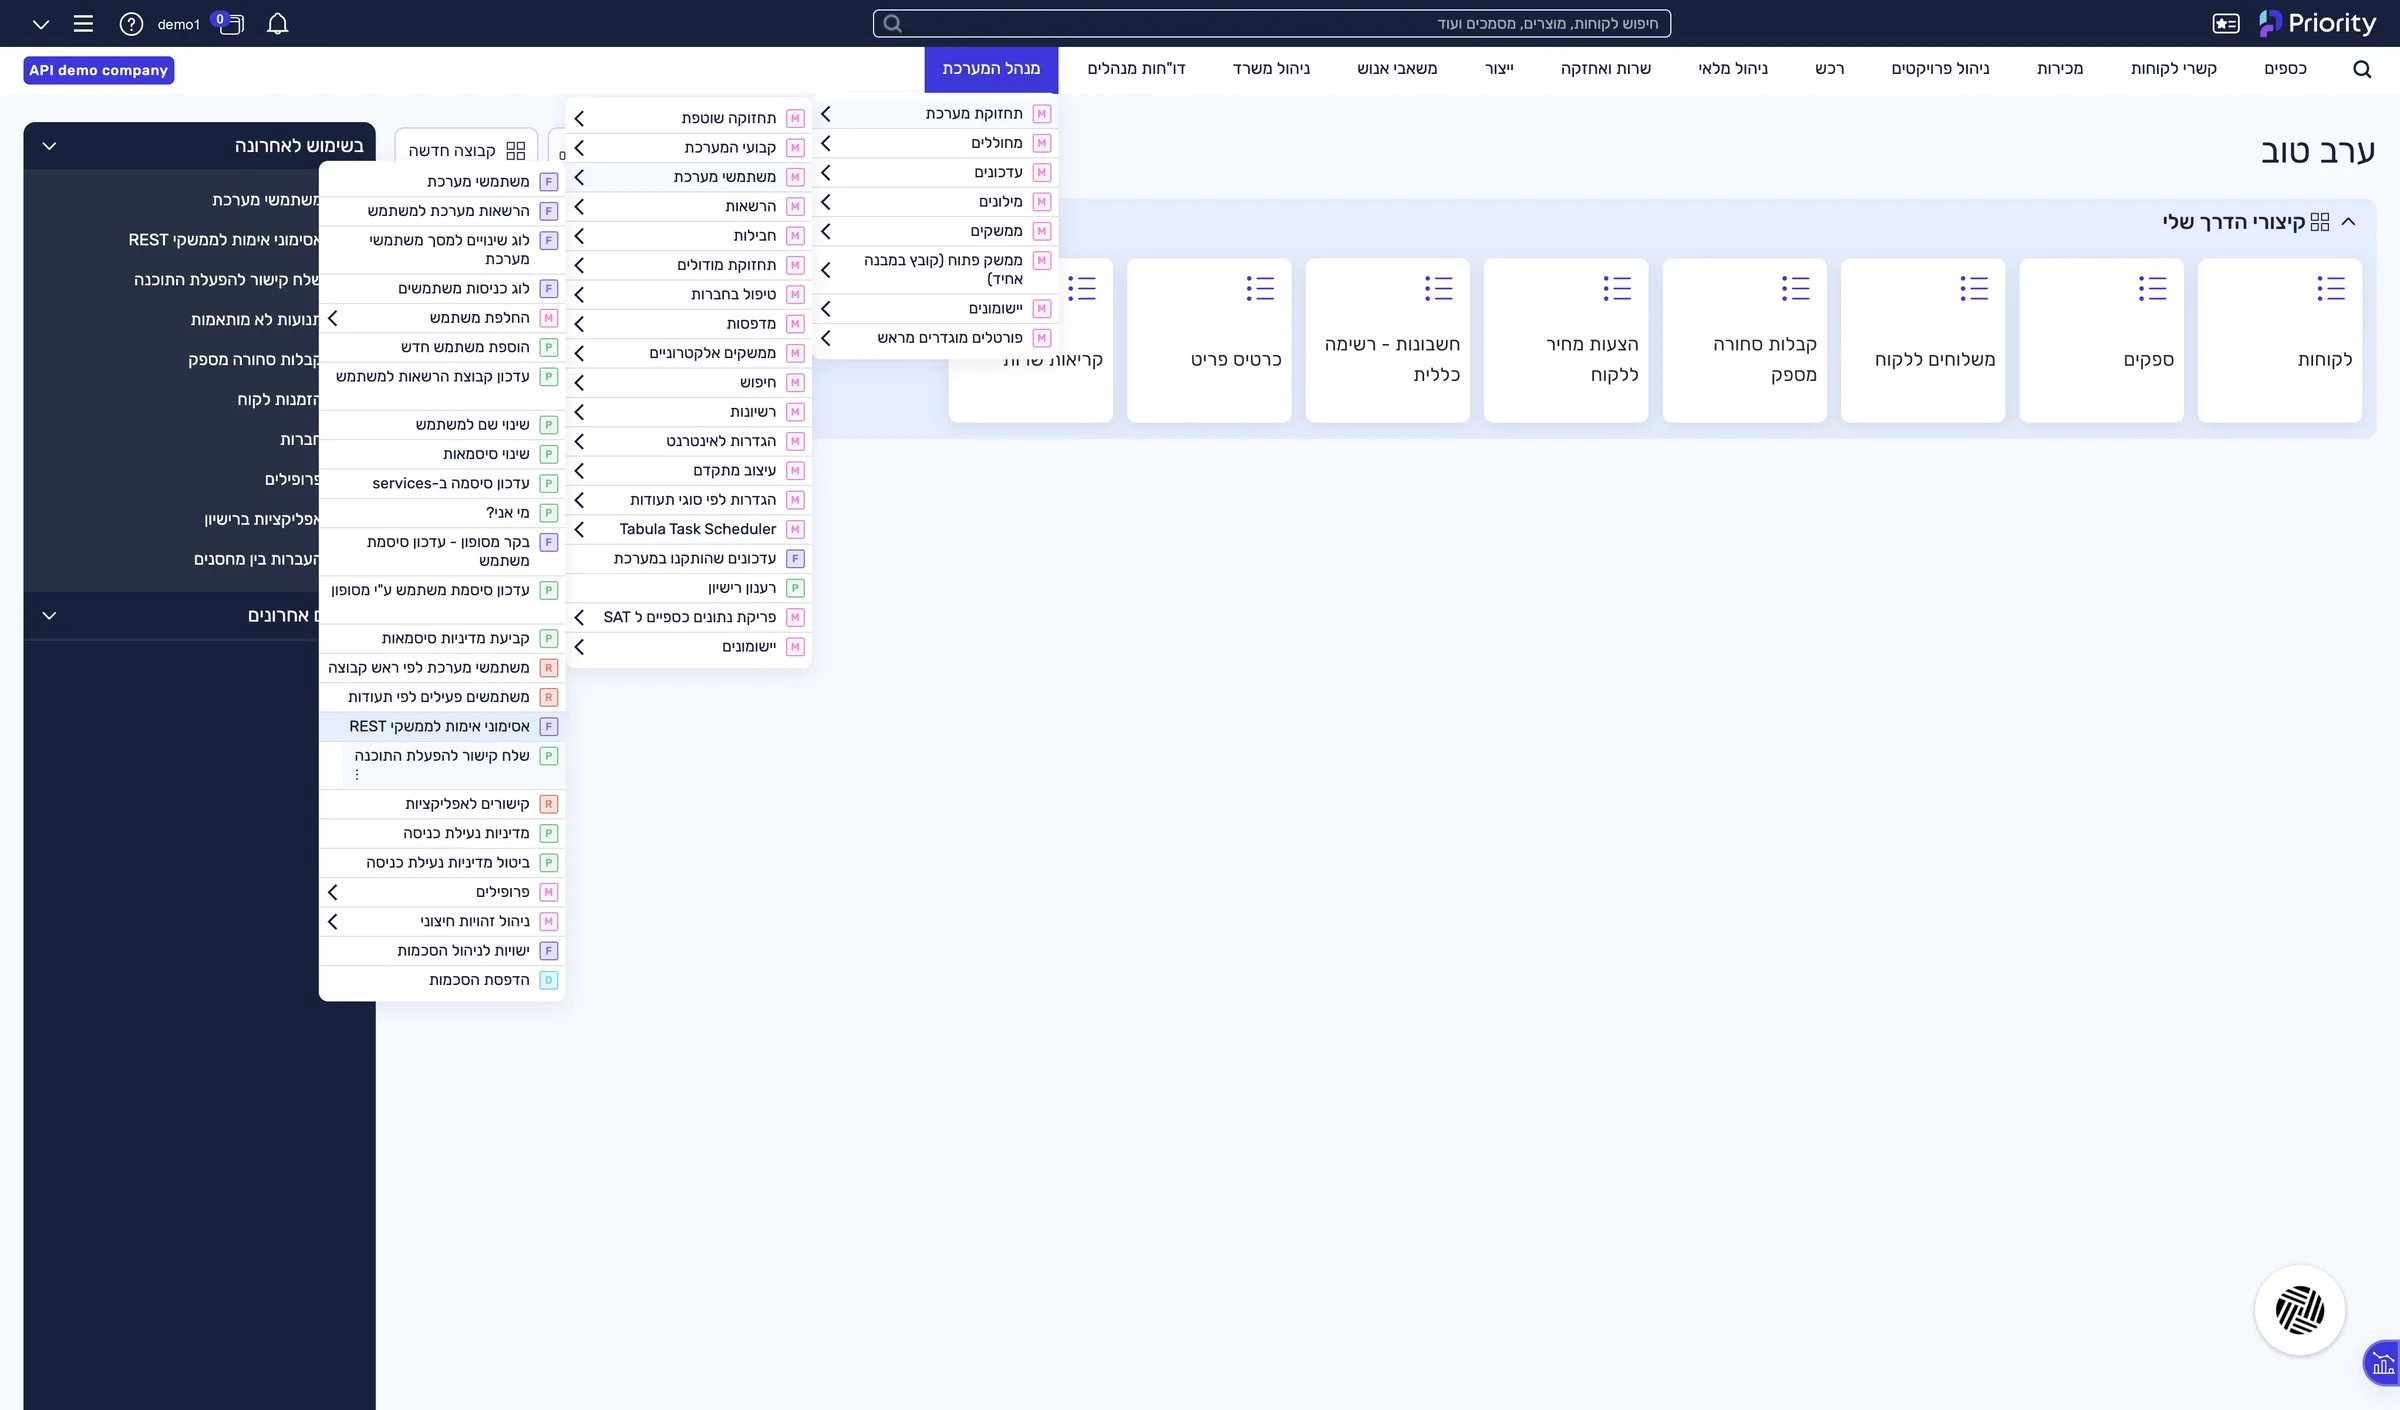
The “REST Interface Authentication Tokens” form is open, with the list of existing tokens.
Click + New, and in the new form check the Create Token box.
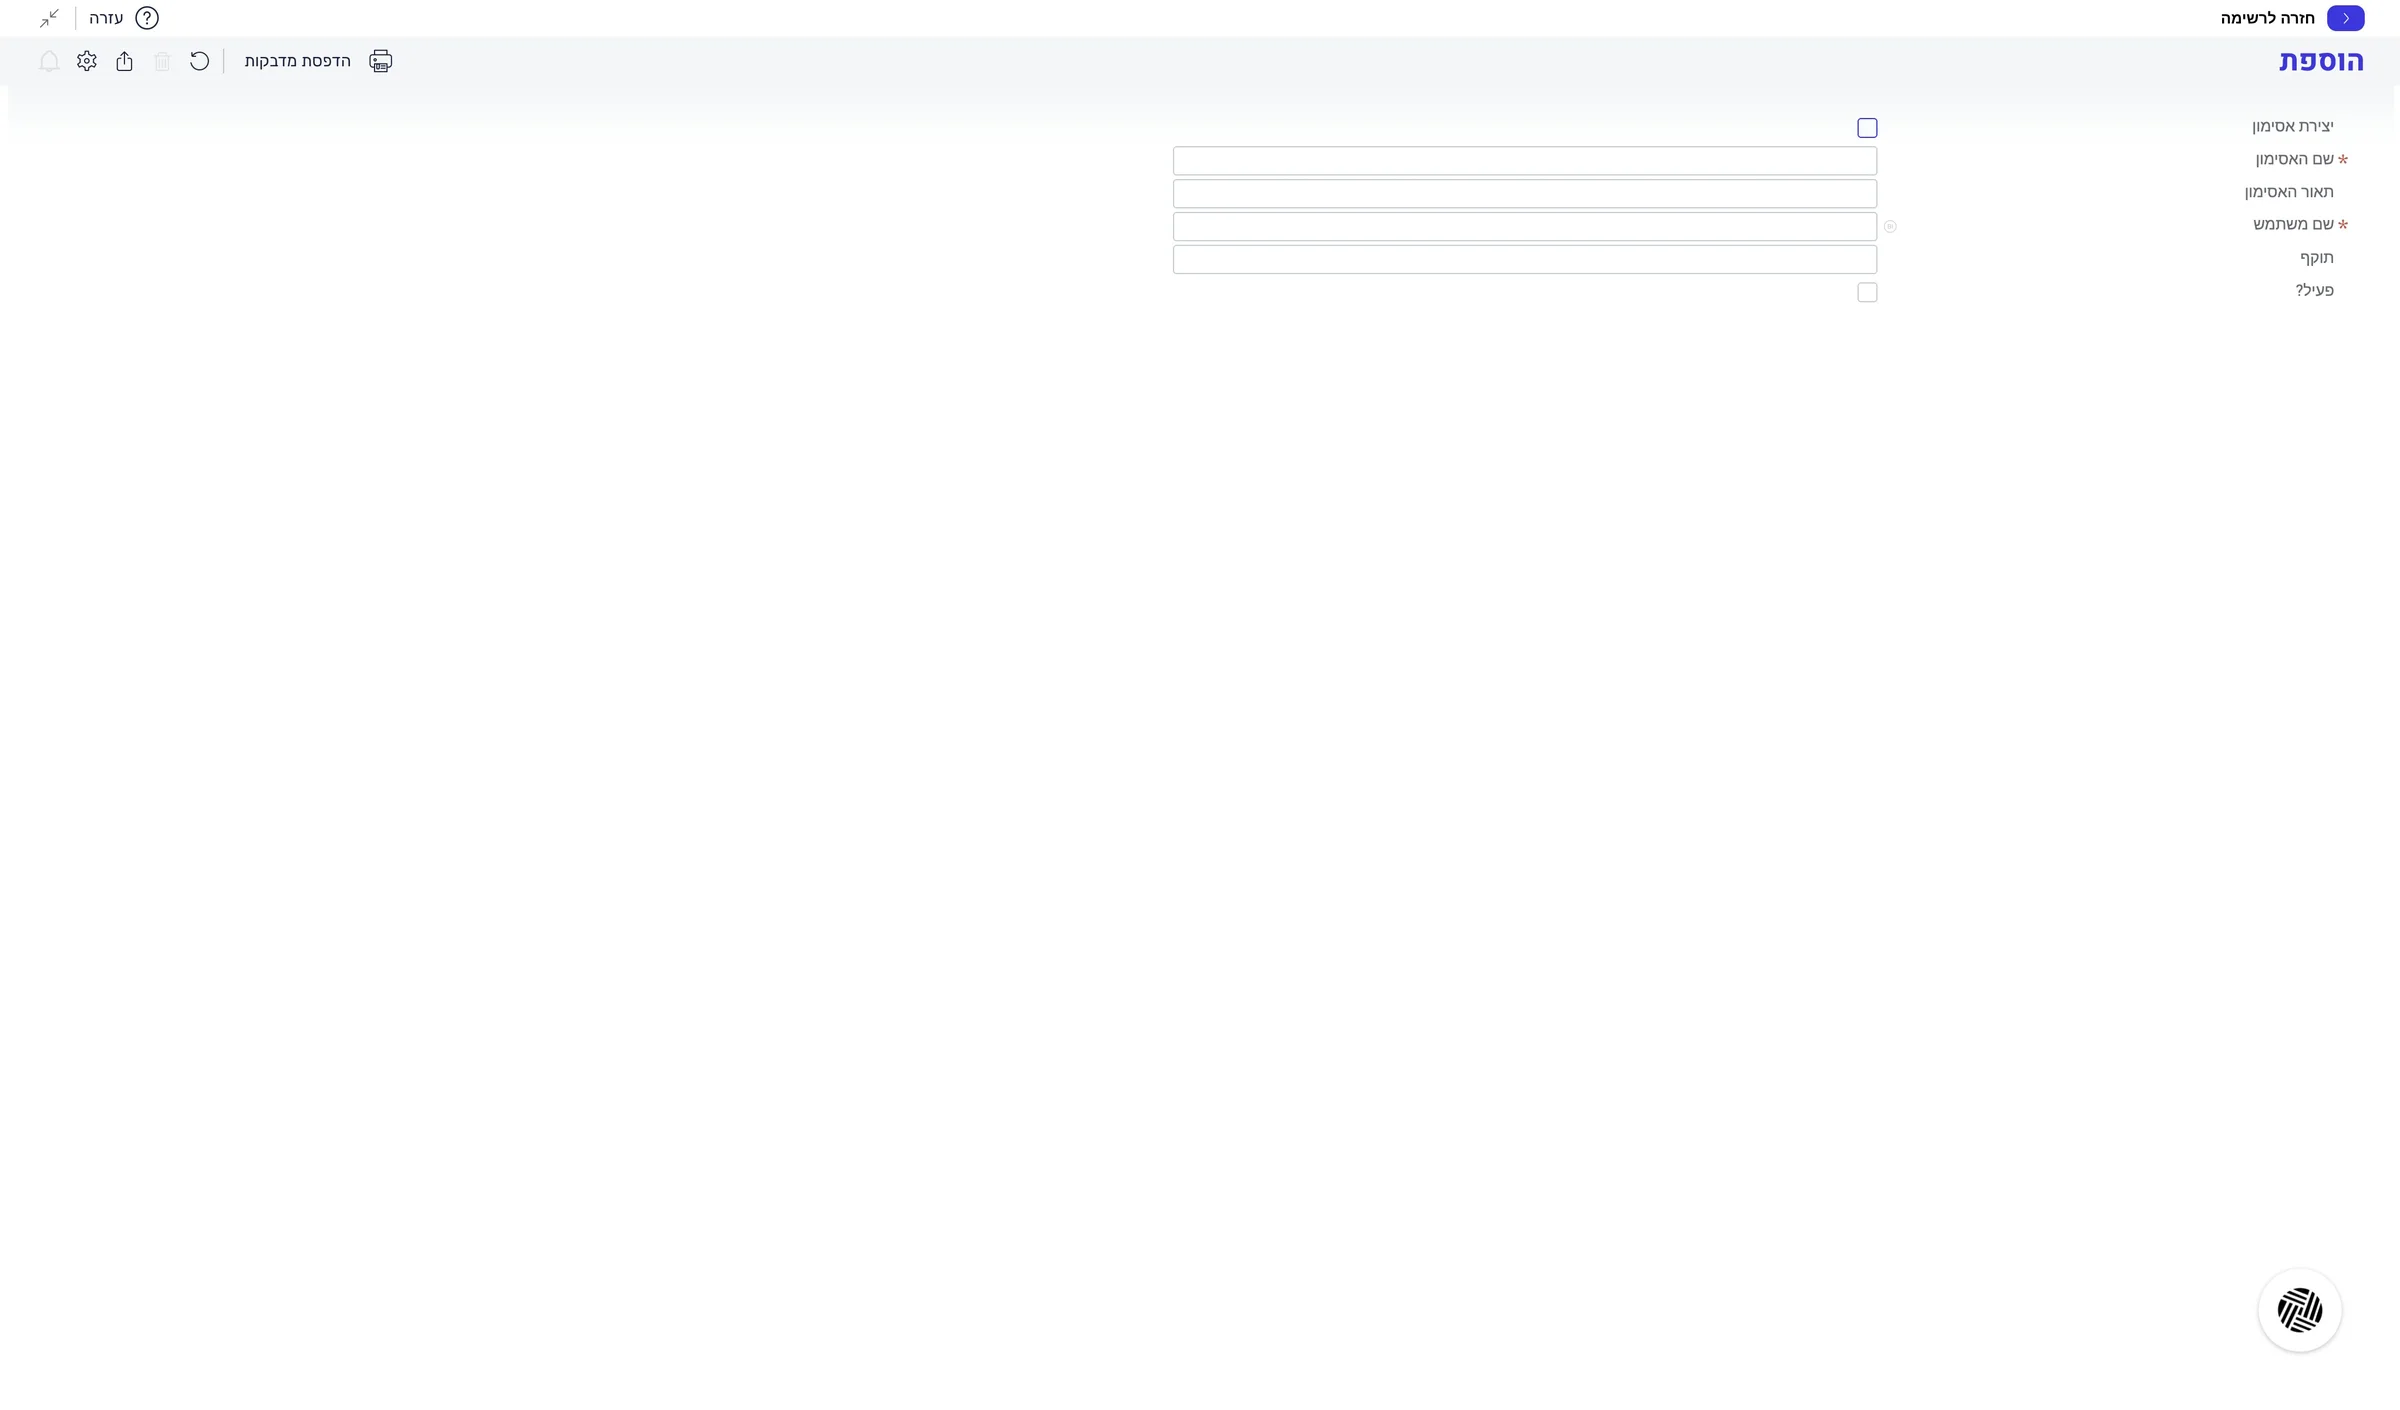
A message about saving the token appears.
In the message You must save the token before leaving the line, click OK.
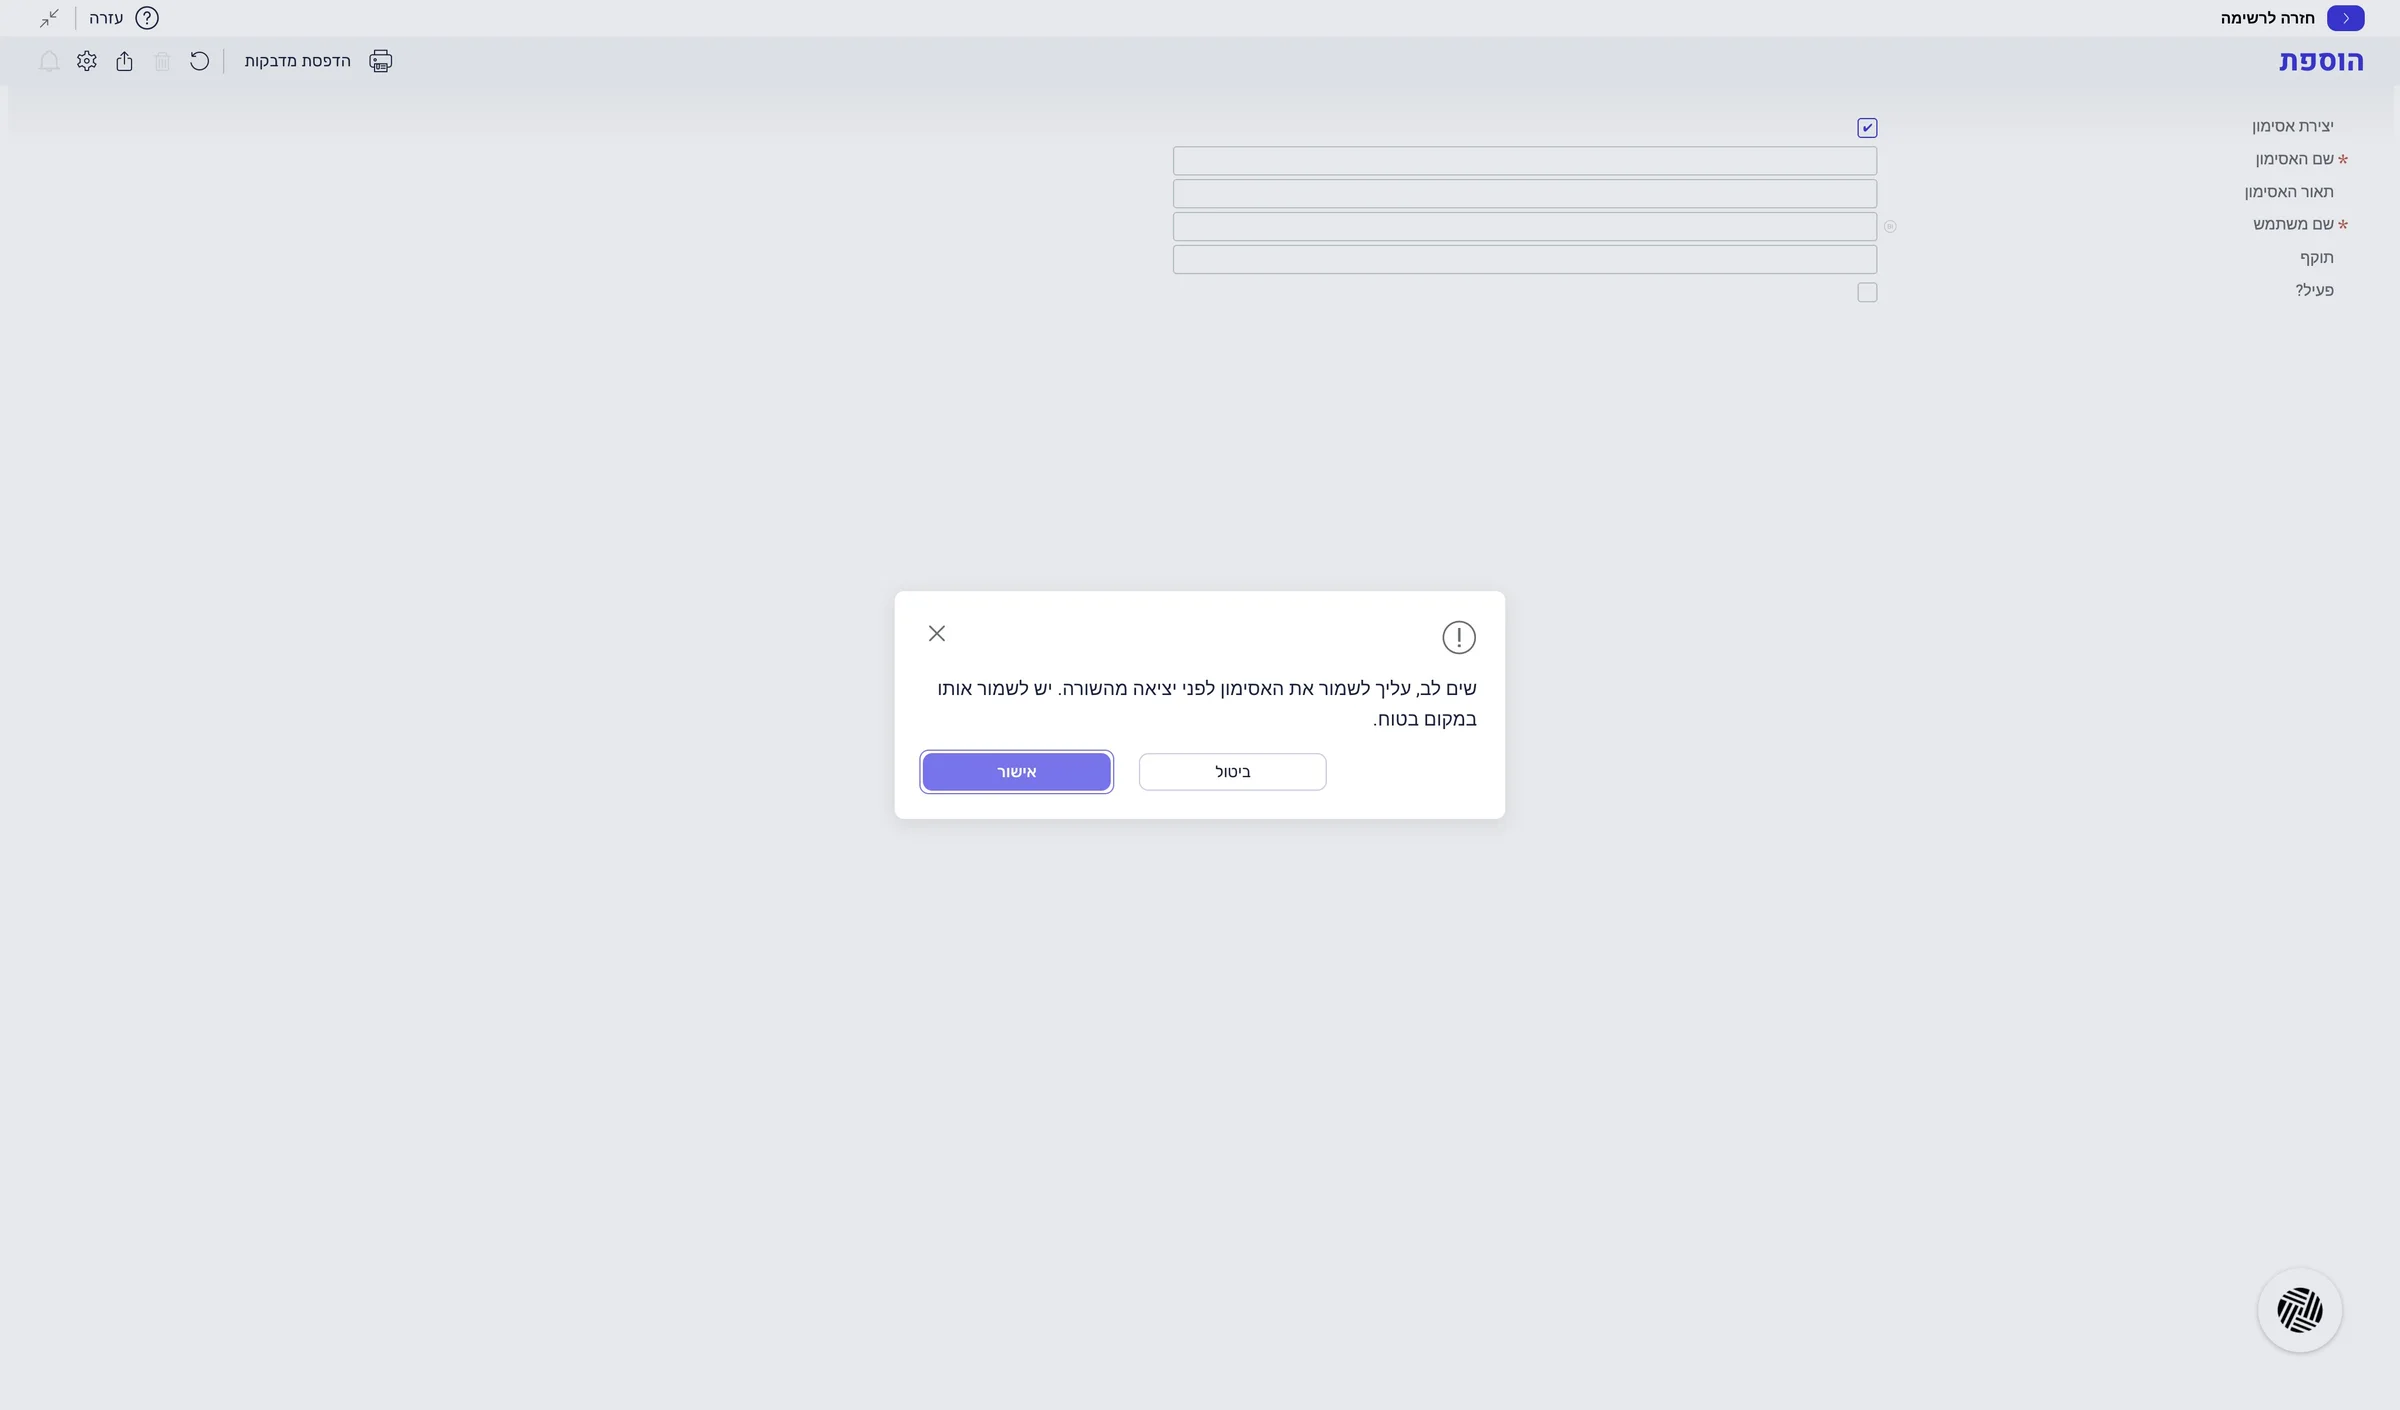
The message closed, and Priority filled in the token name.
Right-click the token in the Token Name field and choose Copy (or Ctrl+C). Keep it somewhere safe until you paste it into LeonAI.
This is the only moment the full token is shown. Once you leave the line, it is hidden.
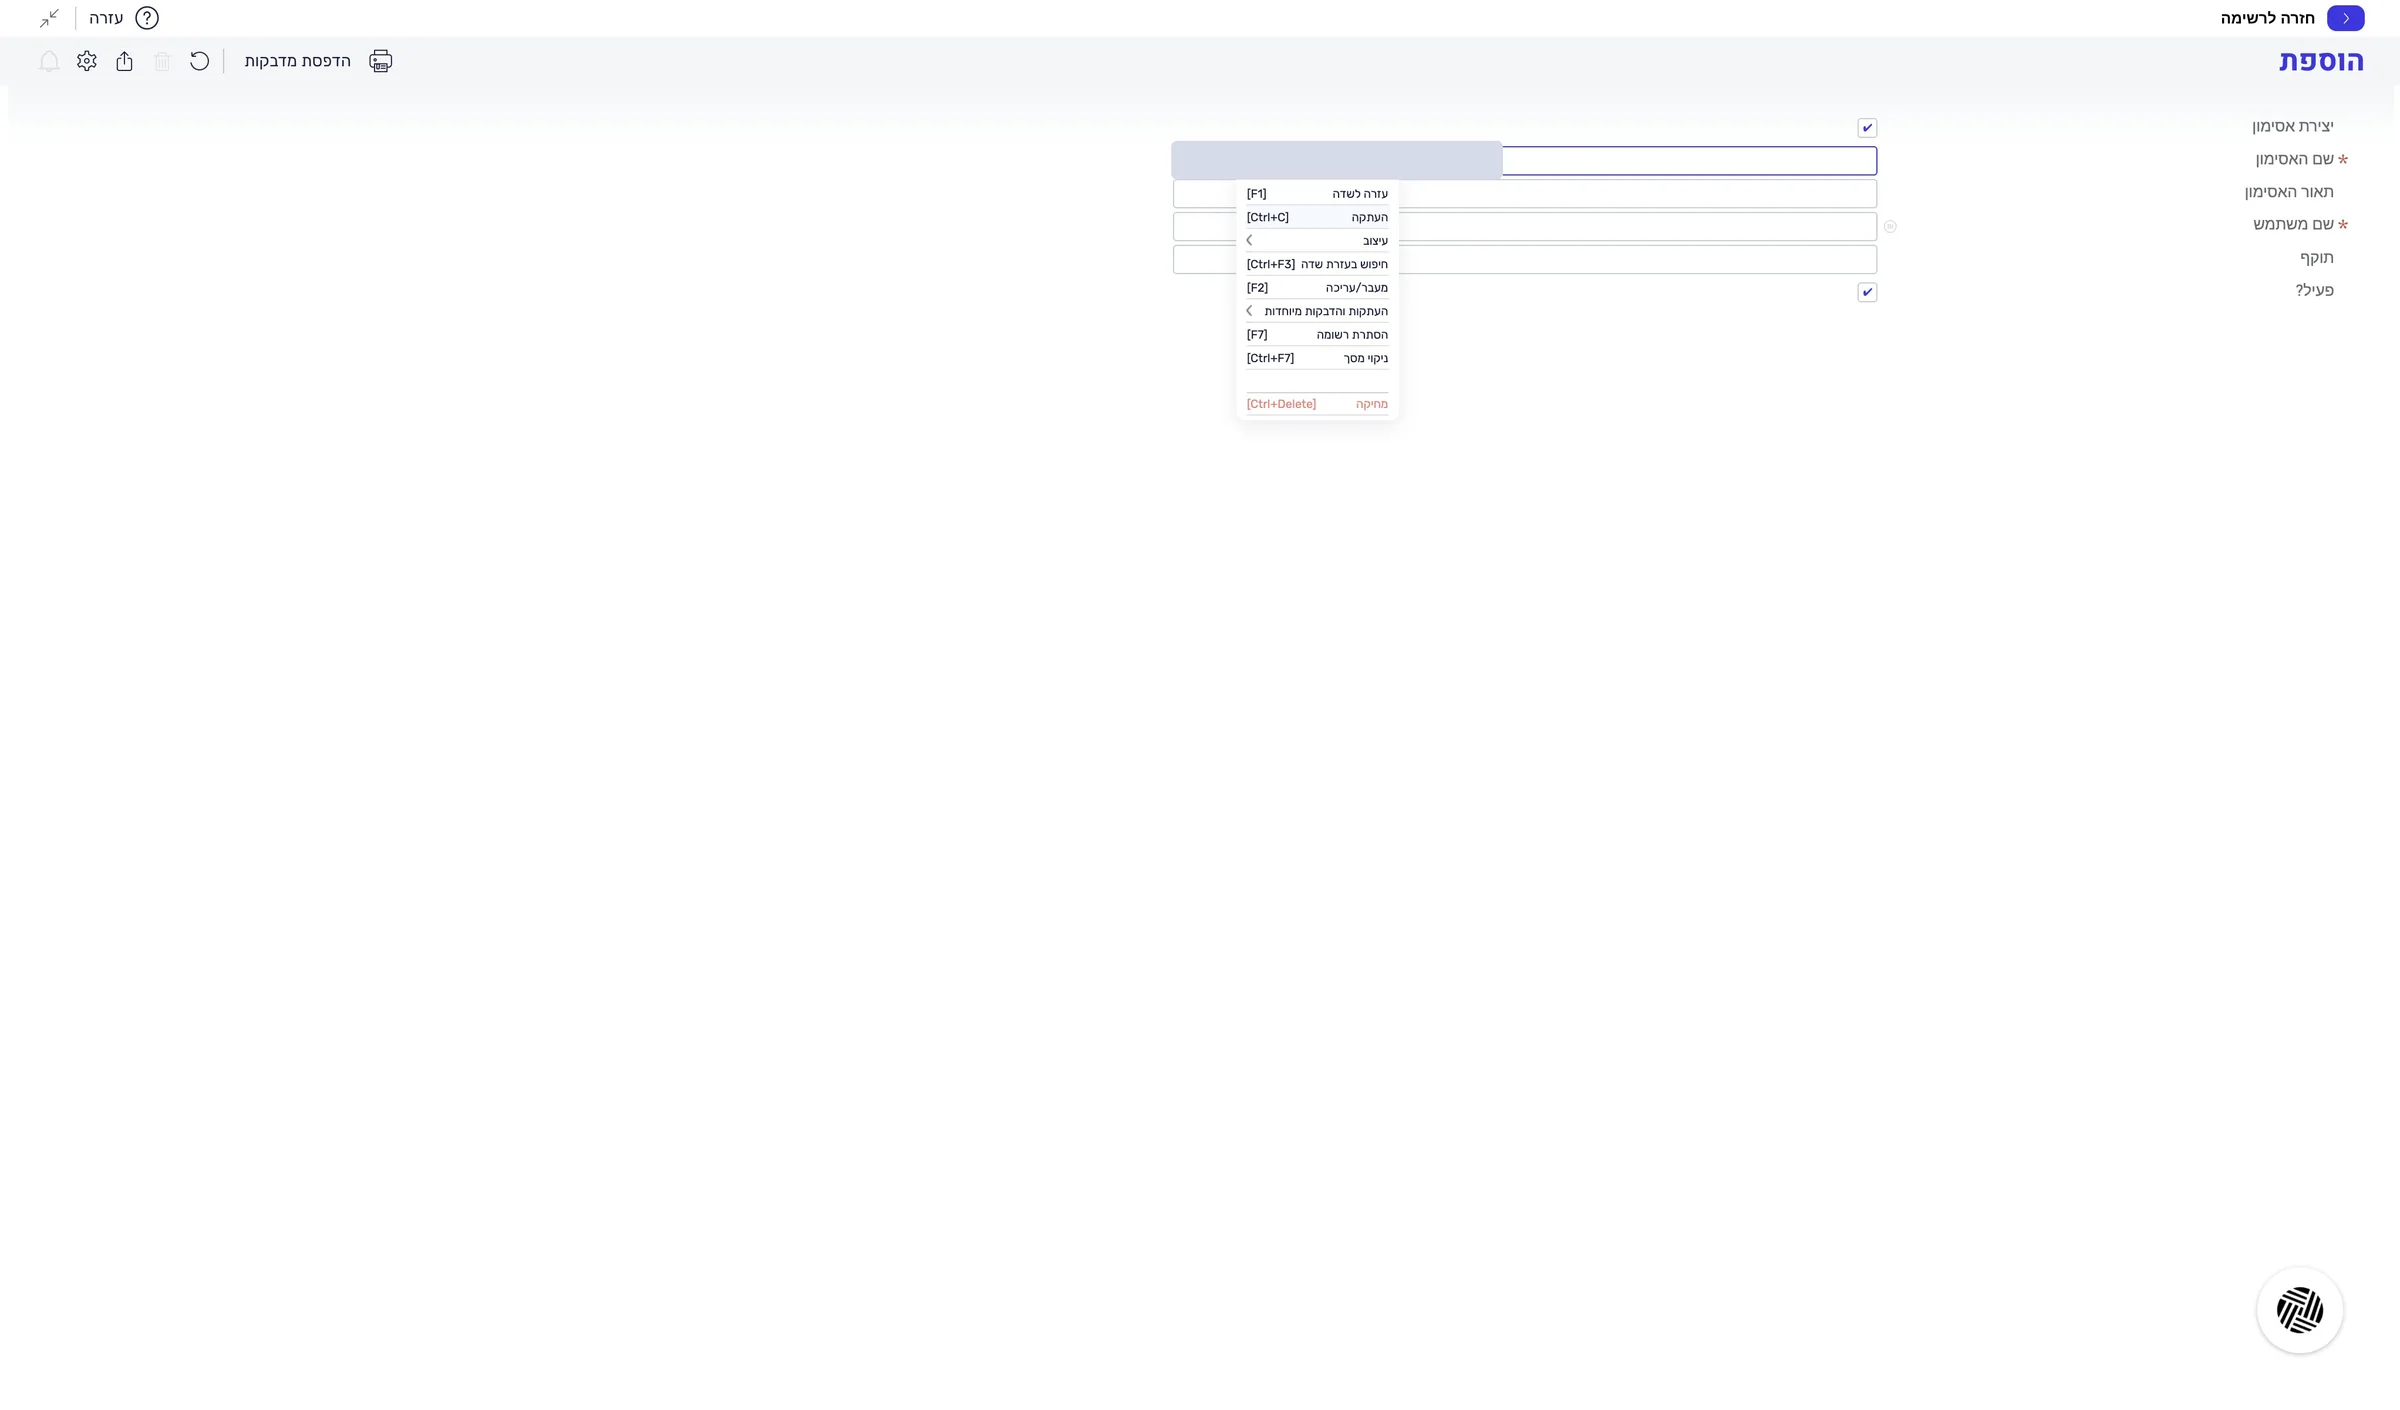
The full token is on your clipboard, and you have not left the line yet.
In the User Name field, choose the user you checked. You can also add a description, for example LeonAI.
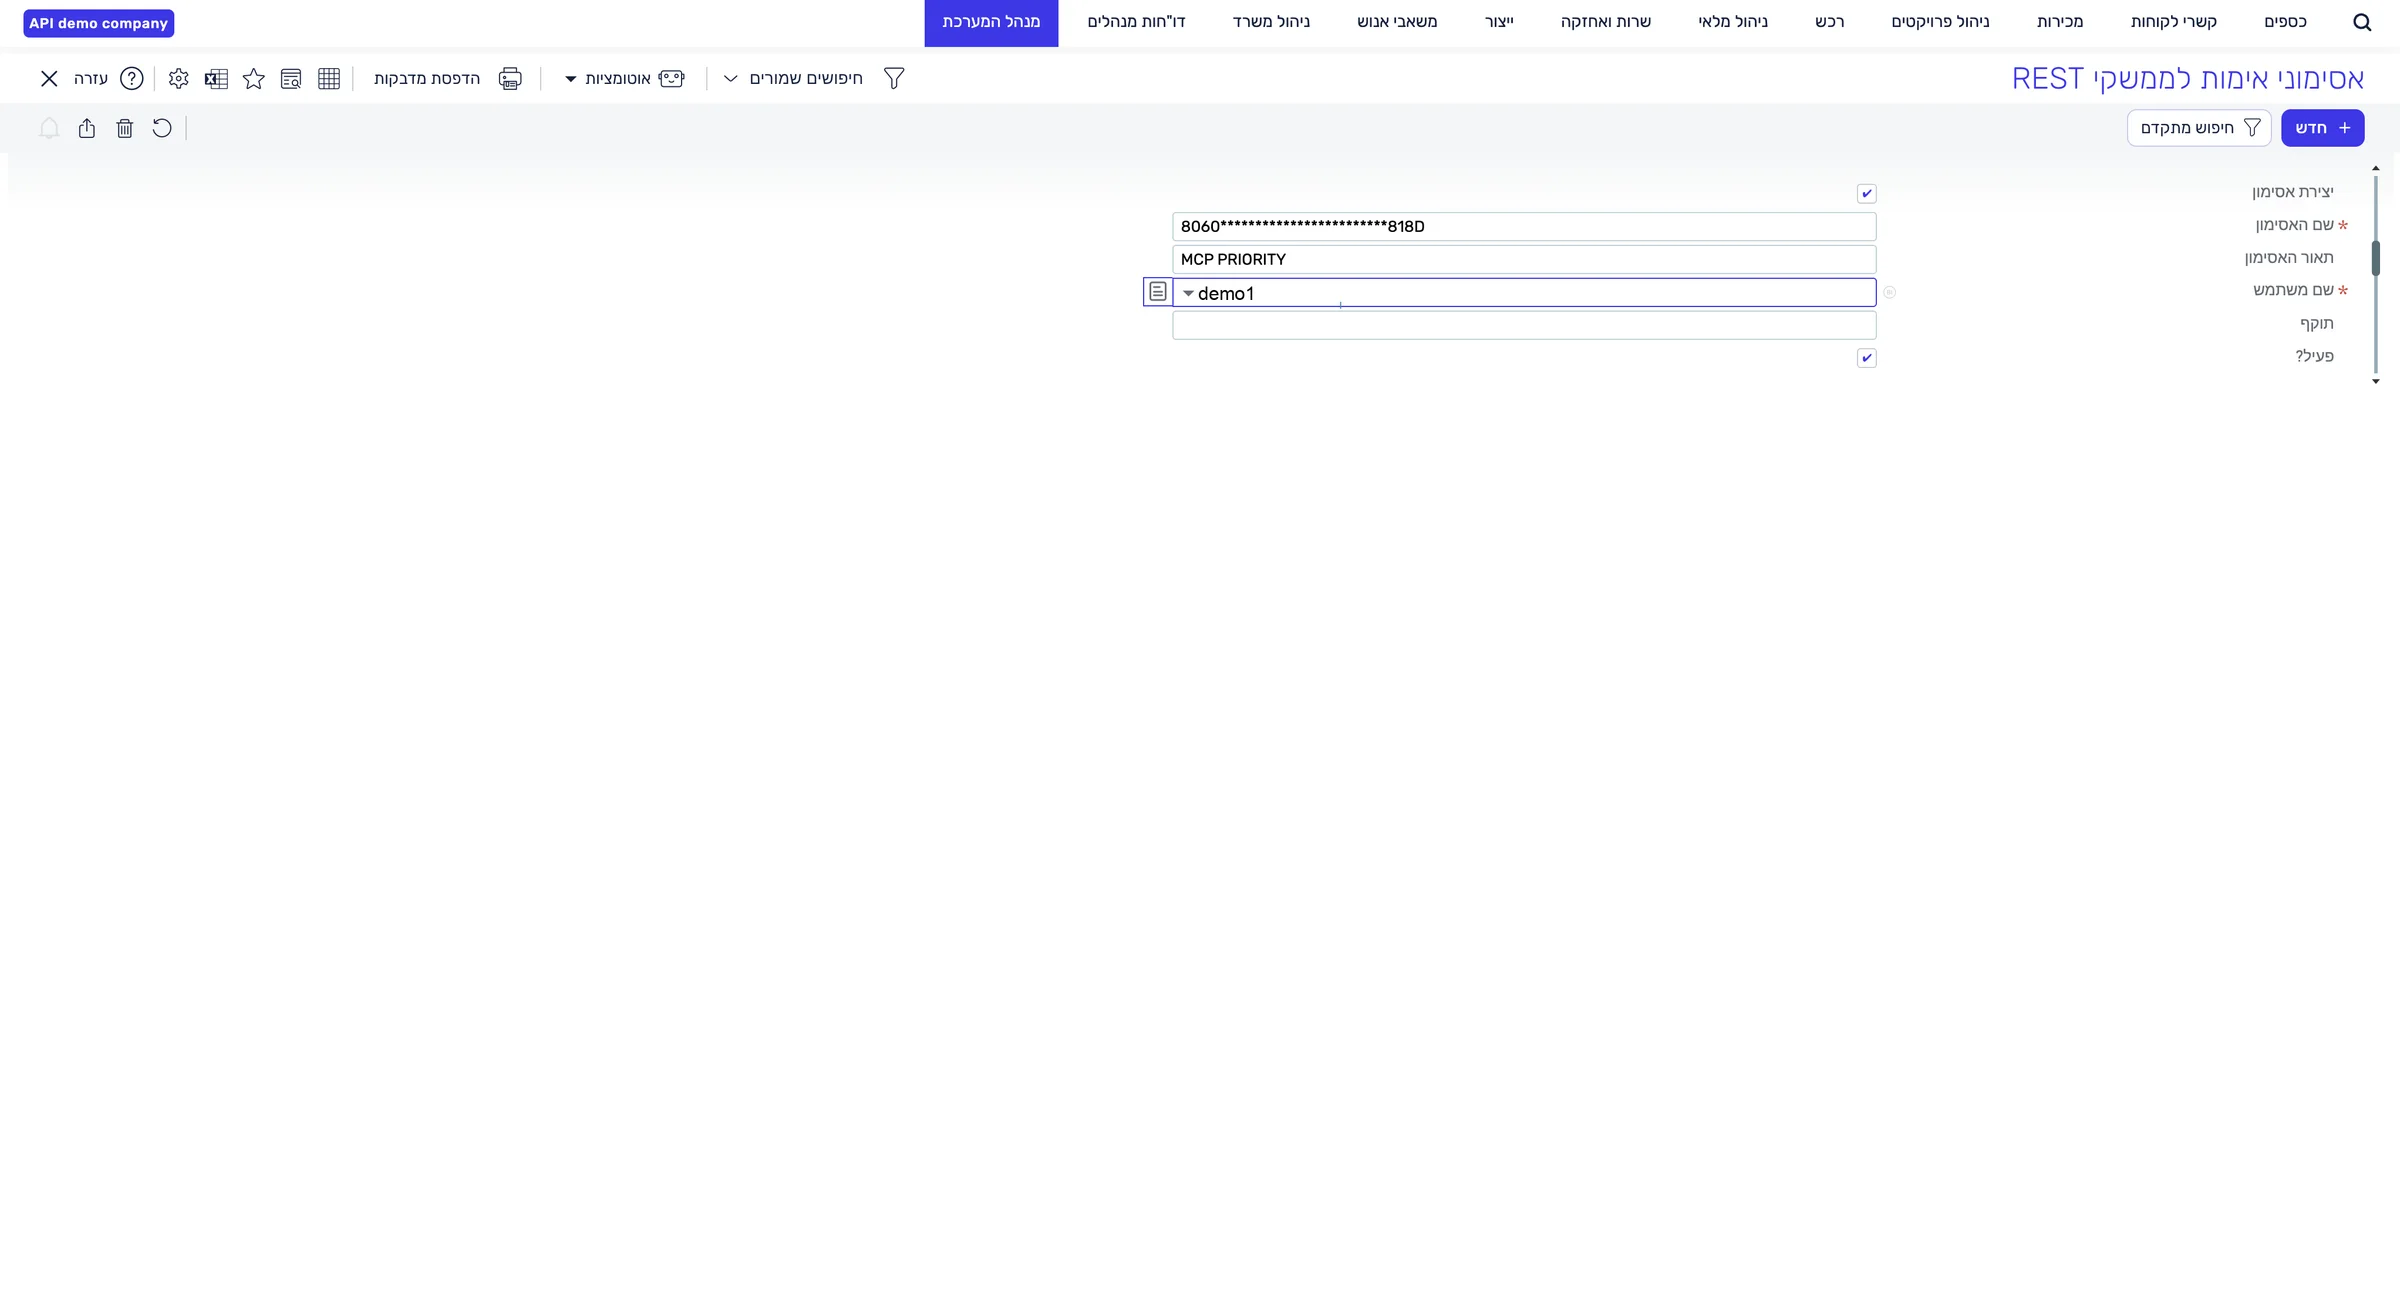
The user with the API licence is selected in the User Name field.
Make sure the Active? box is checked and click Back to list.
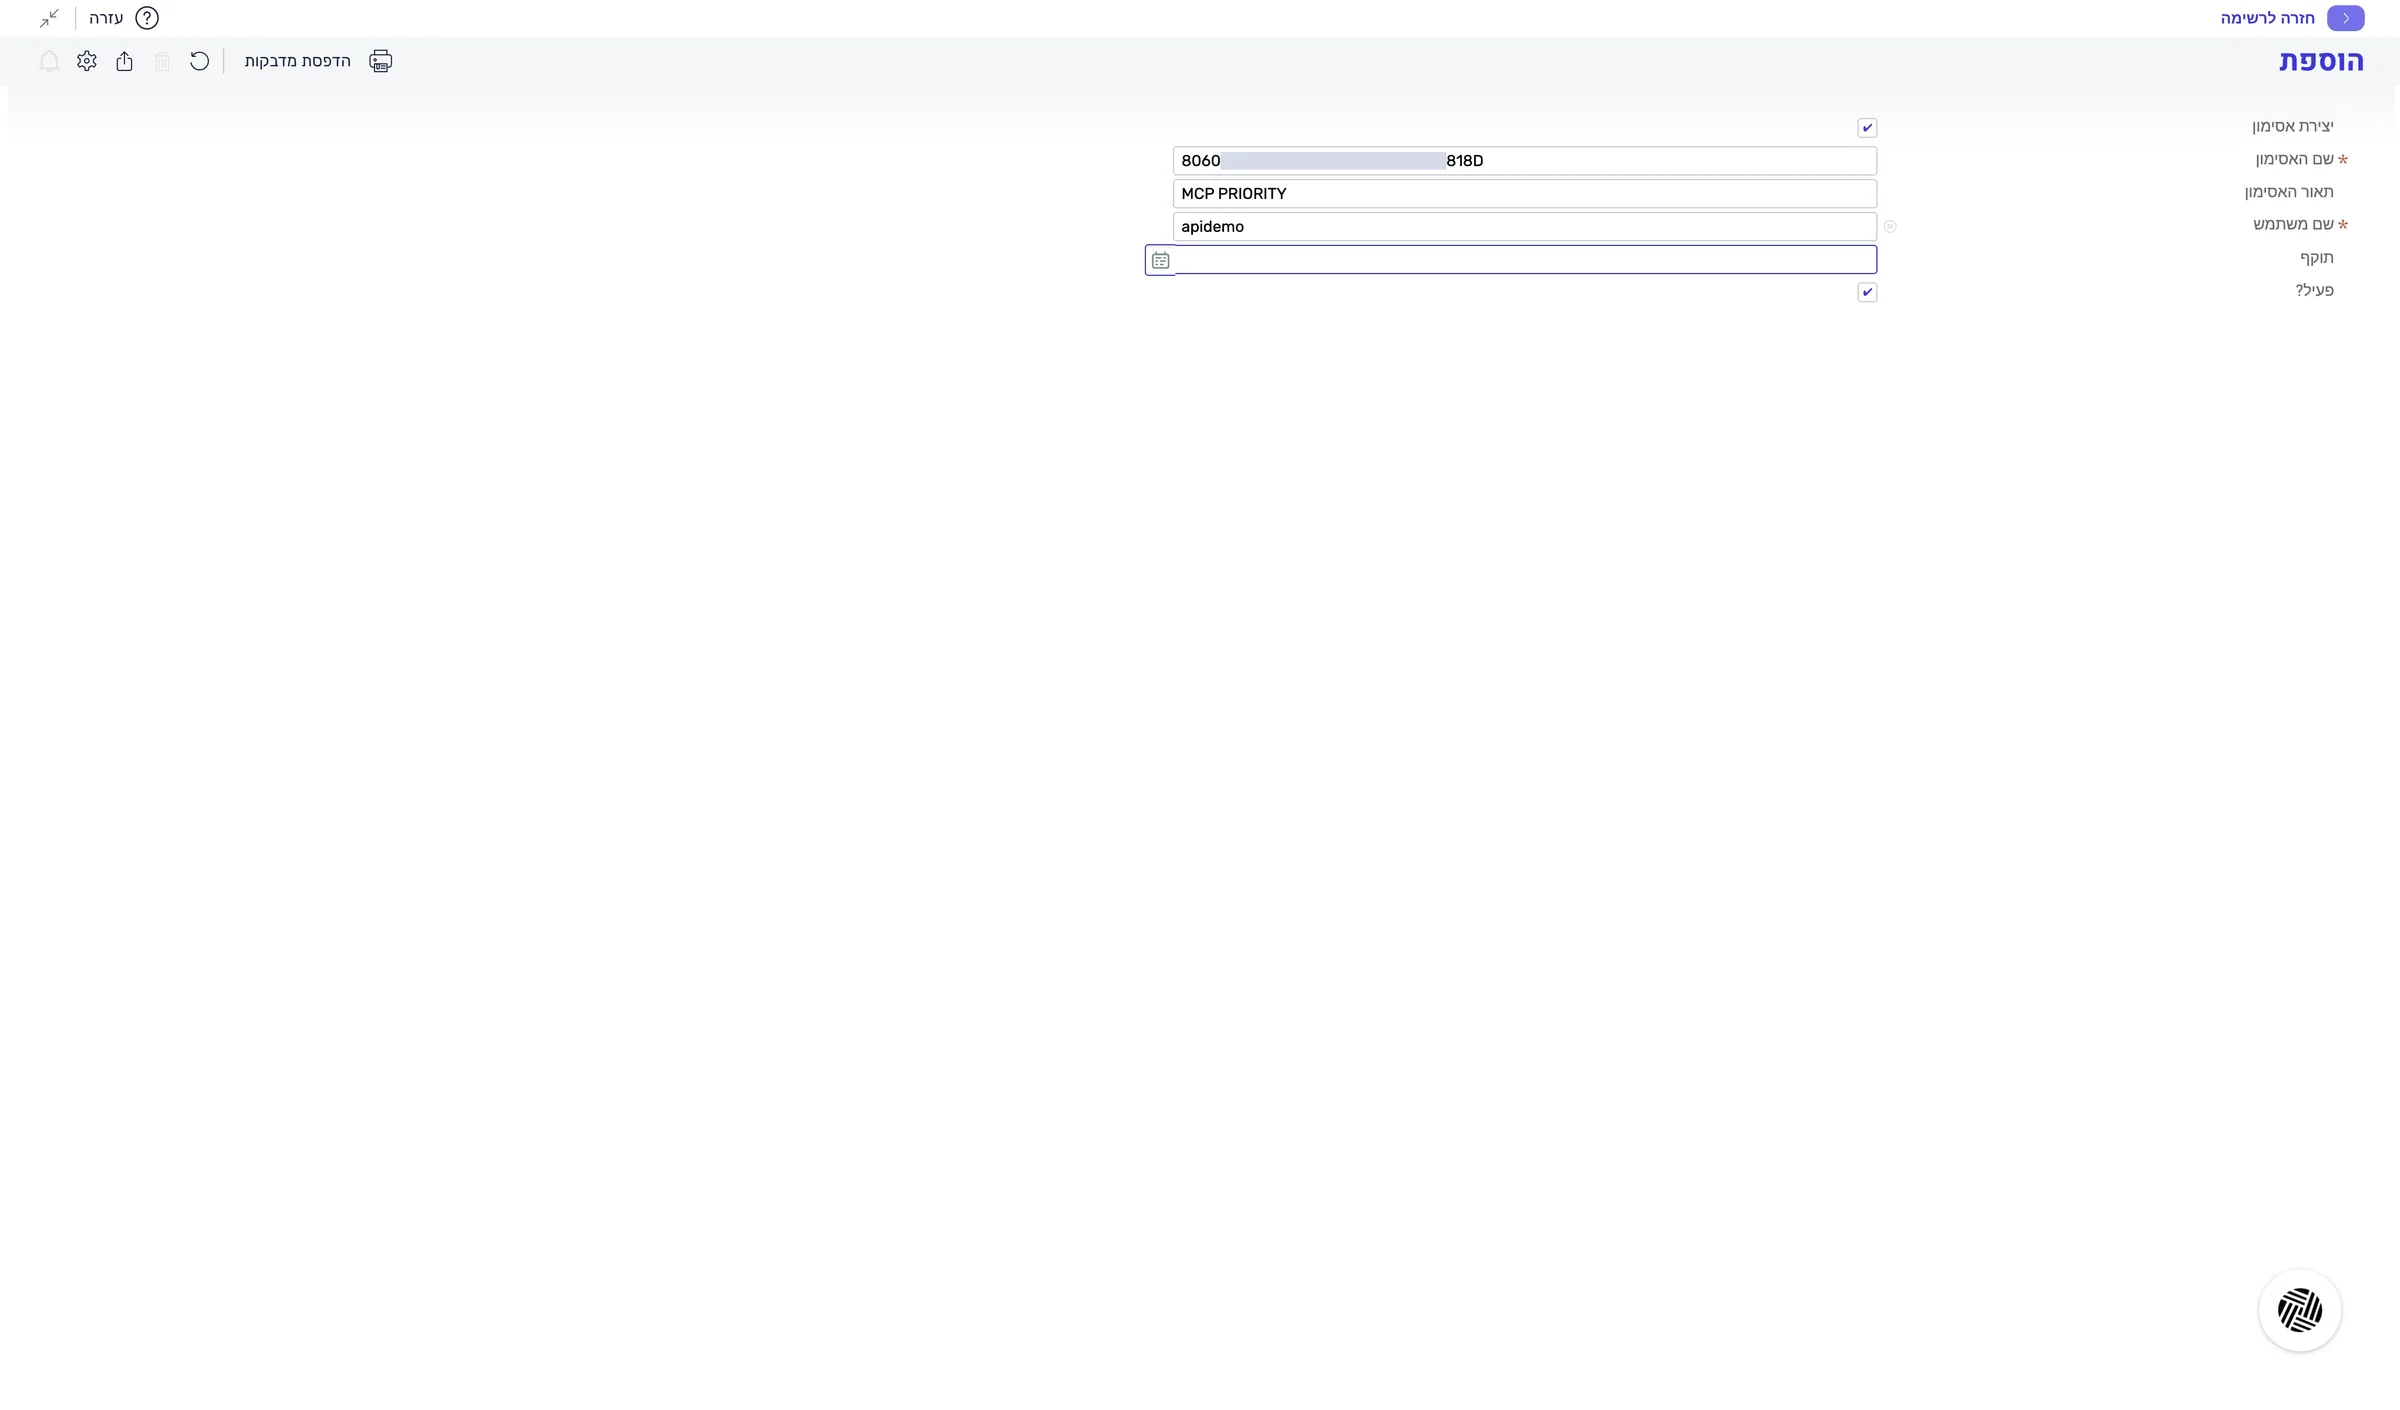
The new token appears in the list, hidden.
Paste the four values from Priority into the wizard, check the permissions, set the defaults and save the API key.
In the LeonAI tab, in the Connect your Priority system window, paste the full address into the PRIORITY server address field.
If you are not sure what is needed, open “Before you connect — what to prepare” at the top of the window. Make sure the address starts with https and that no space got in when you copied it.
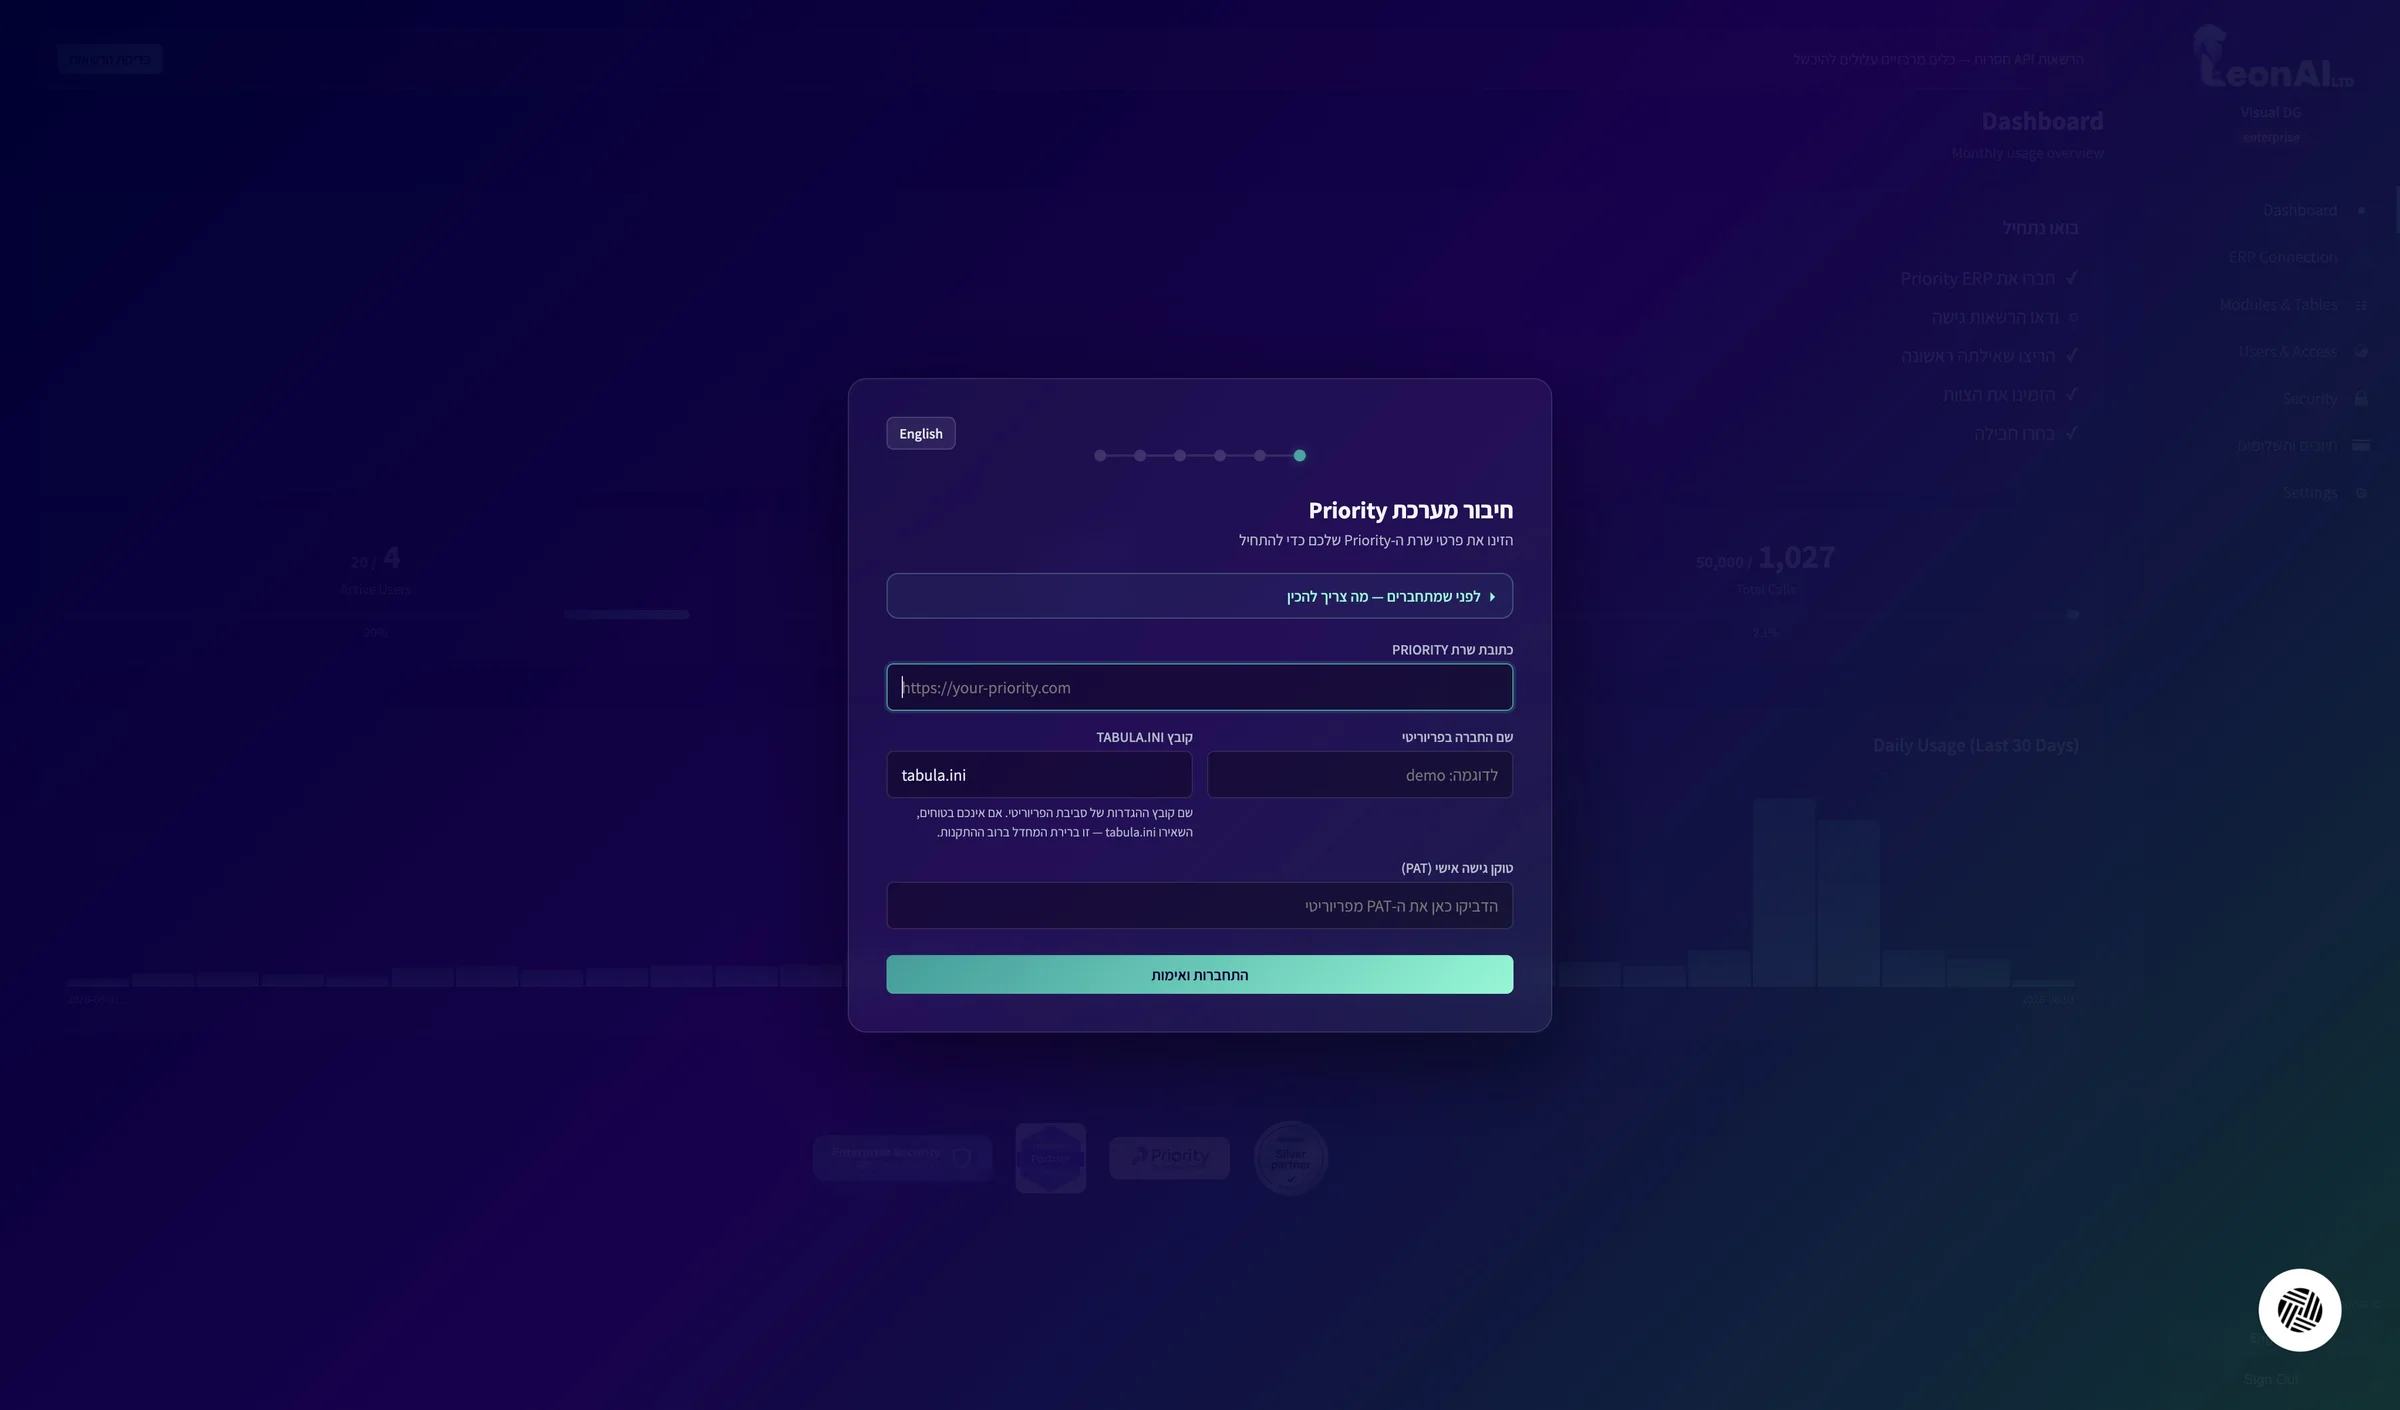
The part priority-connect.online appears as one unbroken word.
In the Company name in Priority field, enter the last part of the address — in the example: usdemo.
The company name is the code of your company environment in Priority, not its trading name. It always appears at the end of the API address you copied.
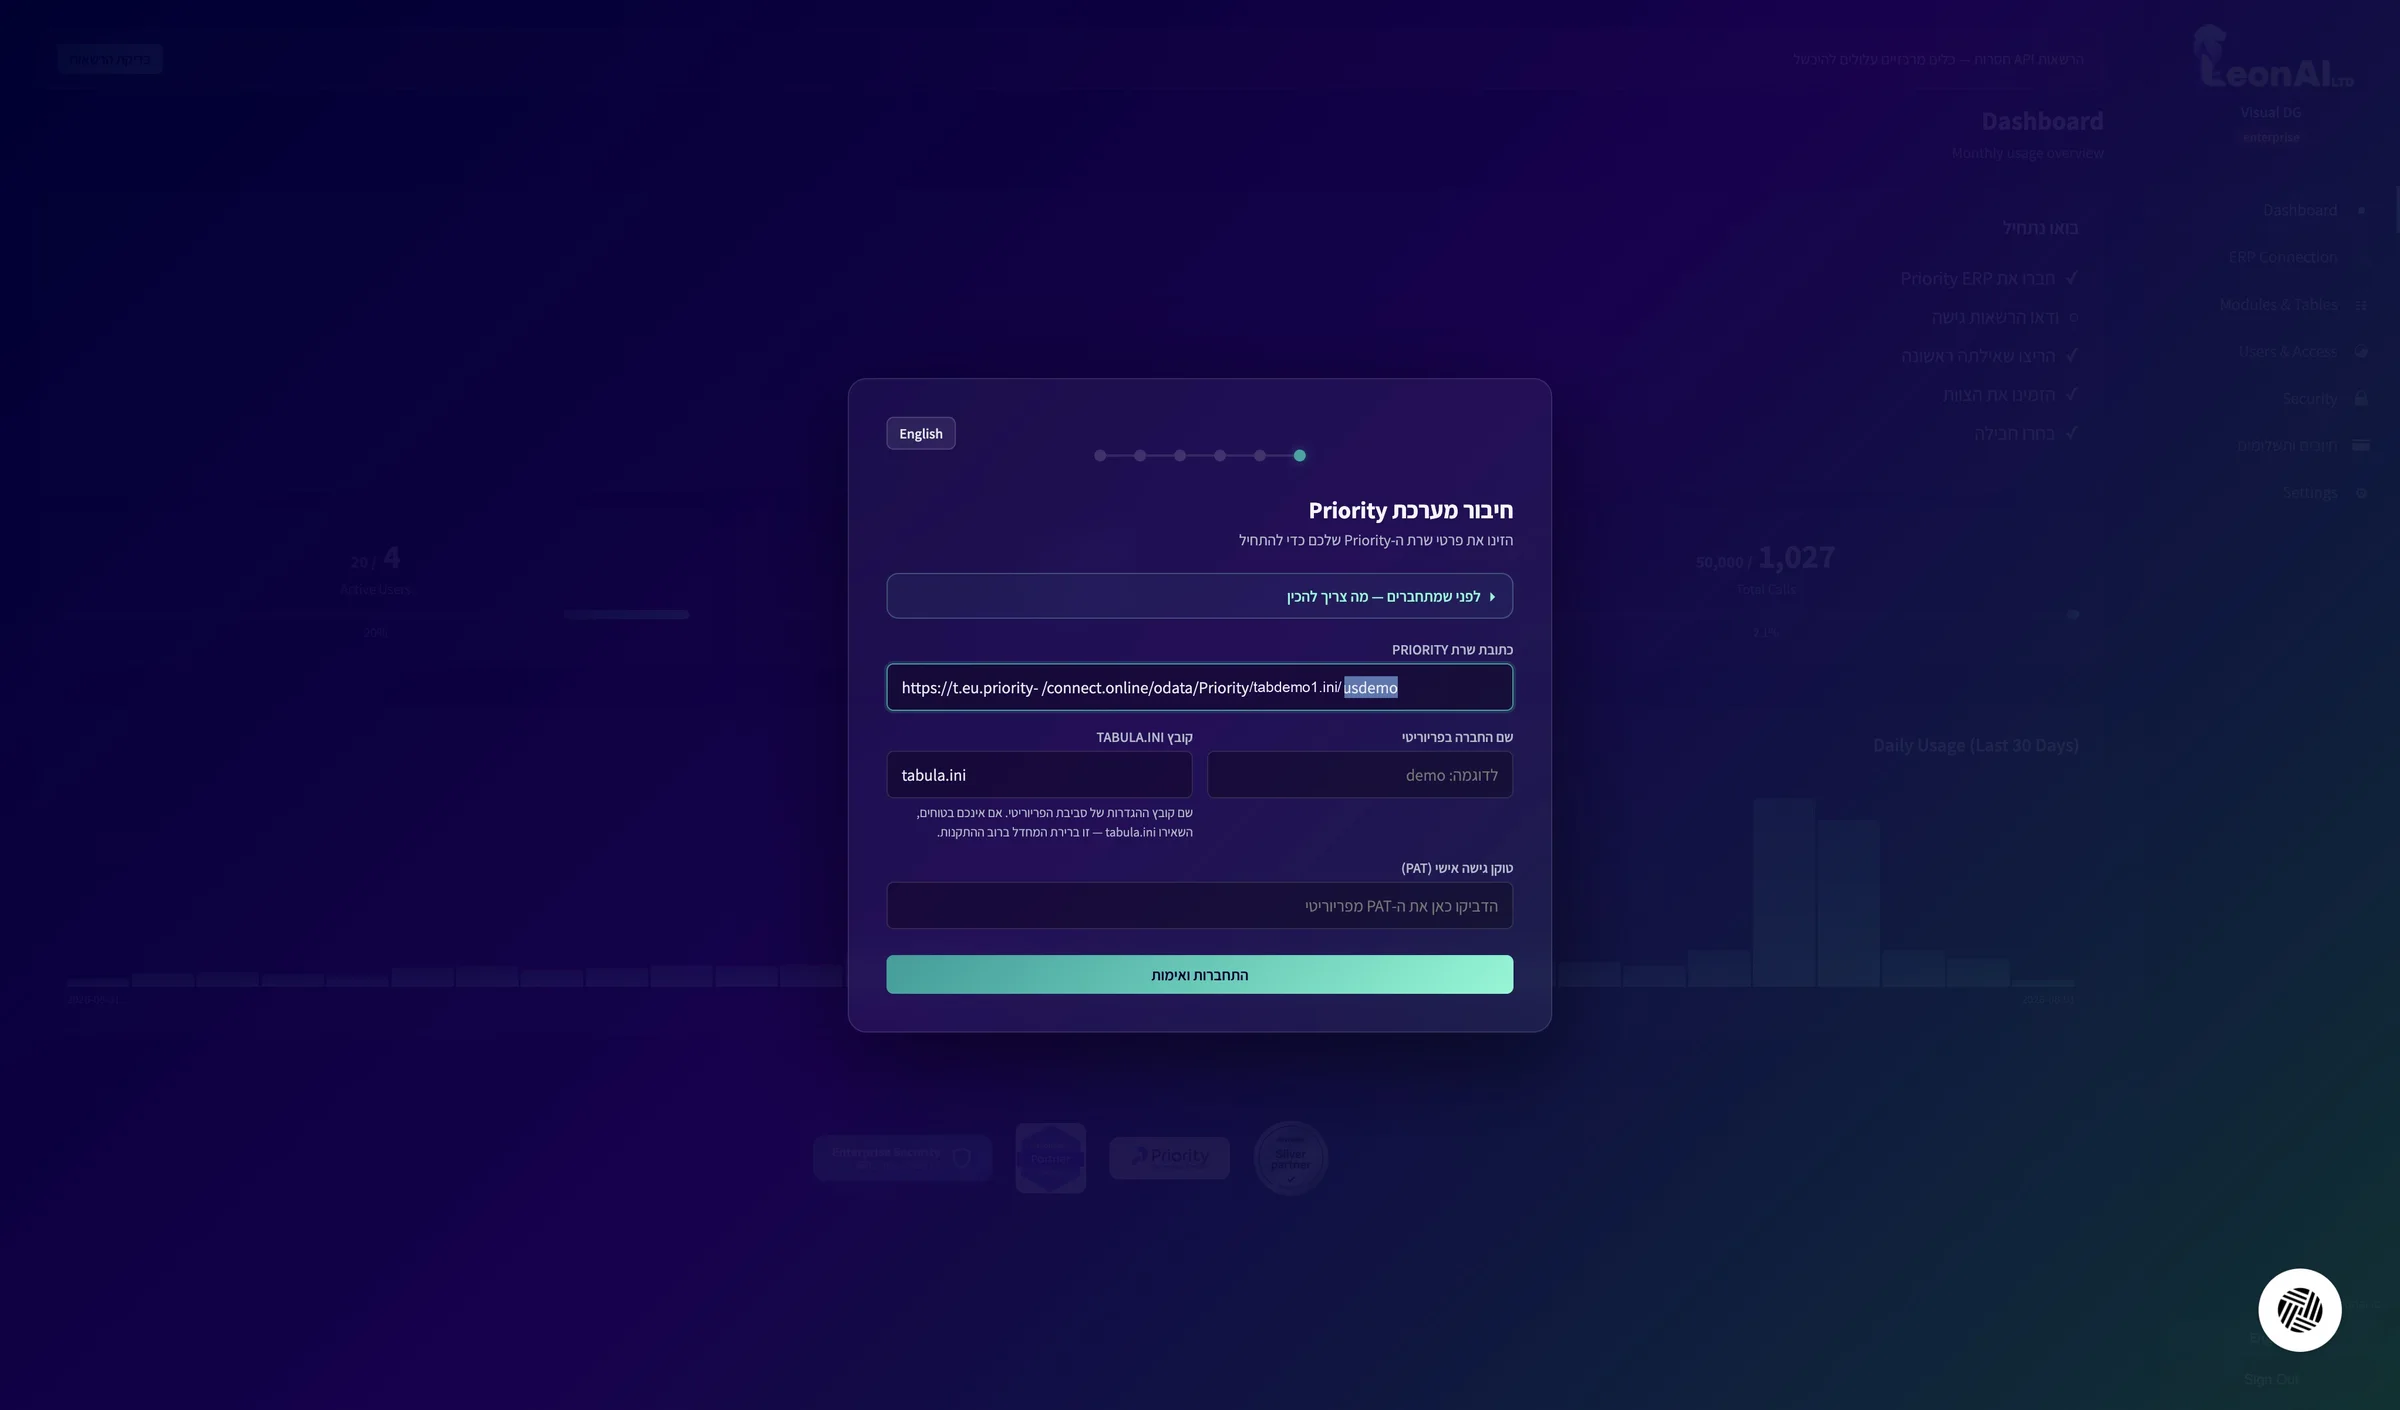
The value in the company name field matches the last part of the address.
In the TABULA.INI file field, enter the part before the company name in the address — in the example: tabdemo1.ini.
In Priority Cloud it is never tabula.ini: copy the file name exactly as it appears in your address.
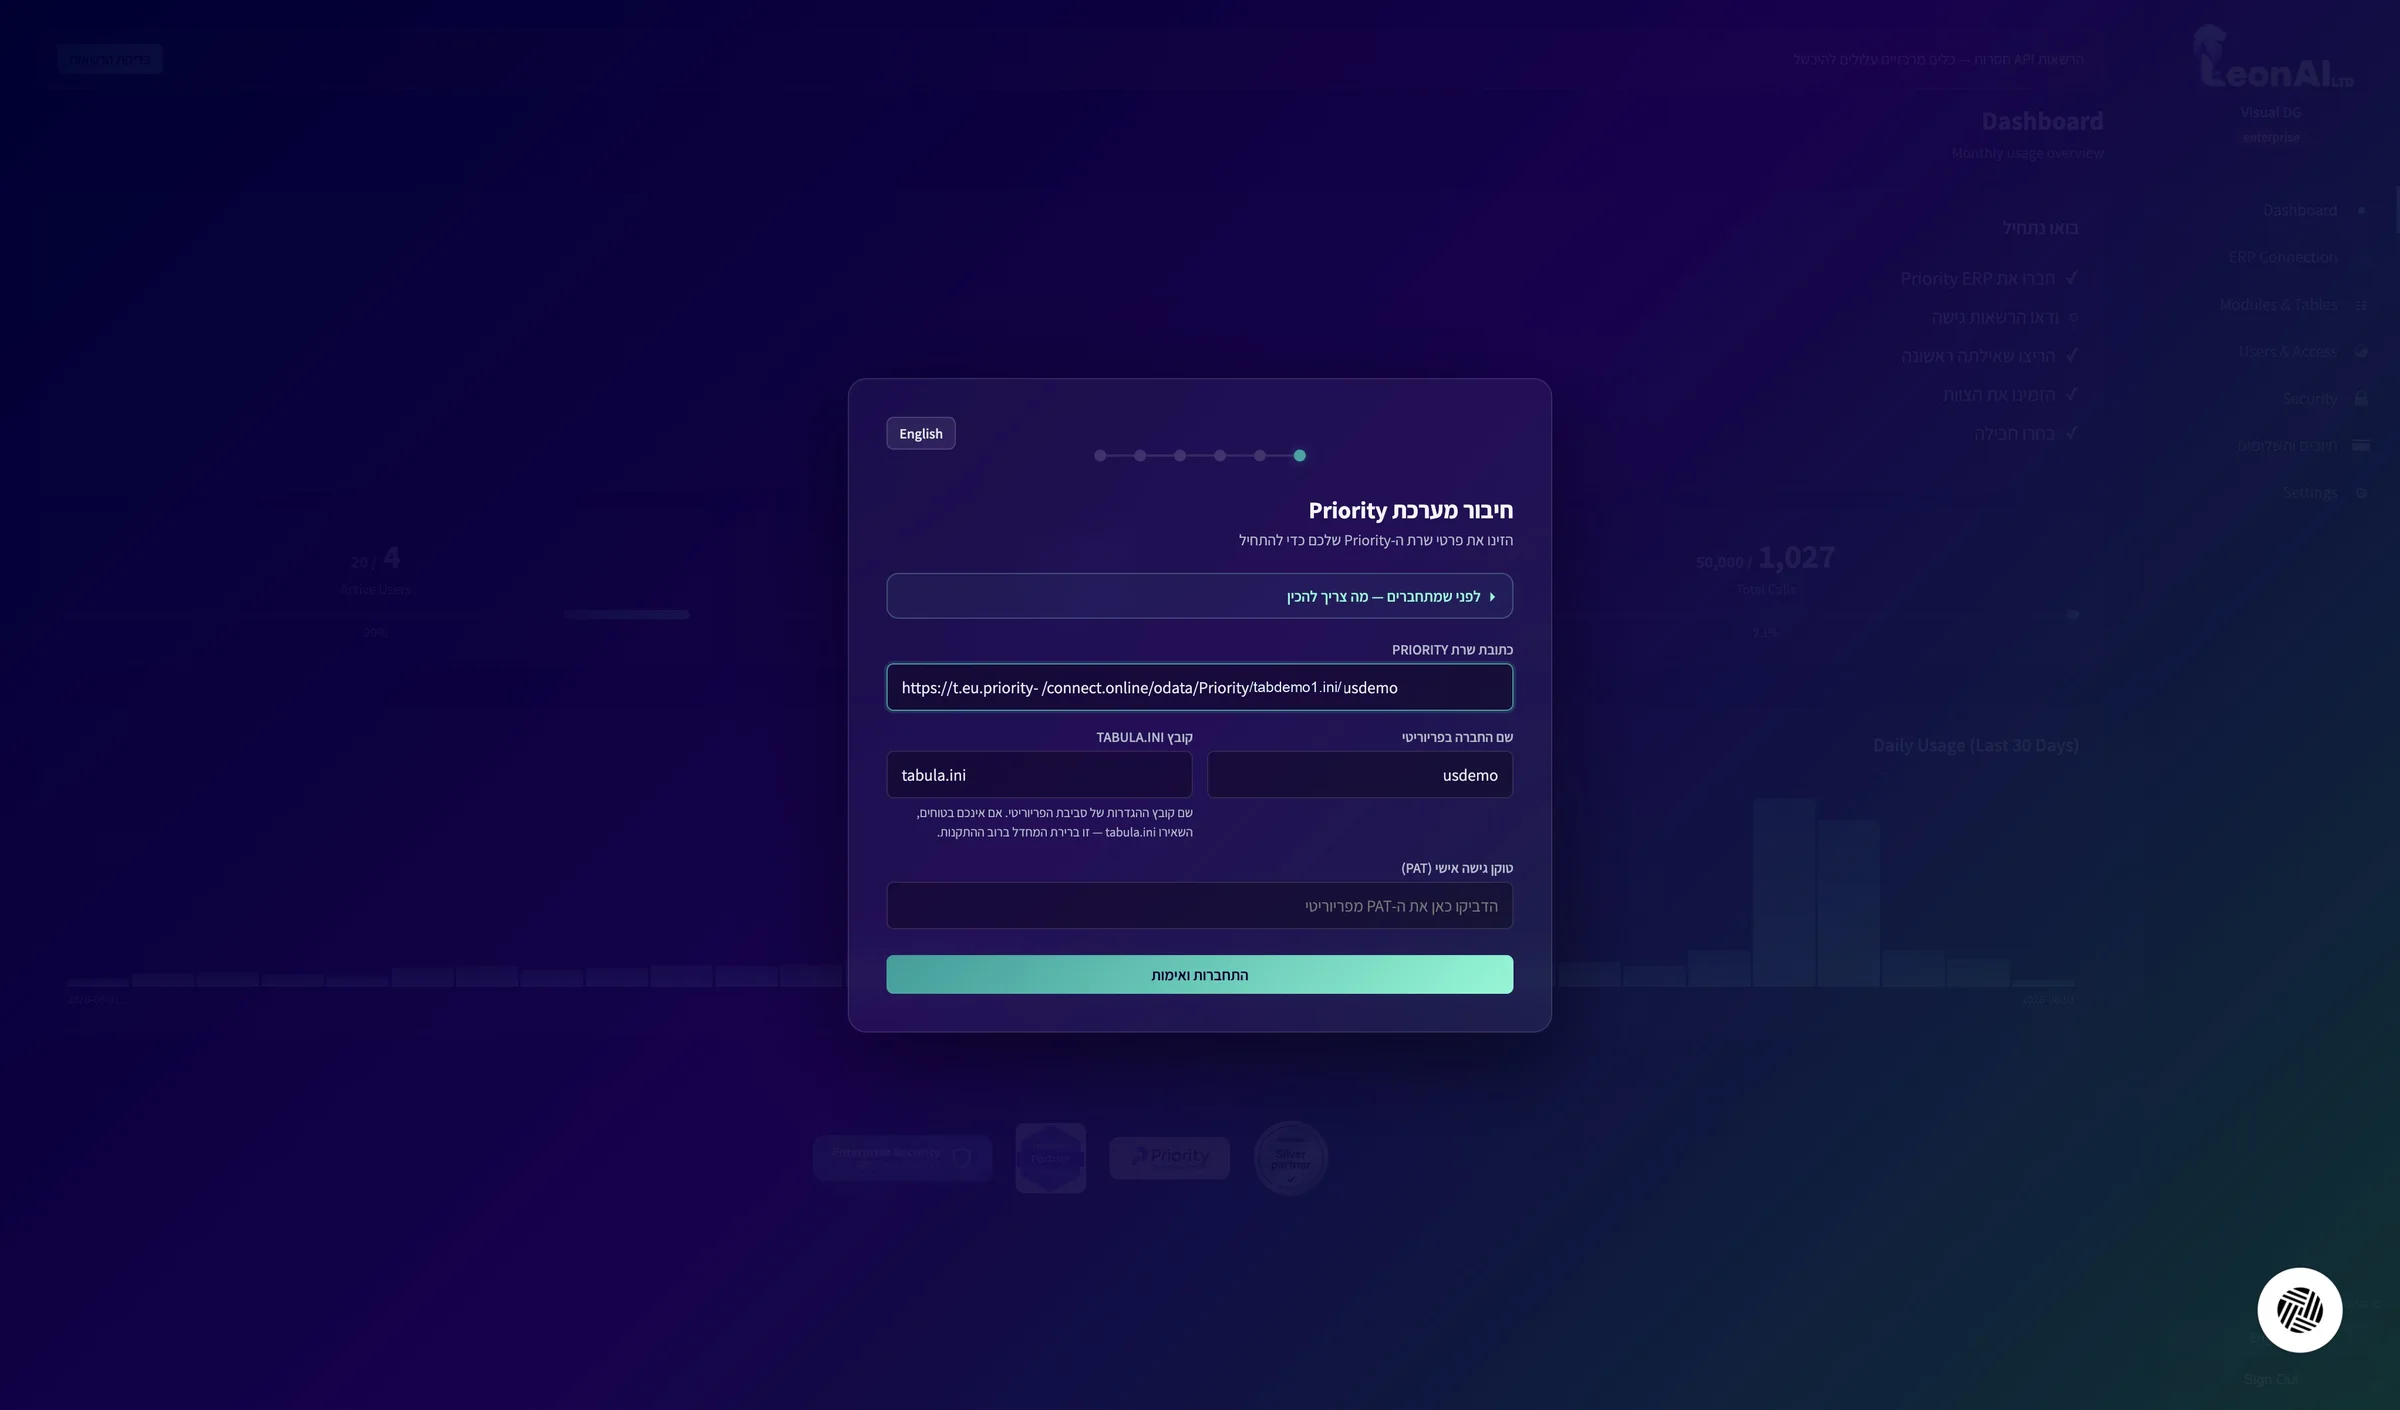
The file name in the field matches the corresponding part of the API address.
Paste the token into the Personal access token (PAT) field.
The field hides the characters after you paste. Make sure you pasted the full token you copied, not the hidden version shown in the list in Priority.
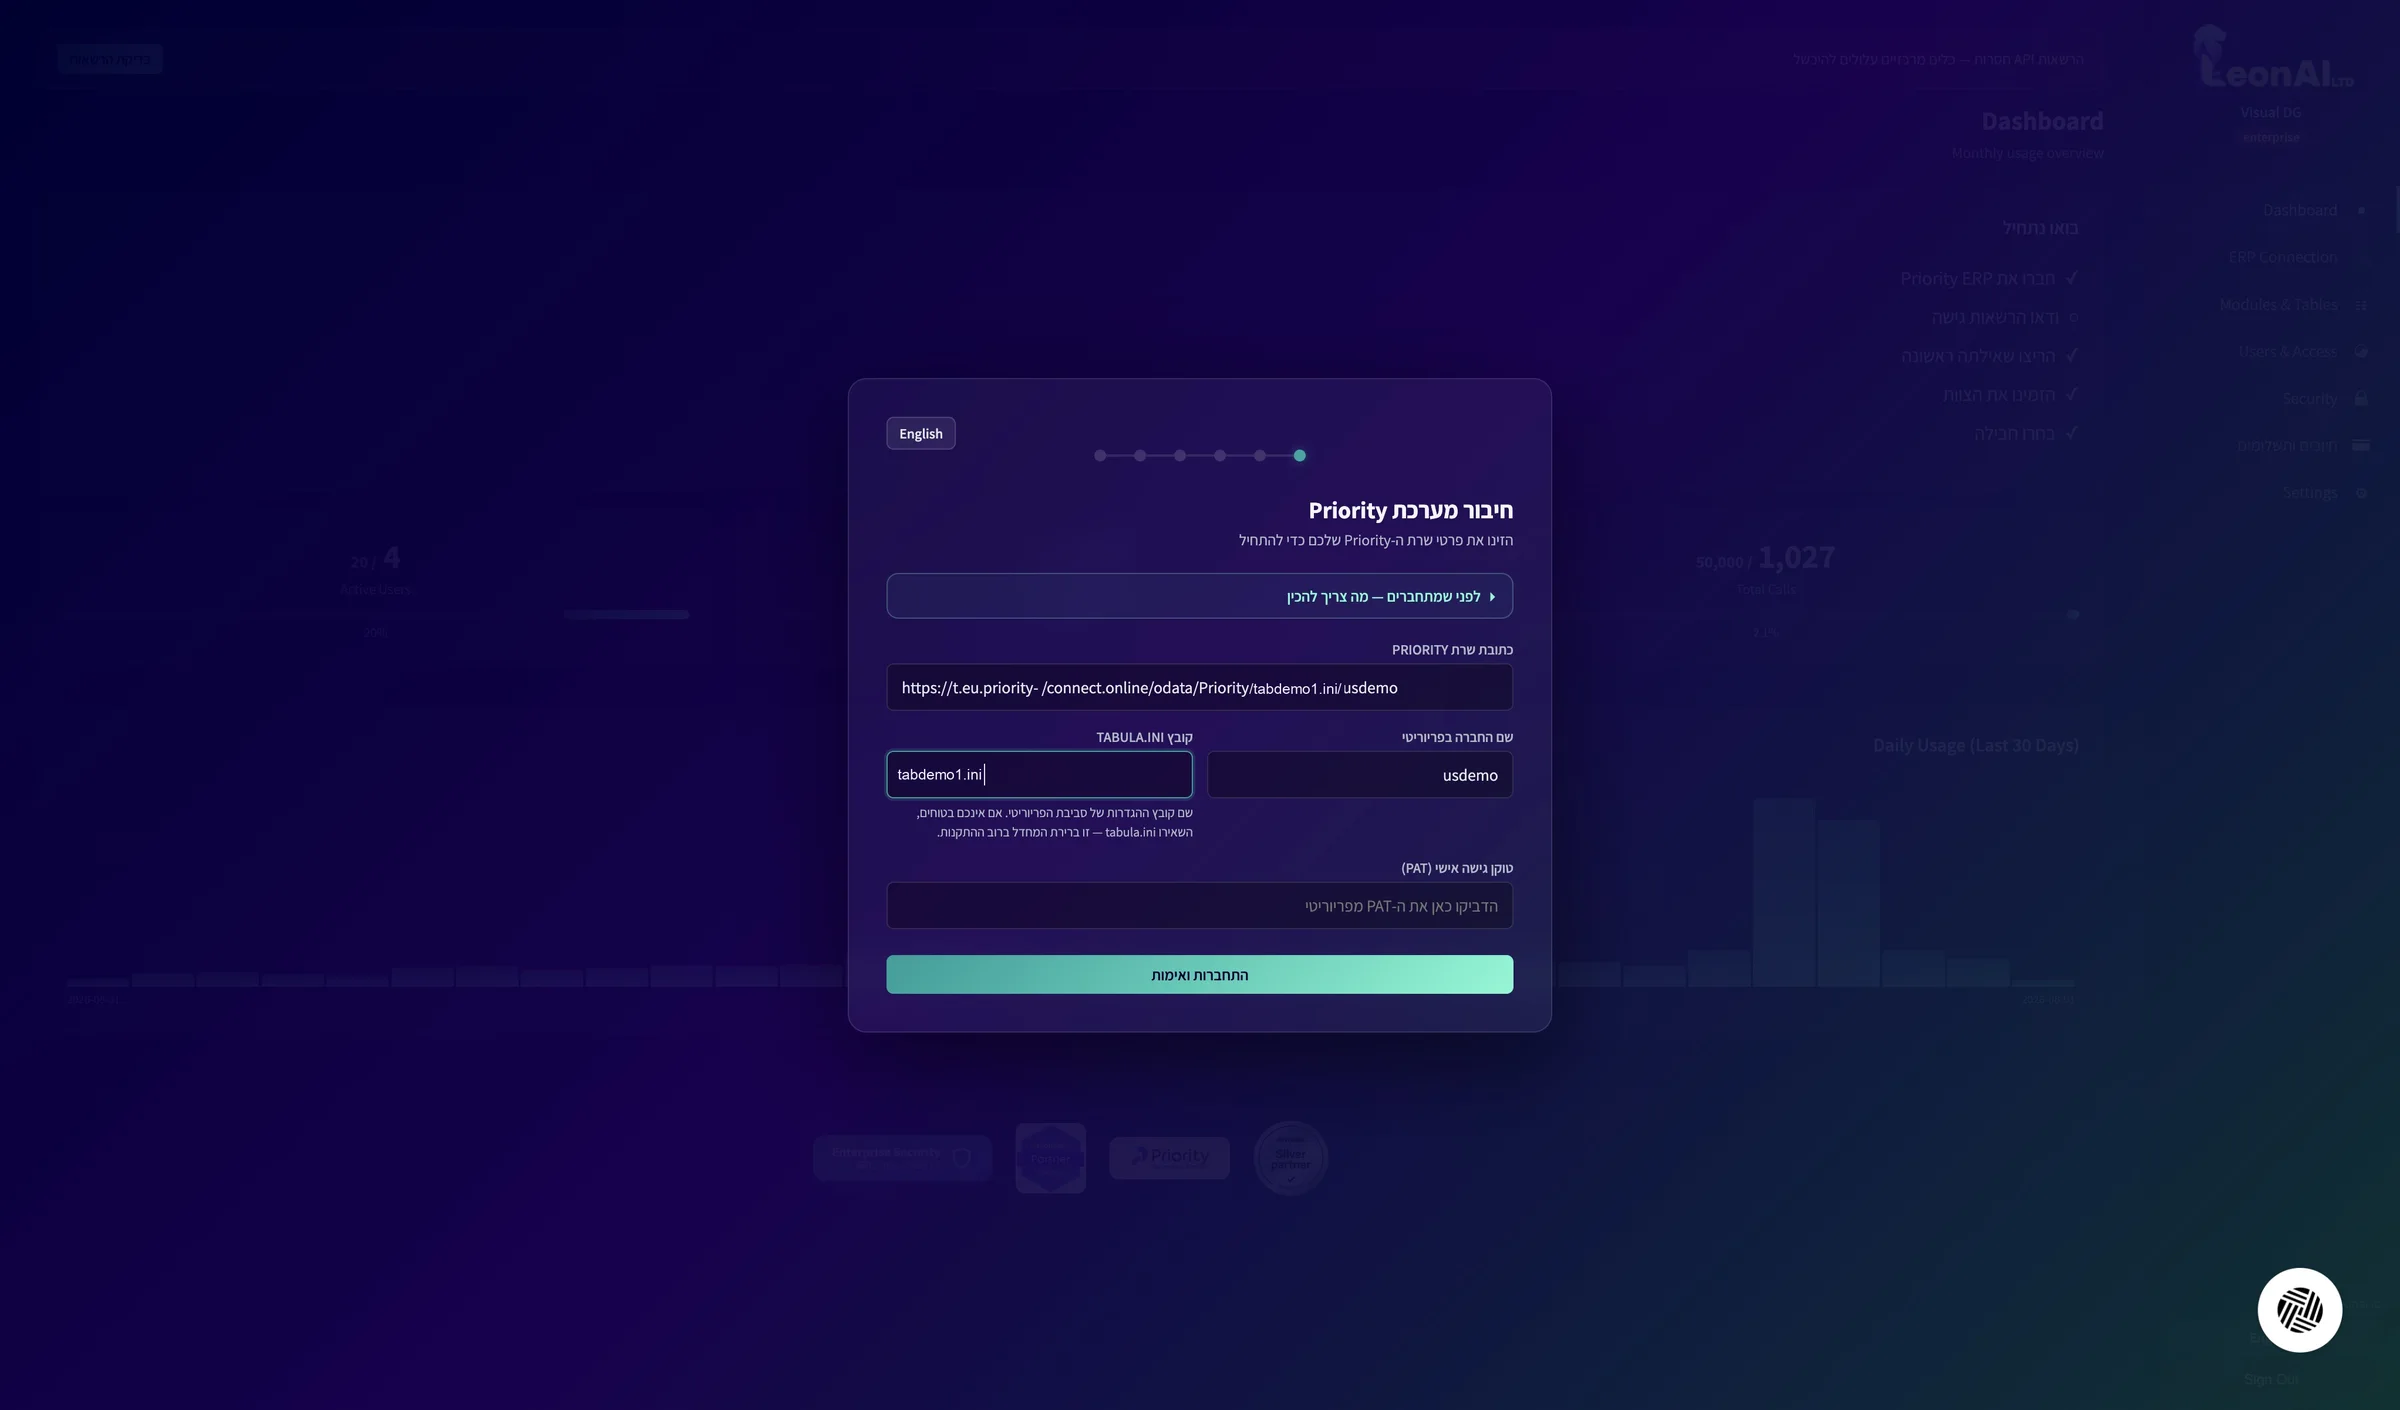
All four fields are filled in: server address, company name, settings file and token.
Click Connect and verify.
If an error says the address points to a private network and a public address is required, check the server address: the part priority-connect.online must appear as one unbroken word. Fix it and click again.
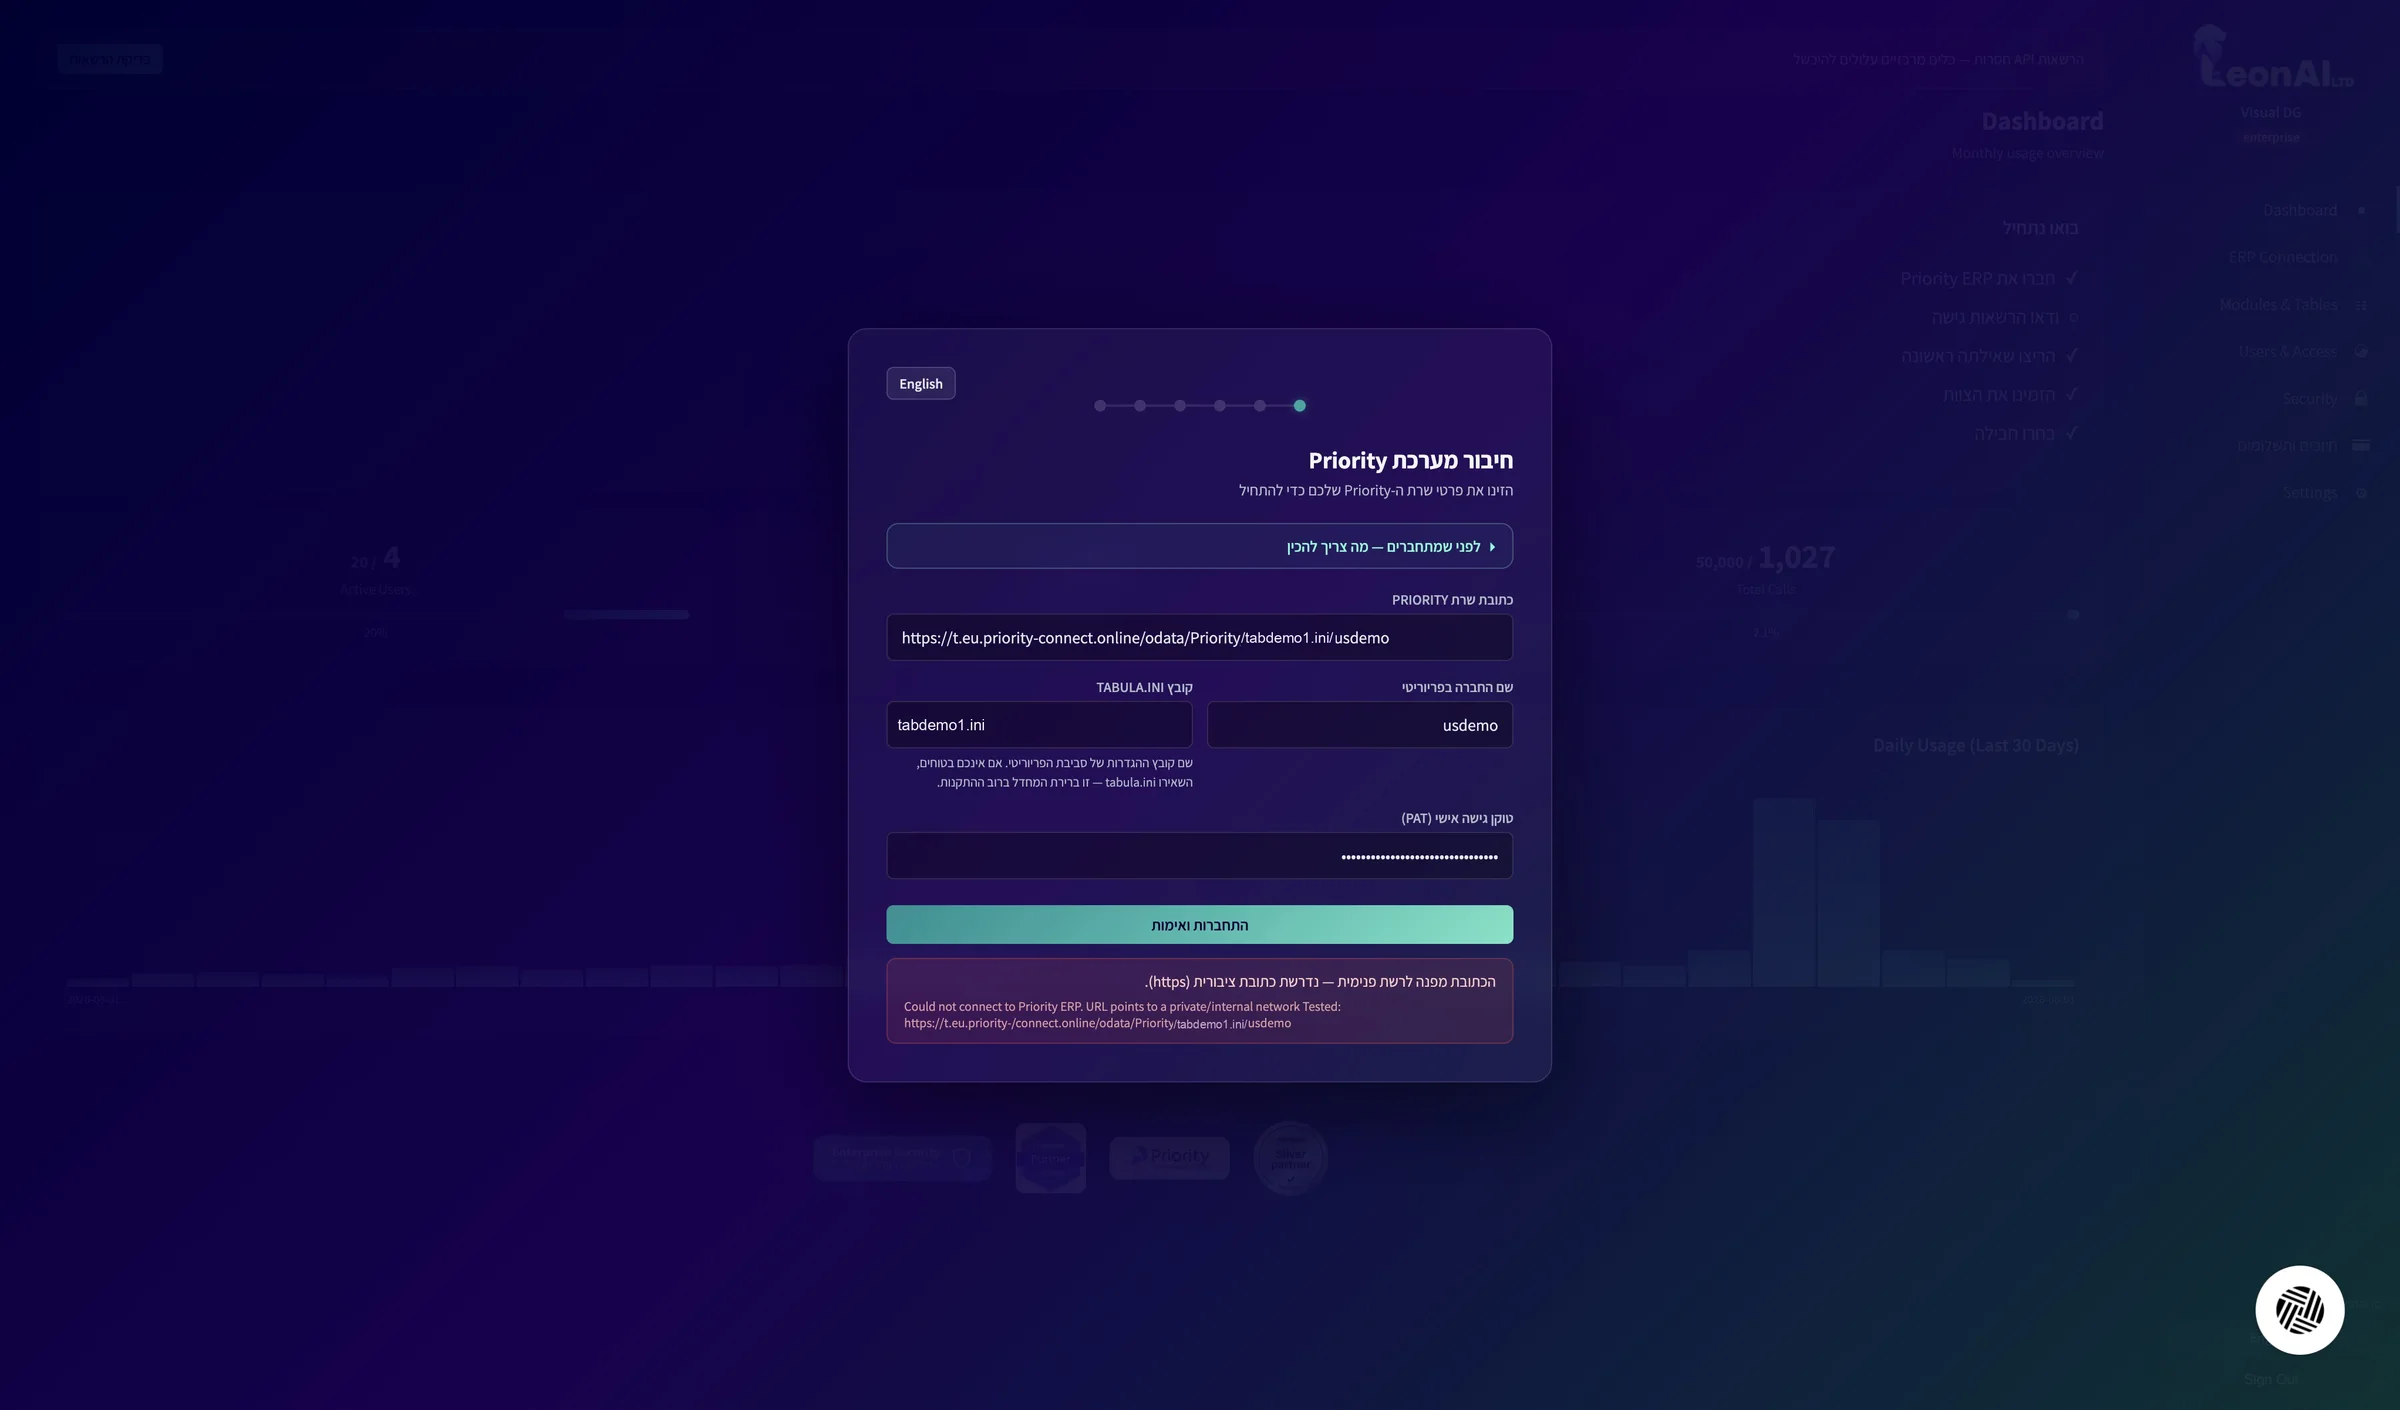
The connection succeeded and the “Access permission check” screen opens.
On the Access permission check screen, make sure all the required forms are marked OK, and click Continue.
LeonAI checks that the user you chose can read the forms it needs, such as CUSTOMERS, SUPPLIERS and LOGPART.
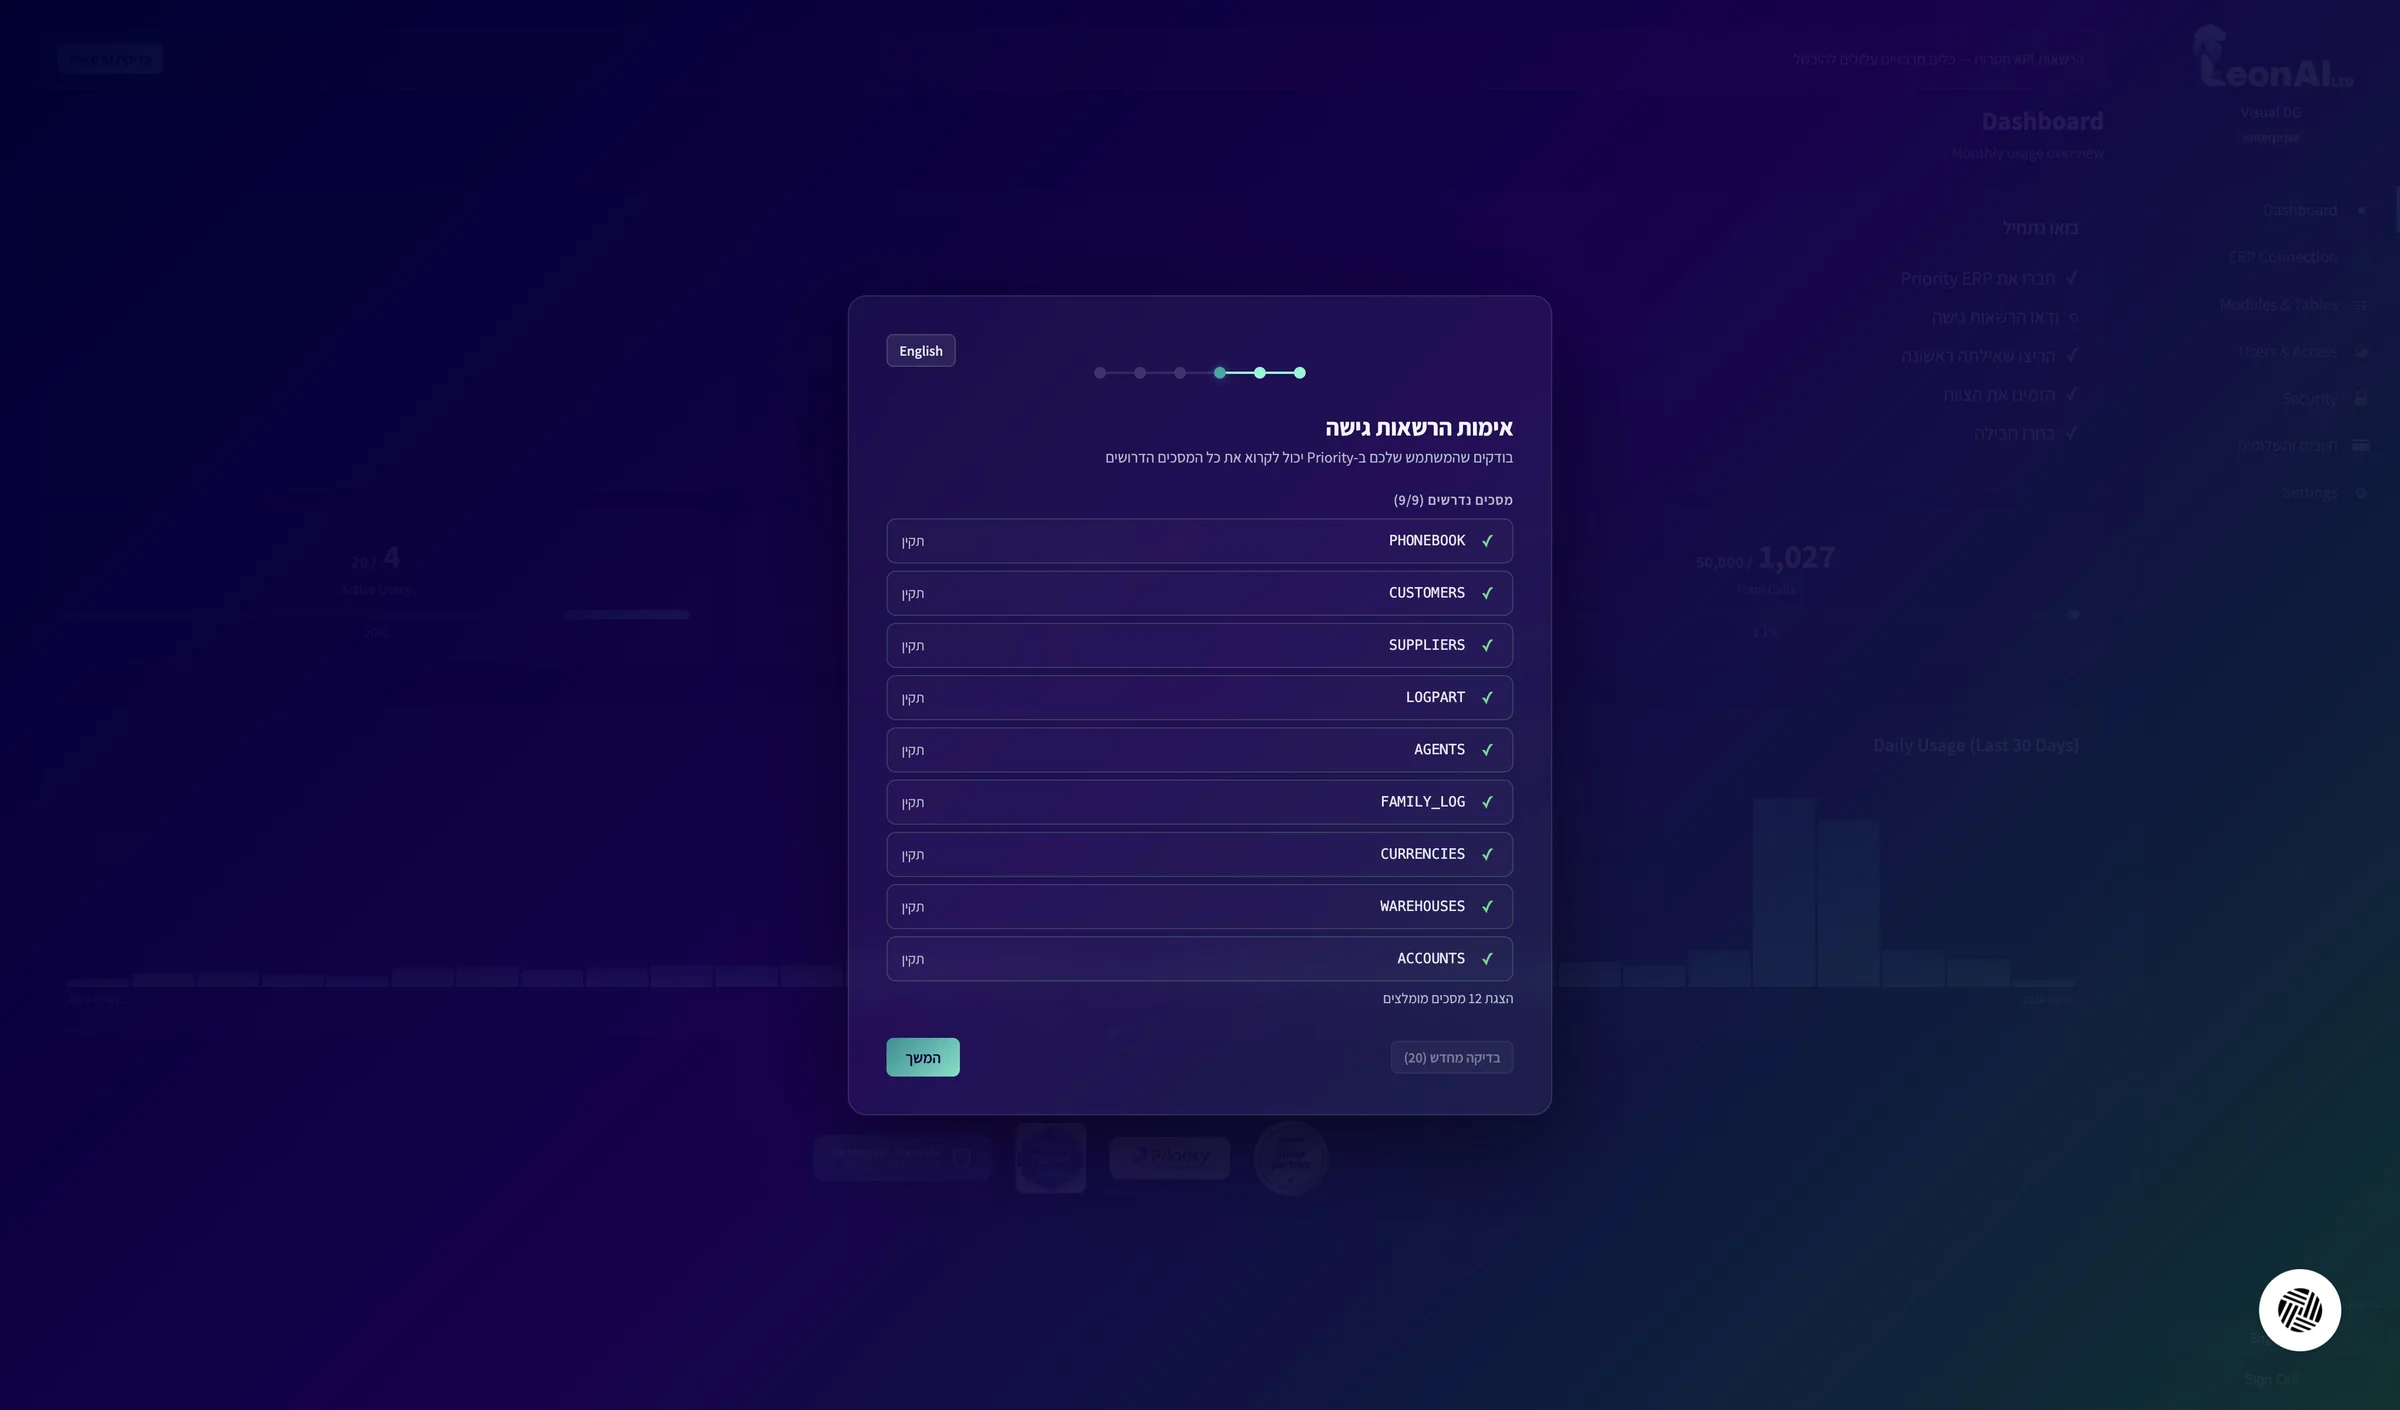
All the required forms are OK (in the example: 9/9).
On the Detected modules screen, check that the modules you use are marked Ready, and click Next.
LeonAI detects which Priority modules are active for you — for example sales, purchasing, inventory and finance. Clicking a module shows details, and “Refresh” runs the detection again.
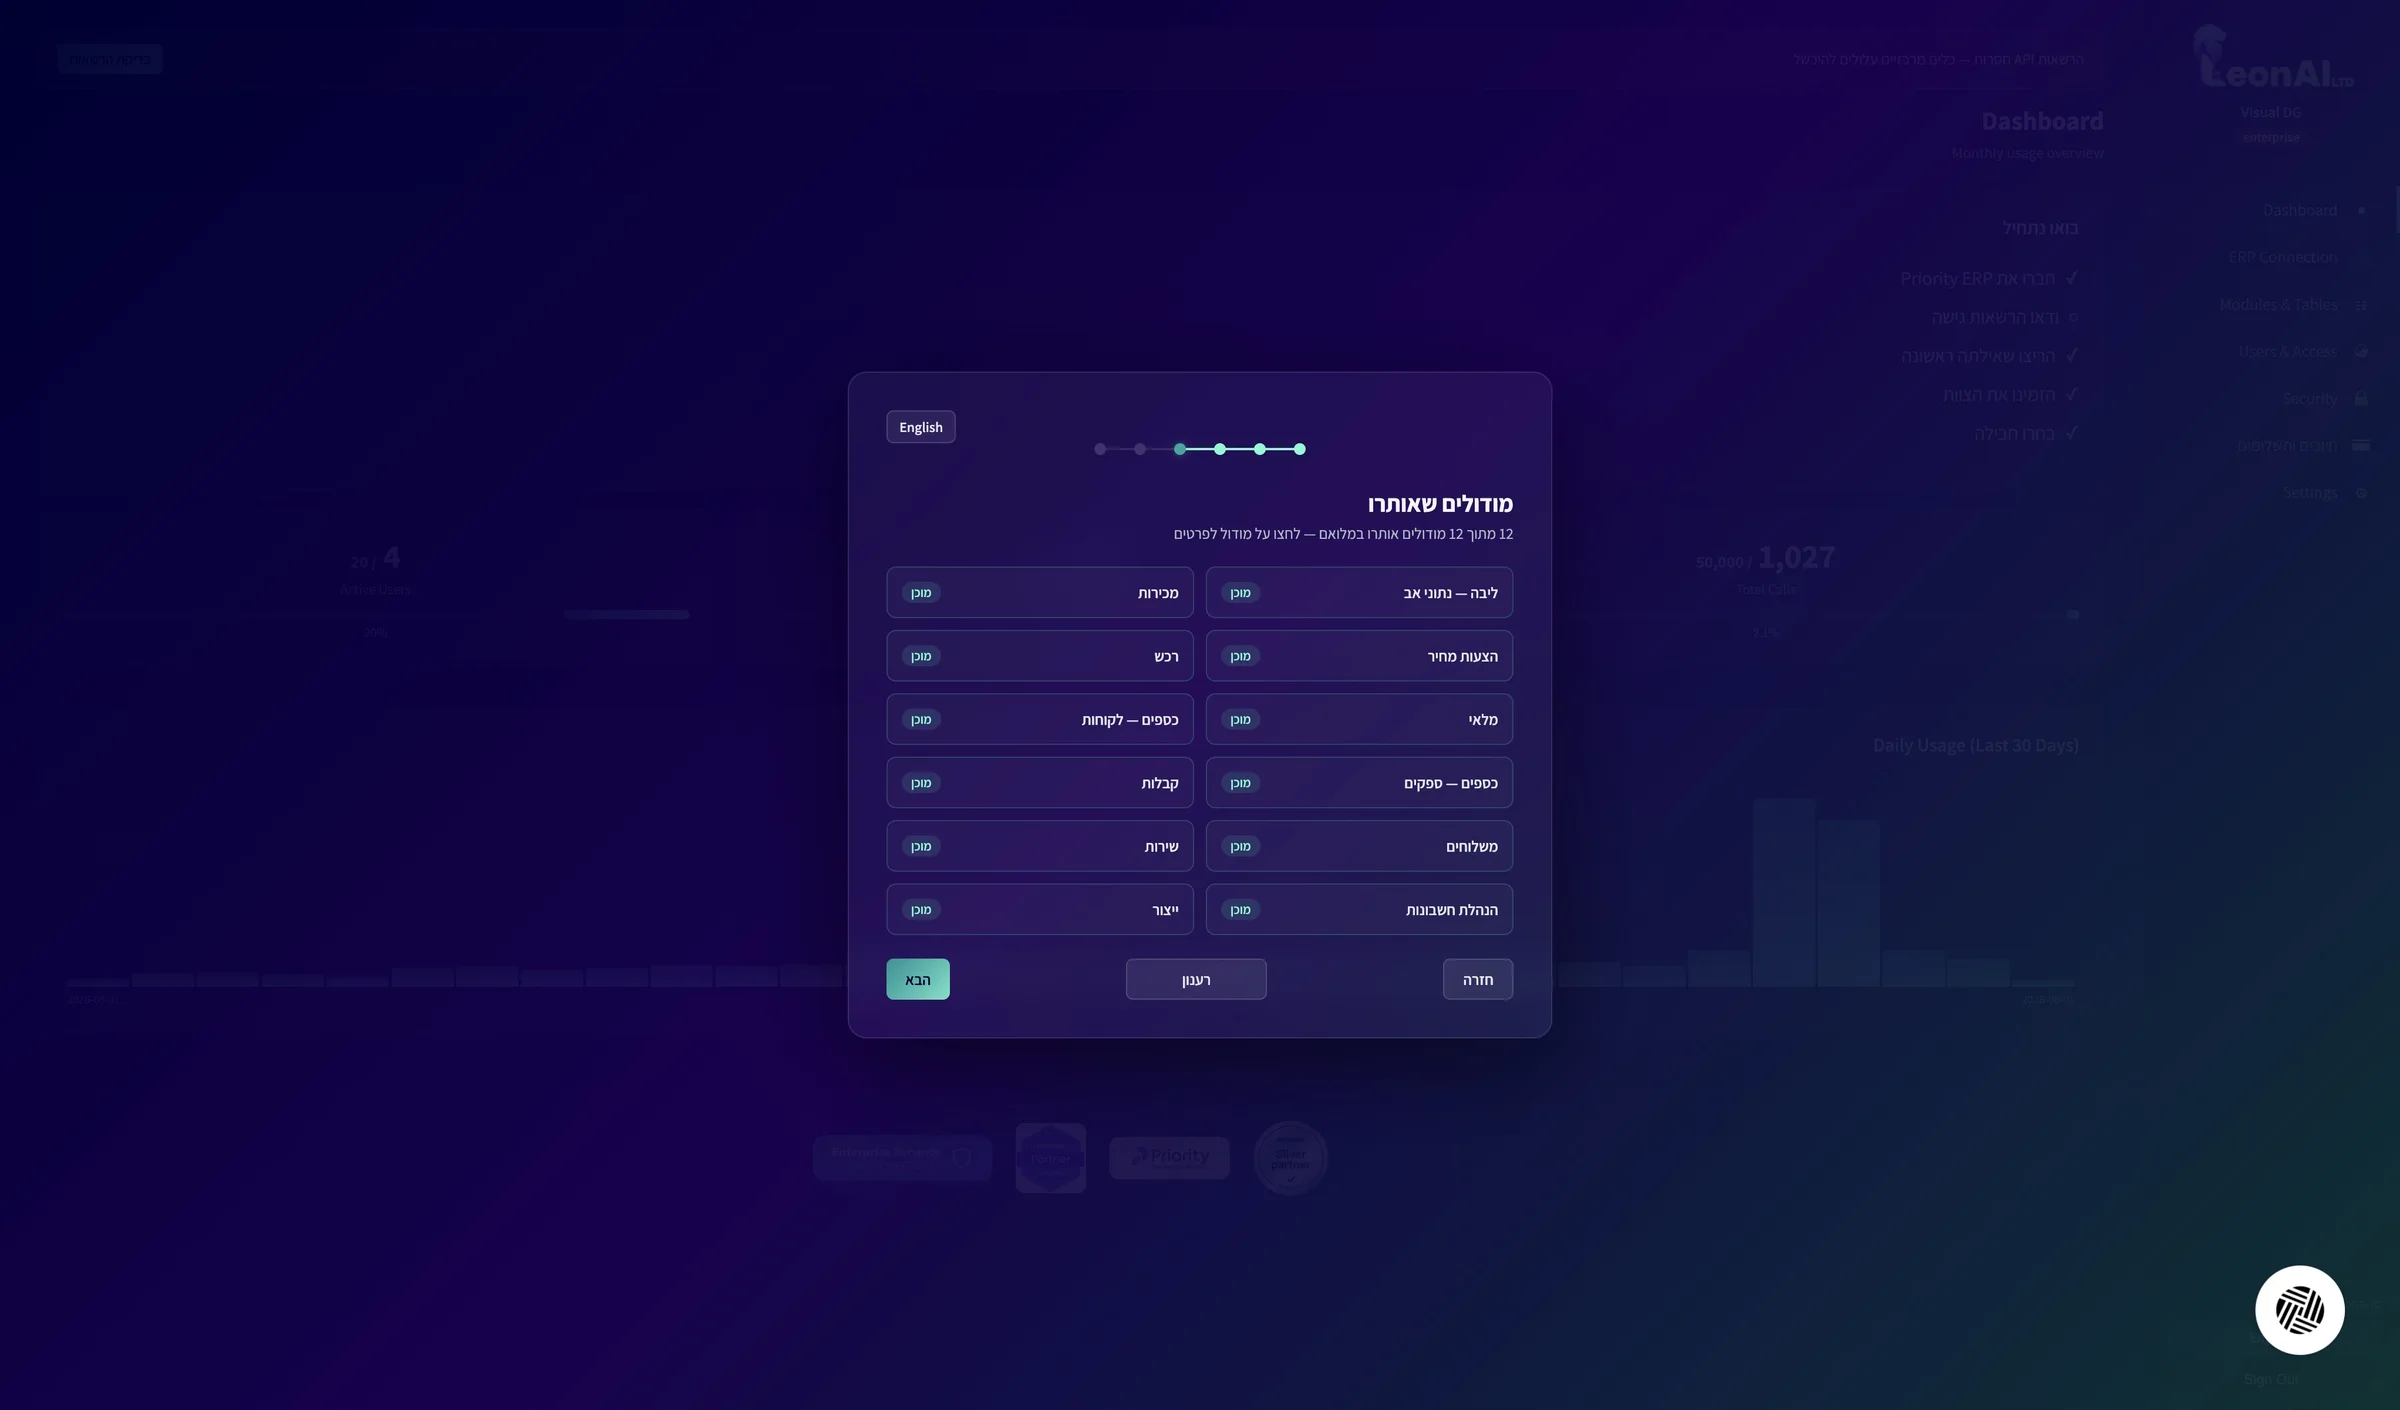
The modules that matter to you are listed as ready.
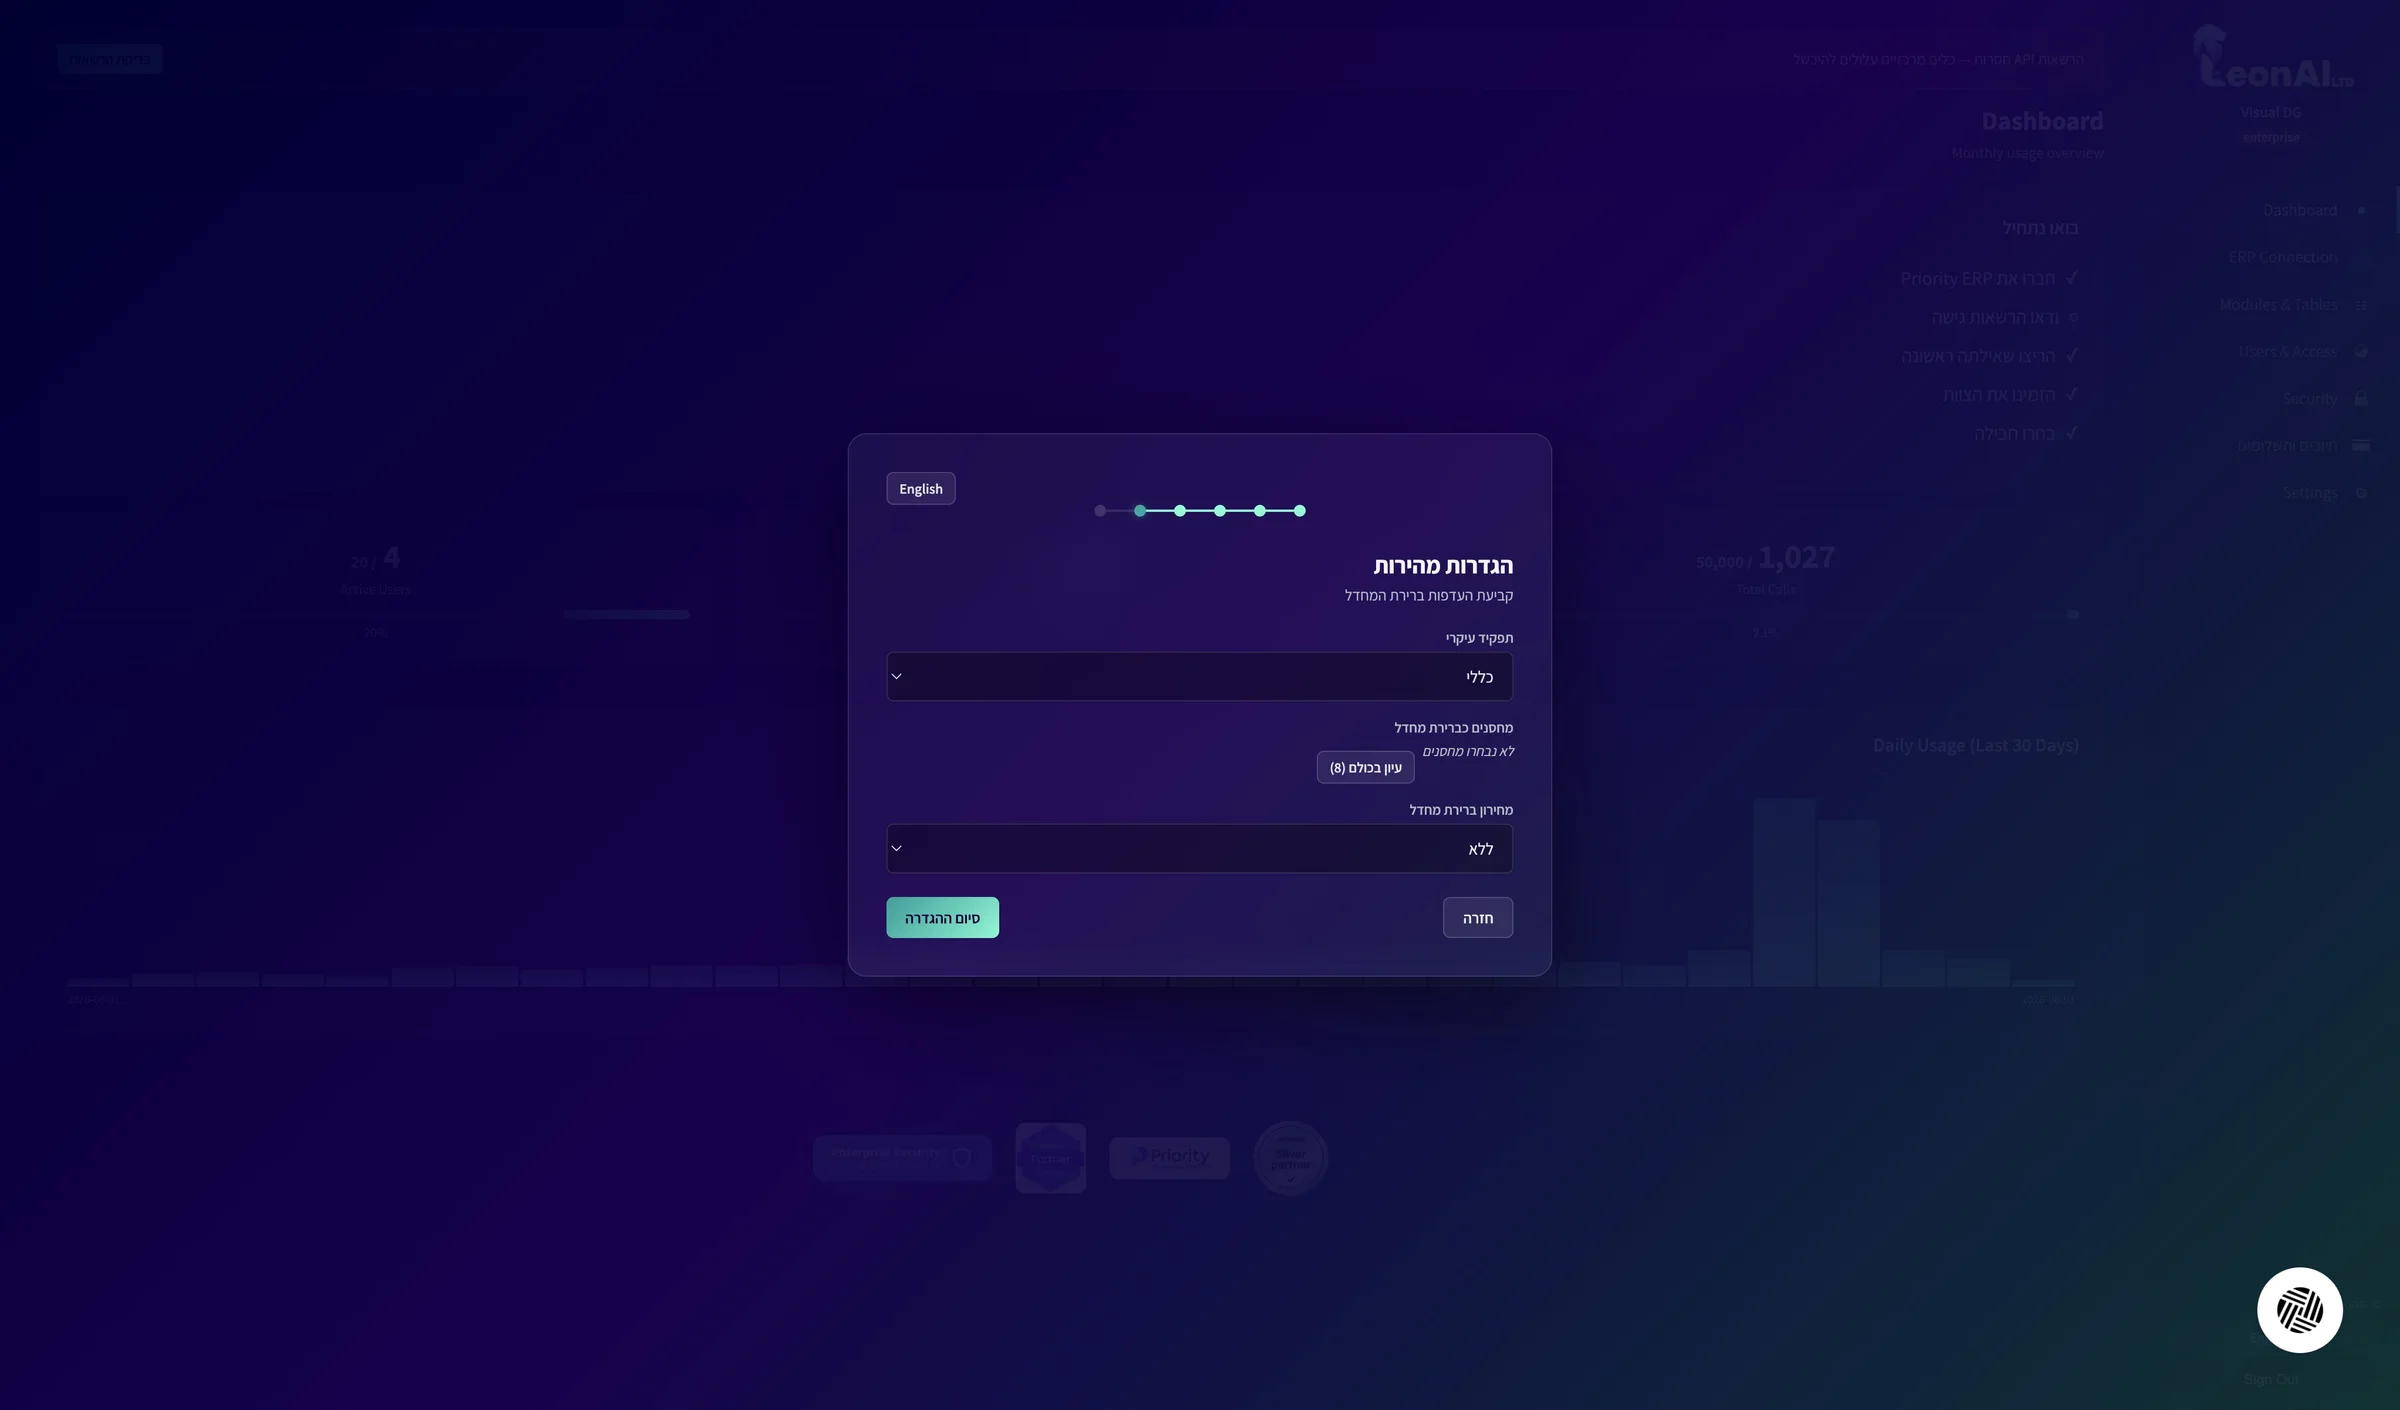
On the Quick settings screen choose a Main role (in the example: General). If relevant, pick default warehouses through Browse all, and choose a Default price list or leave None. Click Finish setup.
This screen sets the account's default preferences: main role, warehouses and price list. The warehouse and price-list lists load directly from Priority.
The “All set!” screen opens.
On the All set! screen click Copy next to API key and keep it somewhere safe. Copy the MCP server address too.
The key is shown only once and will not be shown again. You will need it, together with the email you signed up with, to connect Claude. If you lose it, you can renew it in the admin portal.
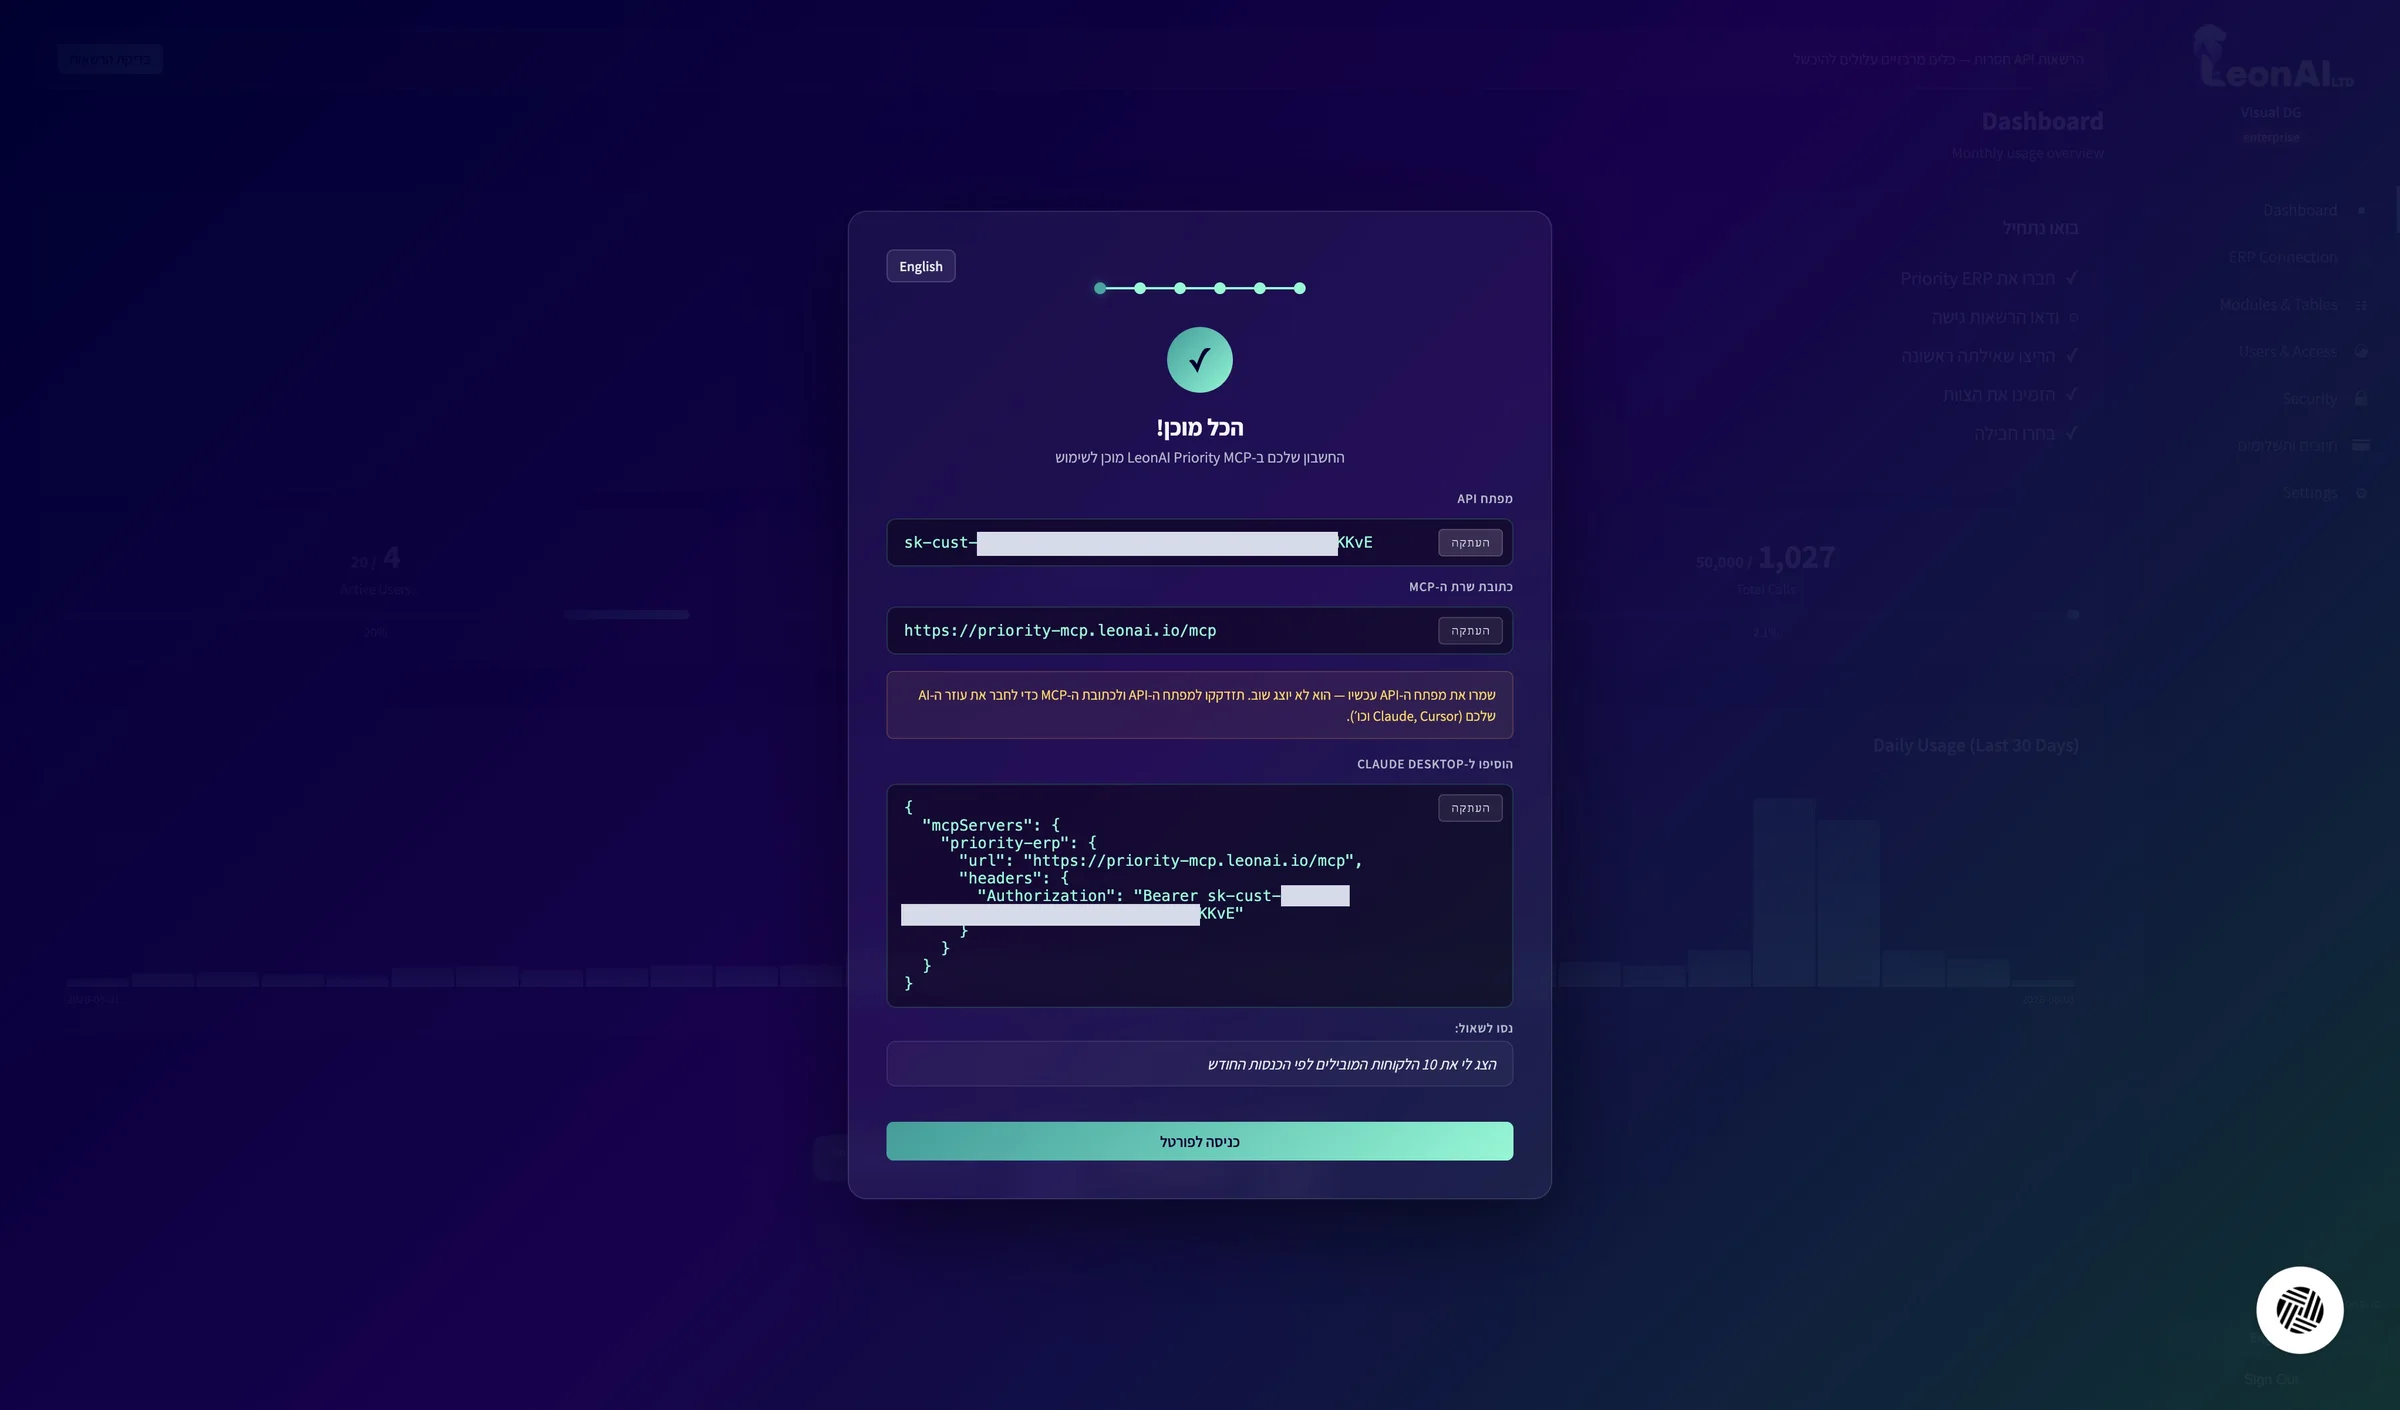
You have saved the API key, which starts with sk-cust, and the MCP address.
On the access-permission check screen, a form is not marked OK
LeonAI checks that the user you chose can read the forms it needs.
I did not save the API key
The URL points to a private network — a public https address is required.
In Priority's window the address spans two lines, and pasting adds an extra character to it.
Not found: check the company name and the tabula.ini file name.
These two values are the last two parts of the API address. In Priority Cloud the settings file is never tabula.ini.
Priority URL must start with https://
The address was copied without the https:// at its start.
Could not reach the server: check the URL, and that the firewall allows the IPs in the prerequisites.
Either the address is wrong, or your organization's firewall is blocking LeonAI's IP addresses.
Connection timed out: make sure the address is reachable from the internet and that the firewall allows the IP addresses in the prerequisites.
Add a custom connector in Claude with the MCP server address, and sign in with your email and API key.
The button opens Claude’s Add custom connector dialog with the name LeonAI Priority and the server address already filled in. Press Continue, keep the detected options and press Add.
Add to Claude (opens in a new window)Add for the whole organization (opens in a new window)
On Claude Team or Enterprise only an Owner adds a connector; then each member presses Connect. Not the Owner? Send them this link:
After Add, LeonAI’s sign-in page opens. Carry on at the step Enter your email.
Every assistant signs in the same way: your email, your API key and a code sent by email.
ChatGPT has no link that fills in a connector. The button copies the address and opens Plugins: press +, choose Add custom MCP server, paste the address, set up the sign-in and press Create as a plugin. Don’t see the option? Ask your workspace admin.
Run in a terminal:
Run the first command in a terminal; it opens the sign-in. If it doesn’t, run the second:
In the Codex app: Settings, MCP servers, Add server, then paste the address.
In VS Code open the Command Palette, choose MCP: Add Server, then HTTP, and paste the address:
In Claude, in the chat window, click +, point to Add connector and click Add custom connector.
The LeonAI connector is not in the list of ready-made connectors, so you add it as a custom connector by its server address.
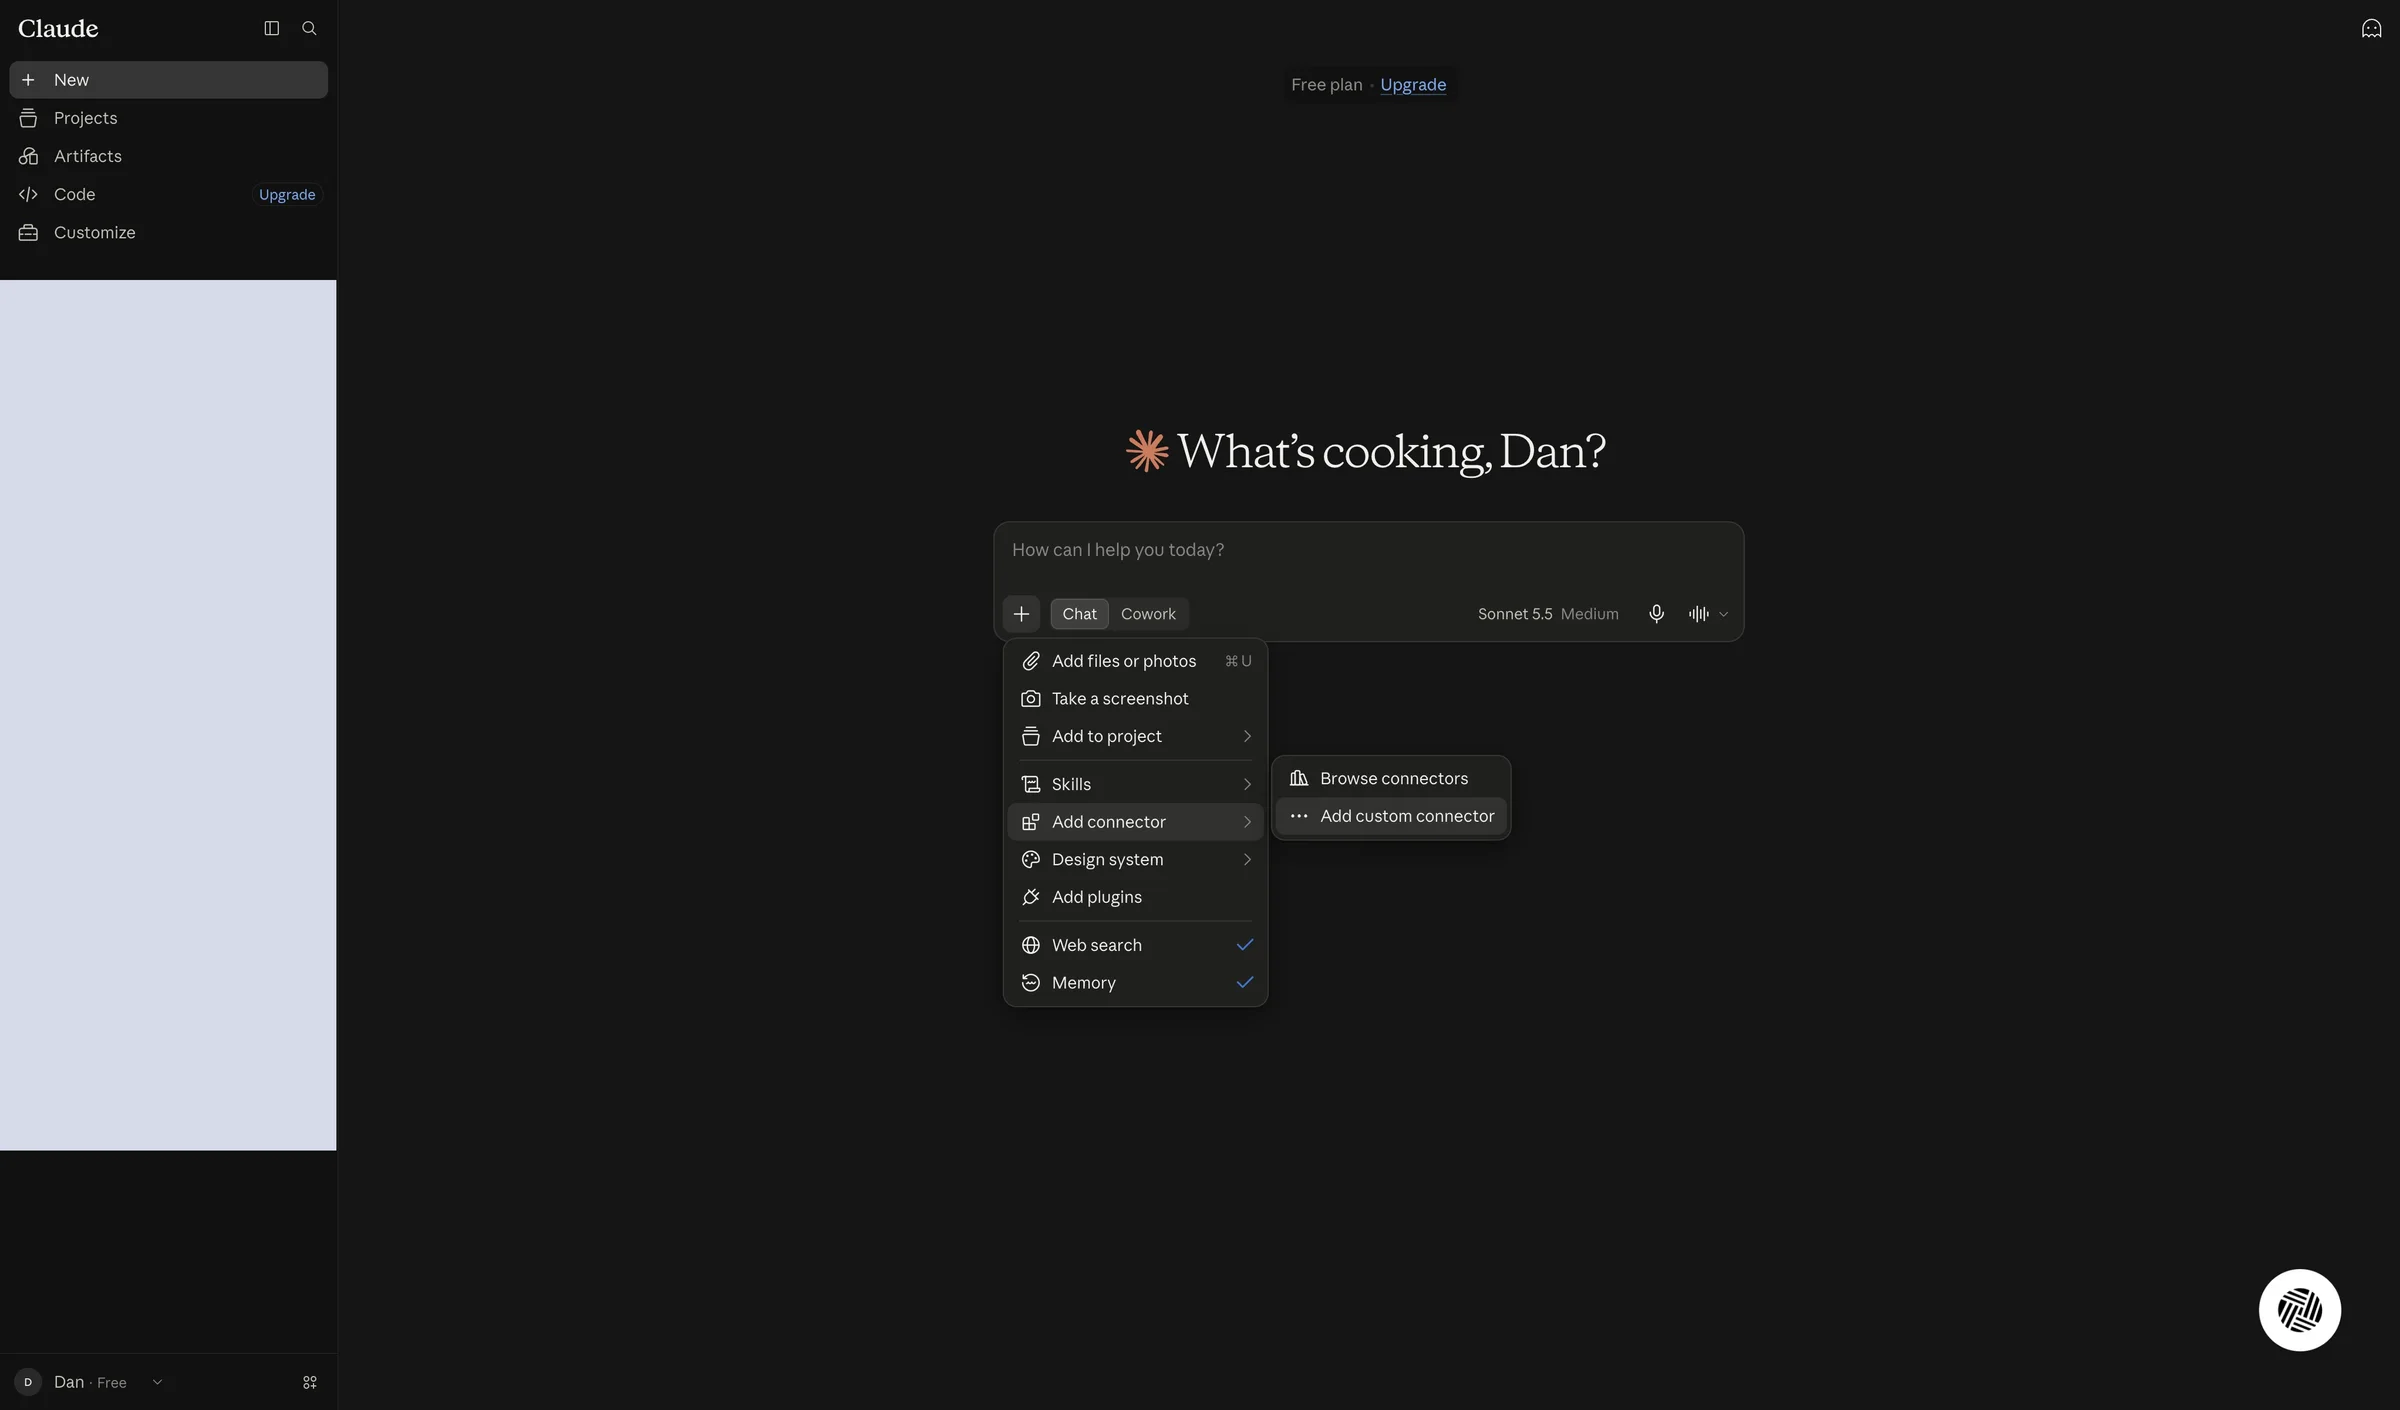
The Add custom connector window opens.
Click the Name field and type a name, for example MY PRIORITY MCP.
As the window explains, the name is shown in the connector list, so choose one you will recognize easily.
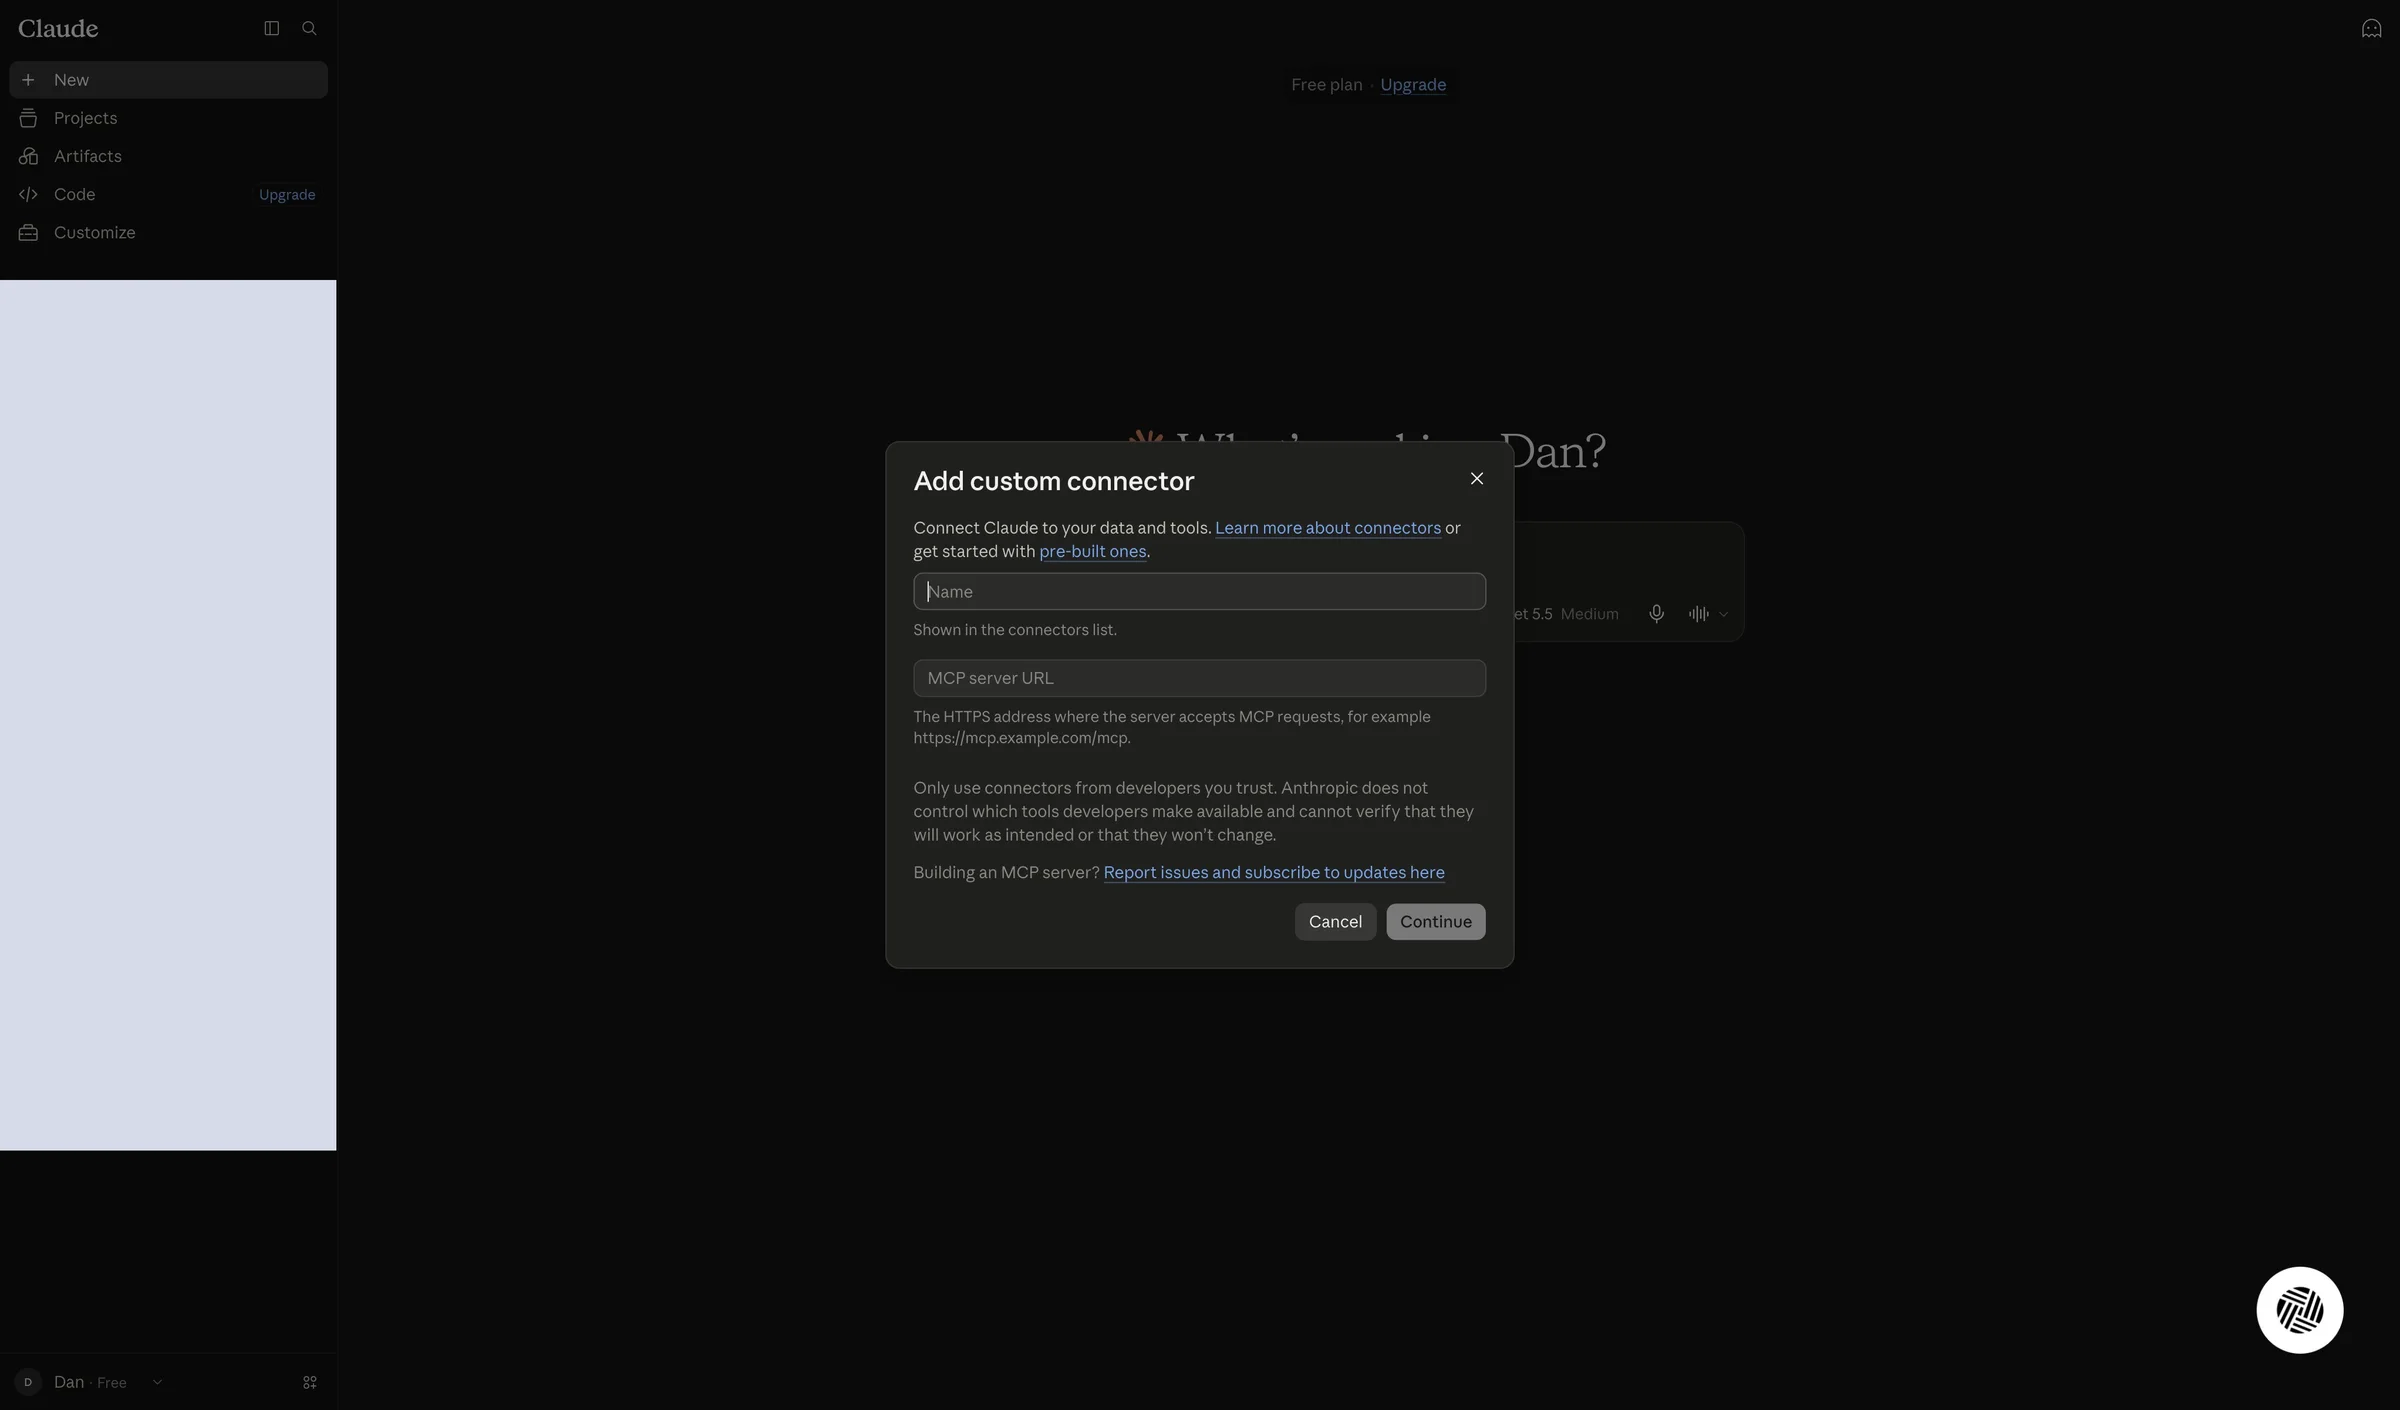
The name you chose appears in the Name field.
Click the MCP server URL field and paste the address you saved on the “All set!” screen.
This is the address where the LeonAI server receives MCP requests. Make sure it starts with https and ends with /mcp.
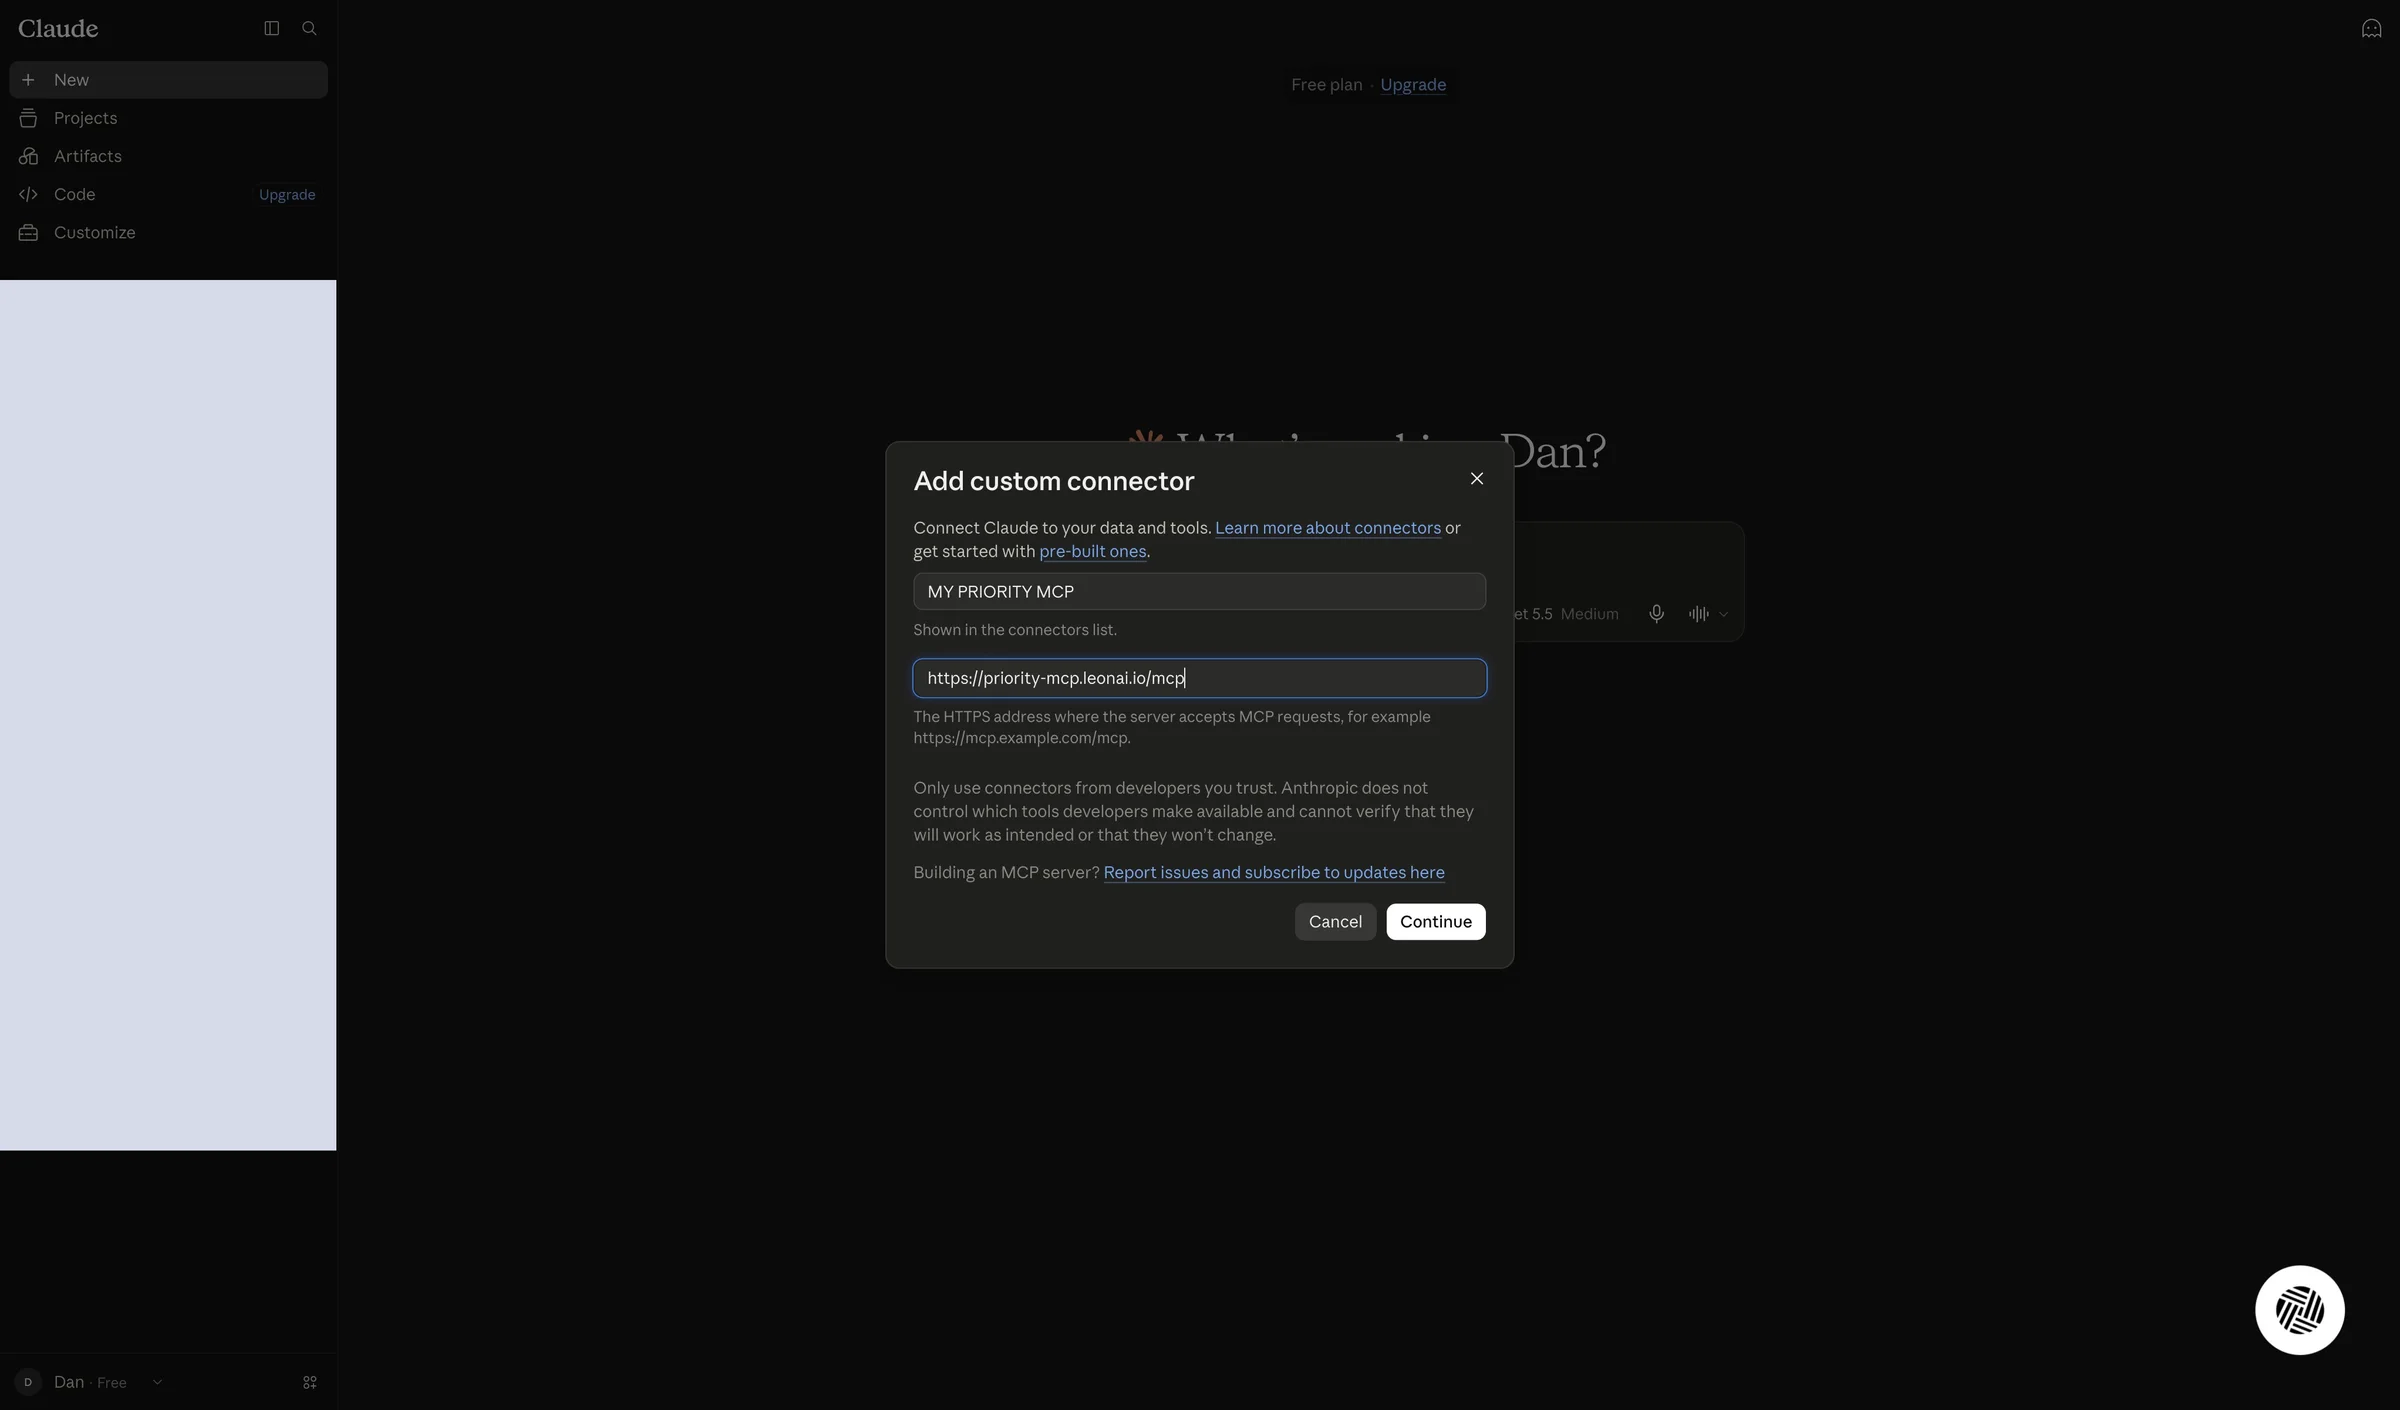
The full address appears in the MCP server URL field.
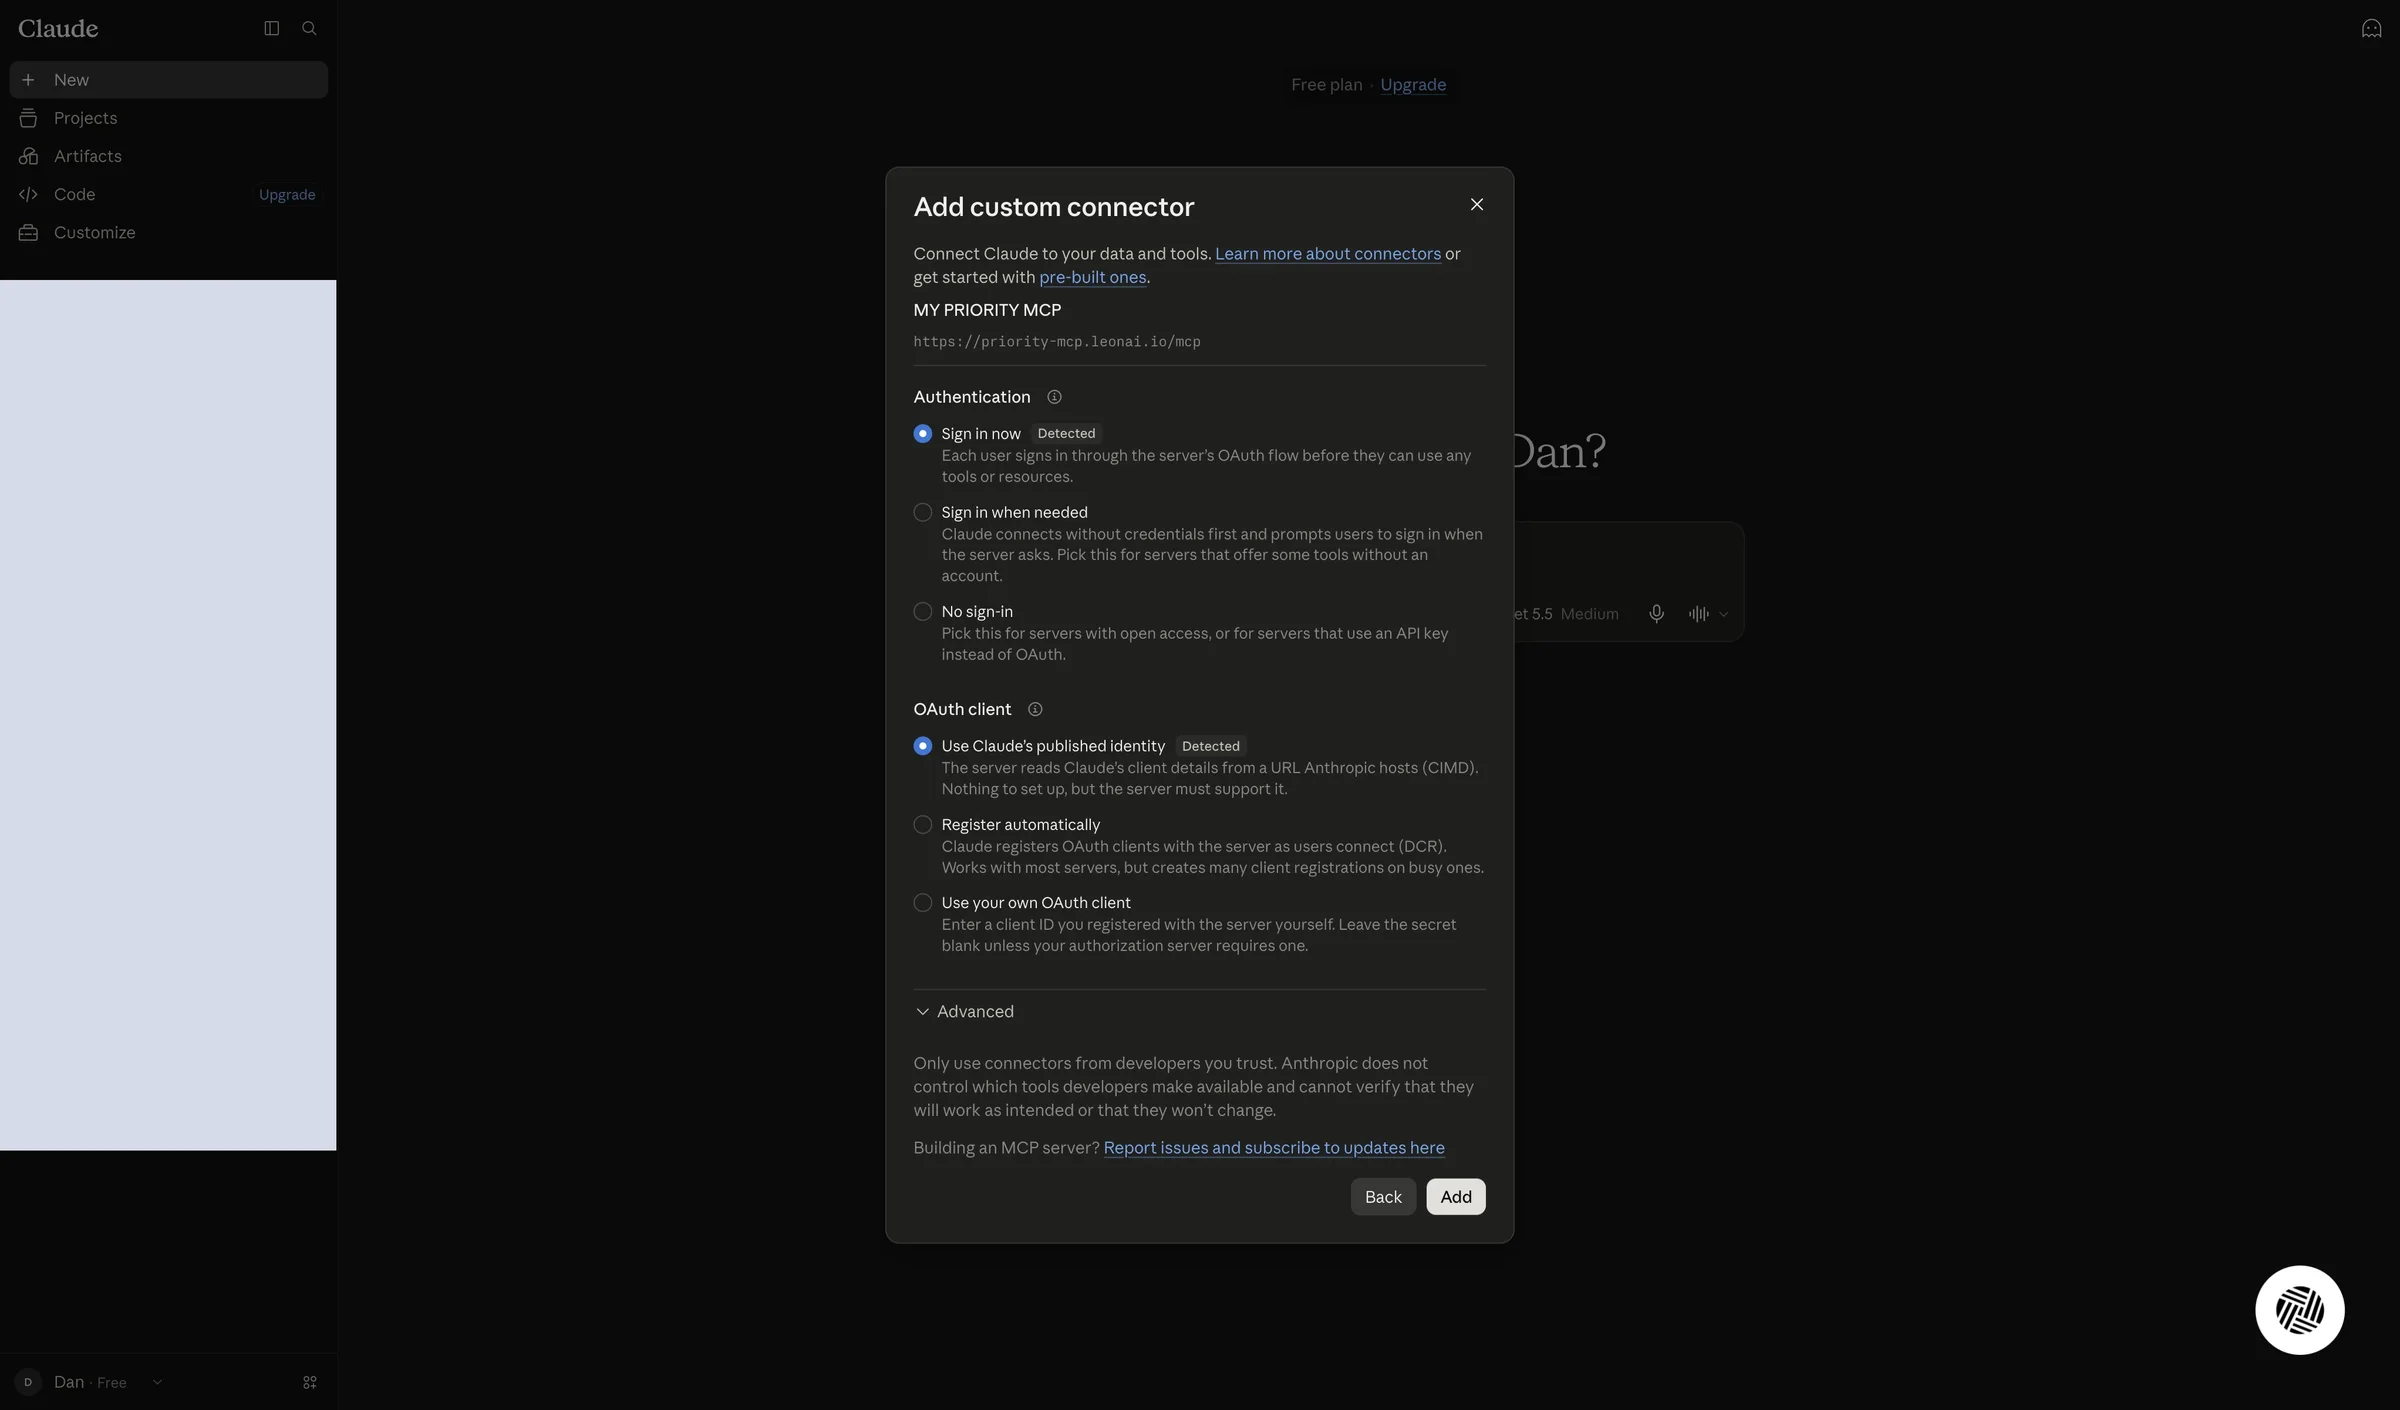
Click Continue. In the next window keep the detected options — Sign in now and Use Claude's published identity, both marked Detected — and click Add.
As the window explains, Sign in now requires every user to sign in through the server's authorization page before using its tools or resources.
The LeonAI Priority MCP authorization page opens.
On the LeonAI authorization page, enter the email you signed up with in the Your Email field.
The top of the page shows which app you are giving access to (Claude) and where you will return (claude.ai). If you do not recognize these details, close the page and do not enter the key.
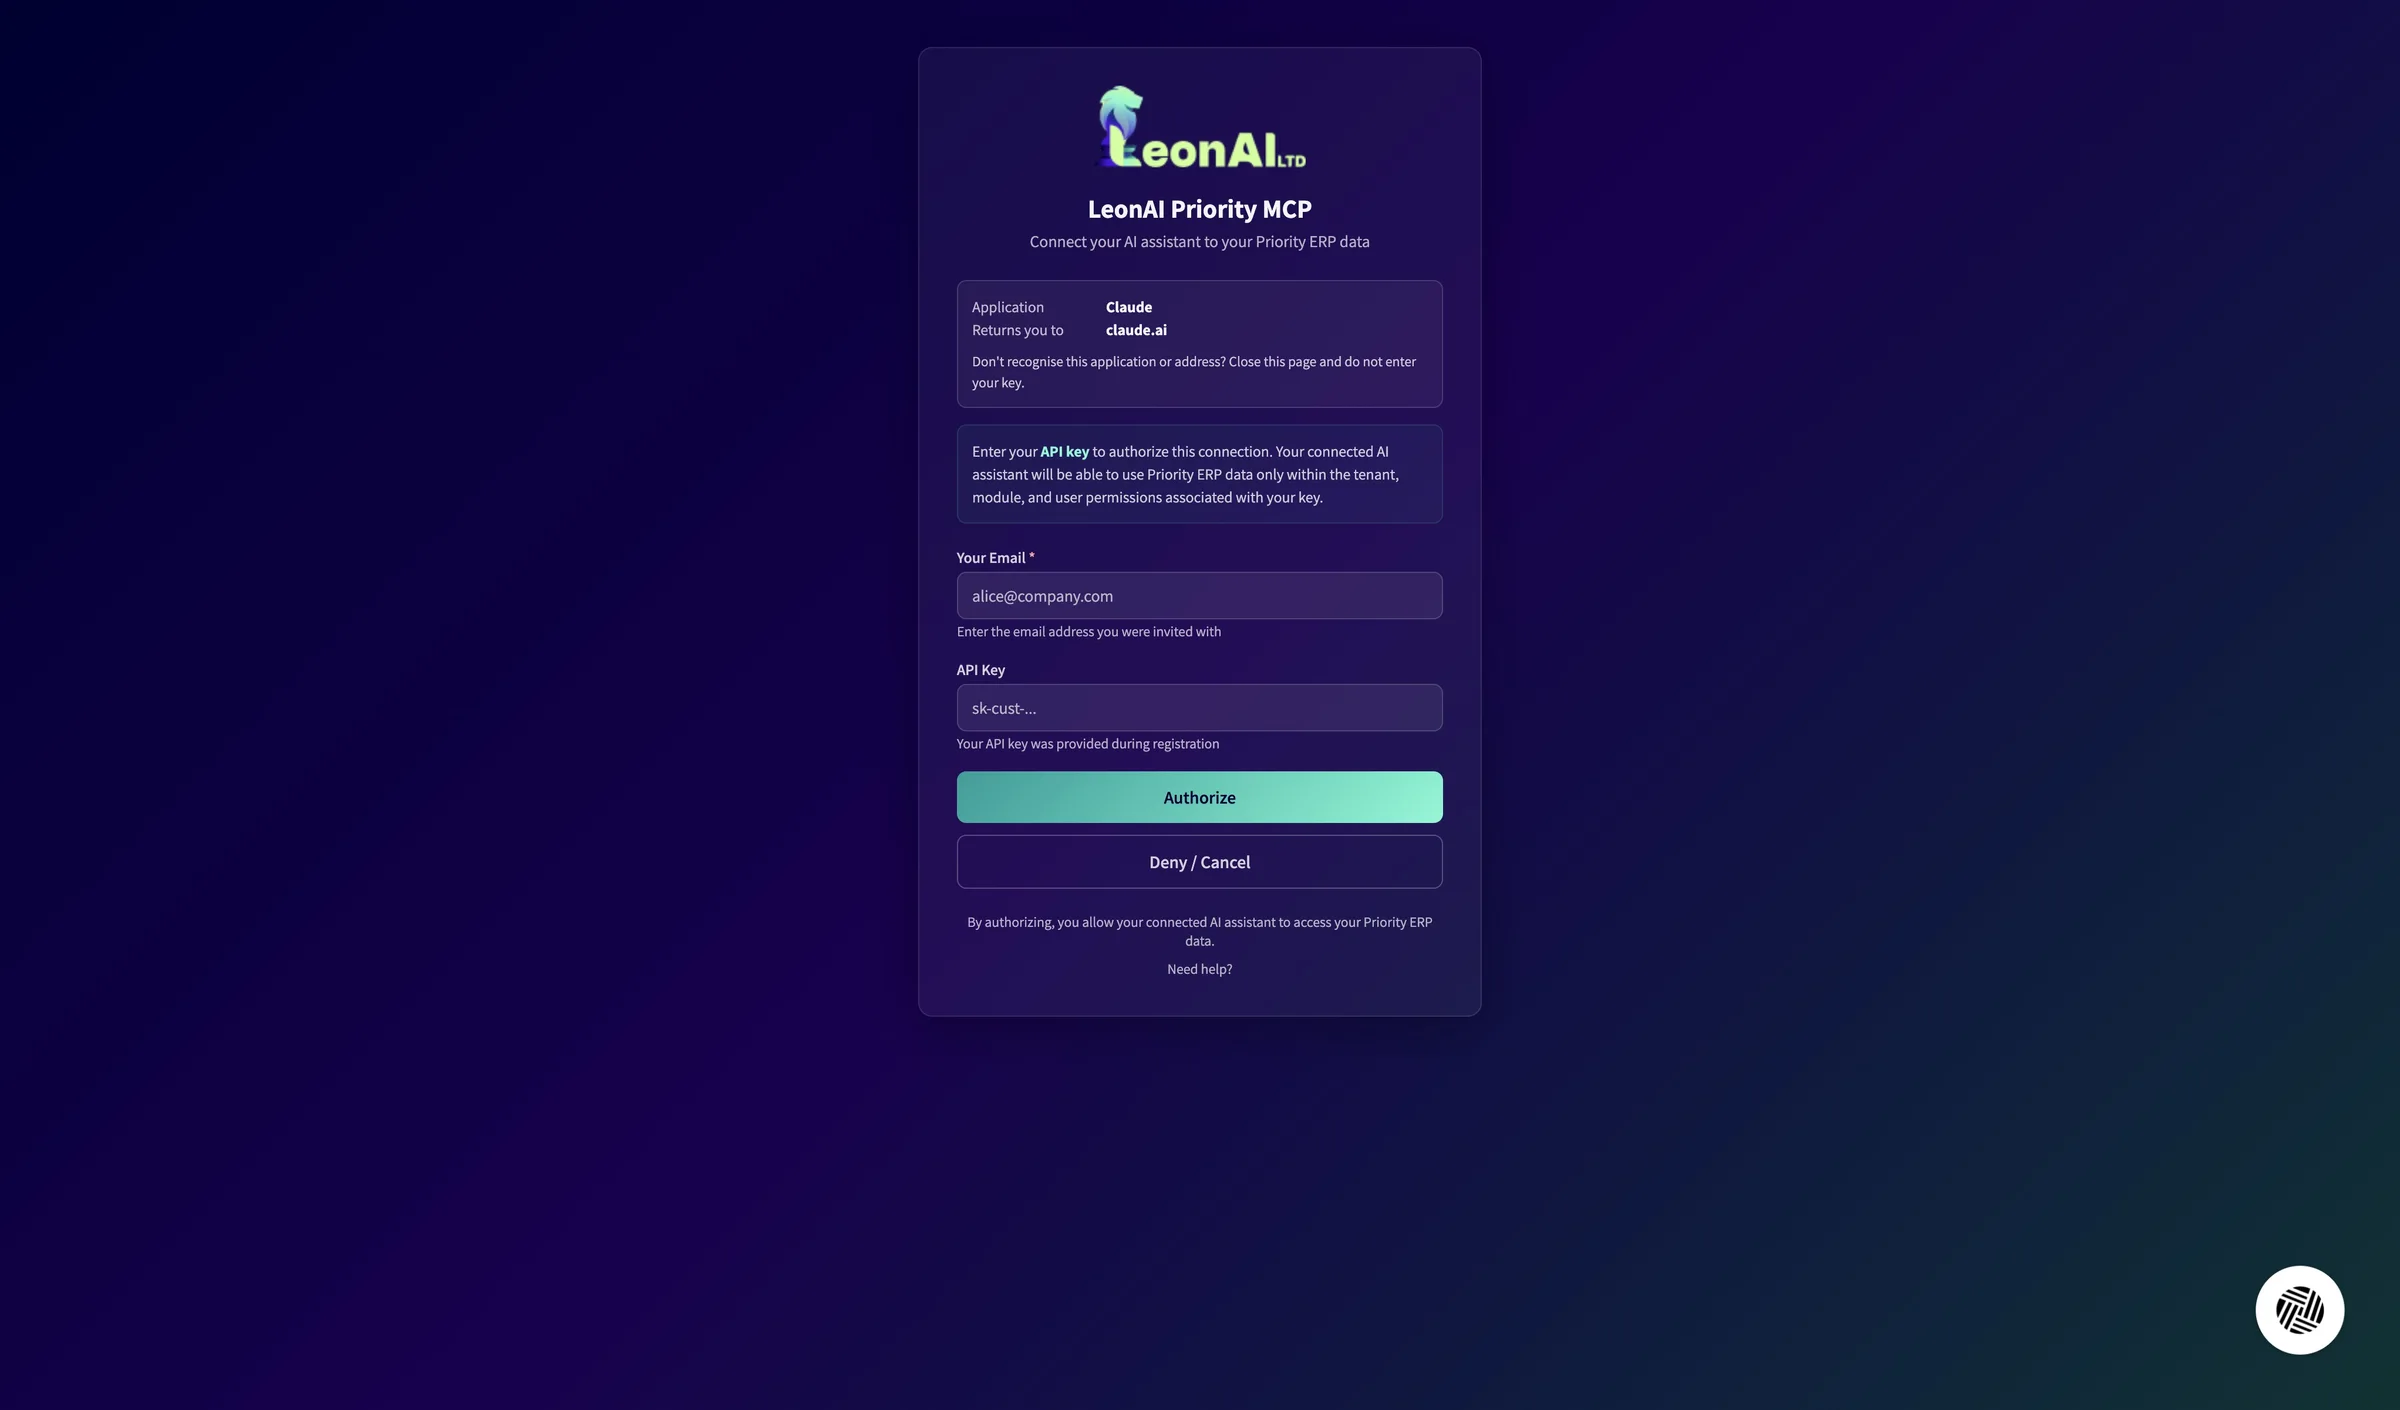
The email you signed up with is entered in the Your Email field.
Click the API Key field, paste the key you saved and click Authorize.
The key starts with sk-cust and was given to you on the “All set!” screen at the end of sign-up. The field hides the characters after you paste: make sure you pasted the whole key, with no spaces at the start or end.
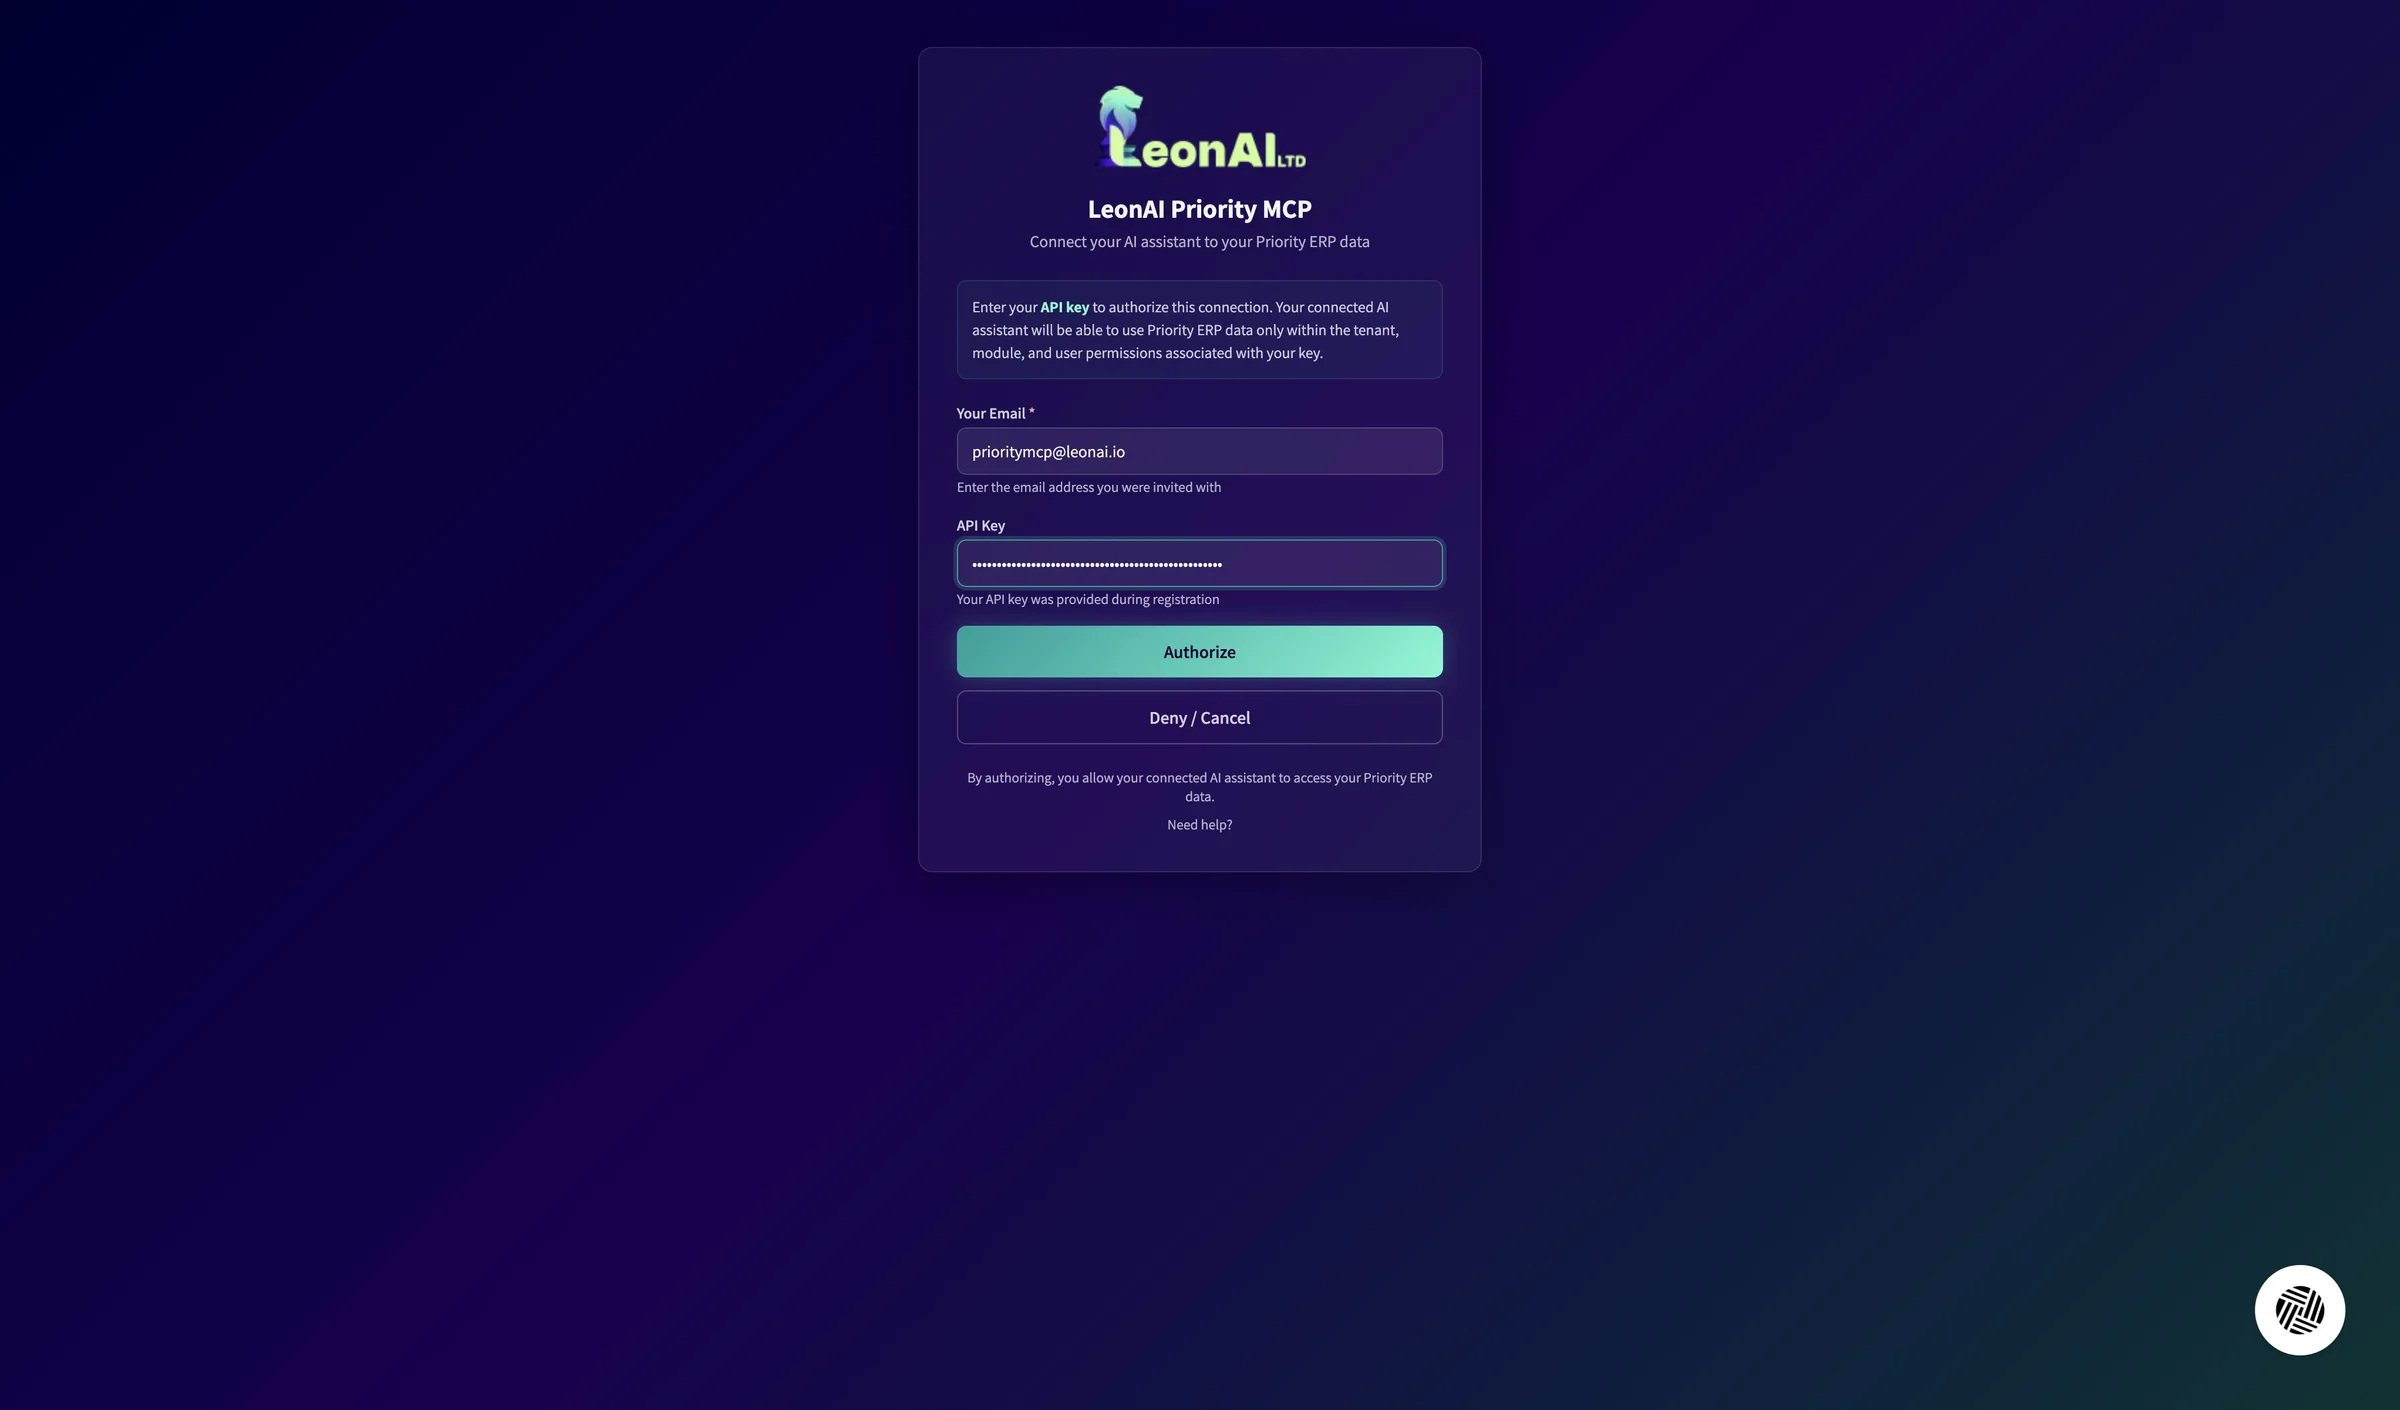
A message says a verification code was sent to your email.
In your inbox, open the email Your LeonAI Priority MCP verification code, then select and copy the 6-digit code.
This is a new code, separate from the sign-up code, and it is valid for 10 minutes. A “Welcome” email arrives at the same time — you will use it later to sign in to the admin portal.
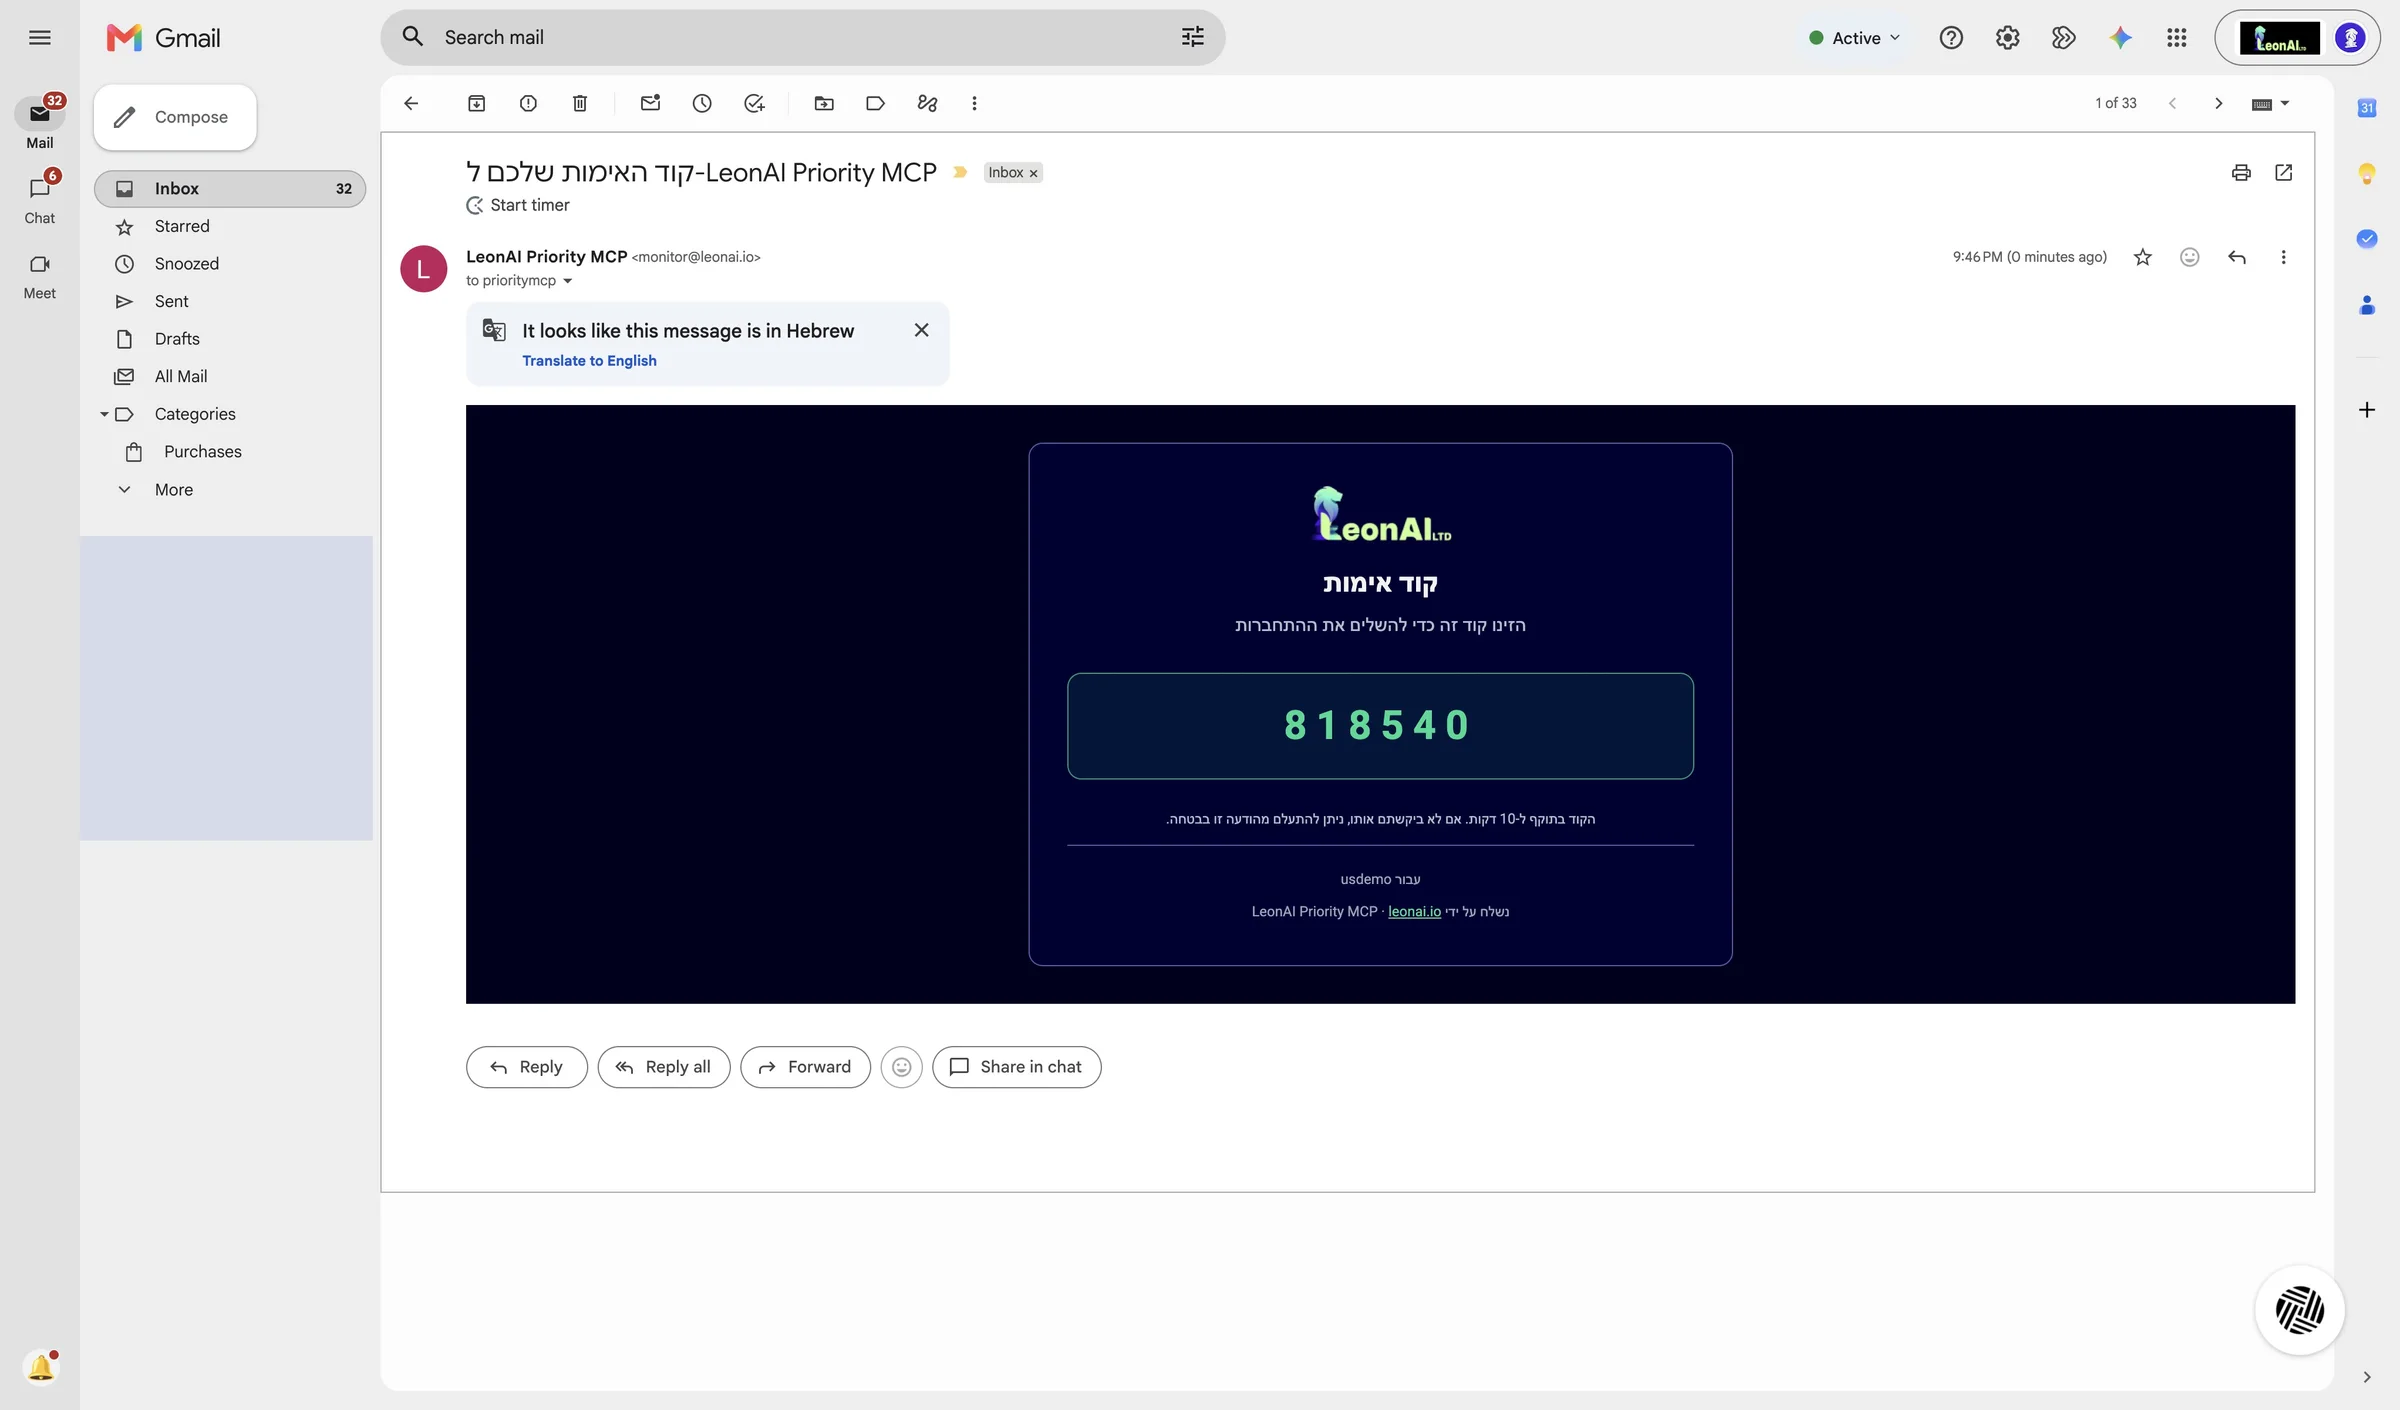
The sign-in code is on your clipboard.
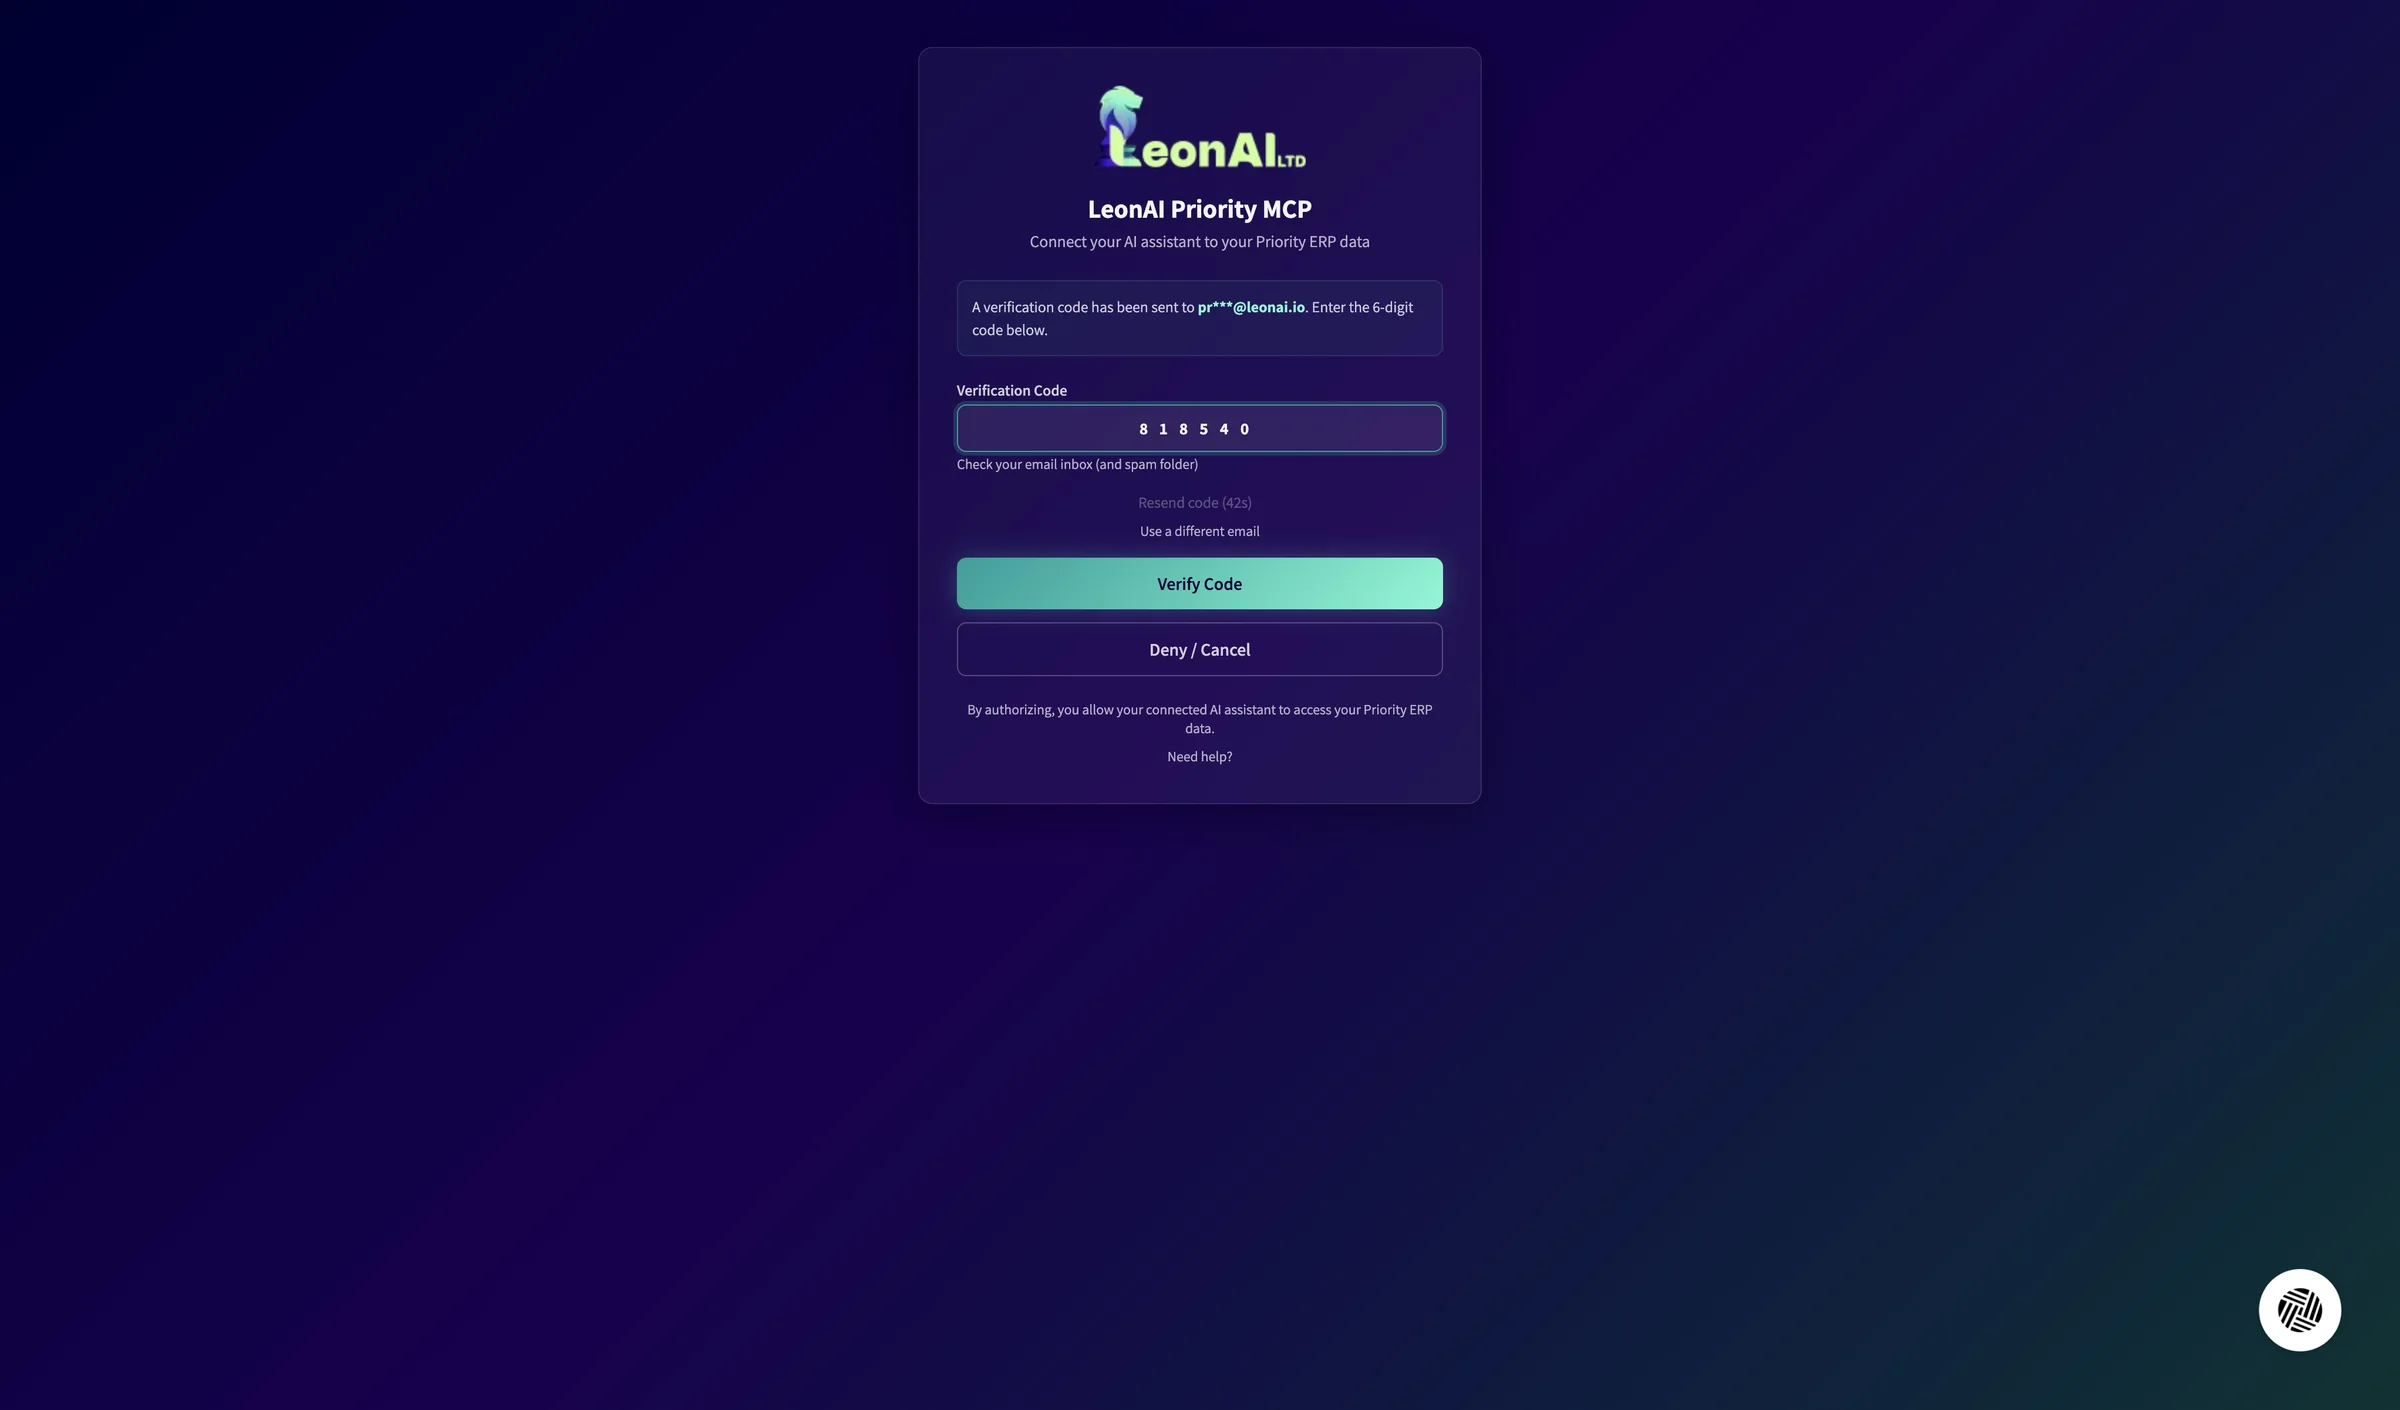
On the authorization page, click the Verification Code field, paste the code and click Verify Code.
The page shows which address the code was sent to, with part of the address hidden.
You are back in Claude, and the LeonAI connector is connected.
The sign-in code did not arrive
Two privacy settings, network access with the LeonAI domain, and AI-powered artifacts.
In Claude's settings (Settings) click Privacy, and turn off the Location metadata and Help improve our AI models switches.
According to the descriptions on screen, the first lets Claude use your approximate location (city/region), and the second lets your chats and coding sessions be used to train Anthropic's models.
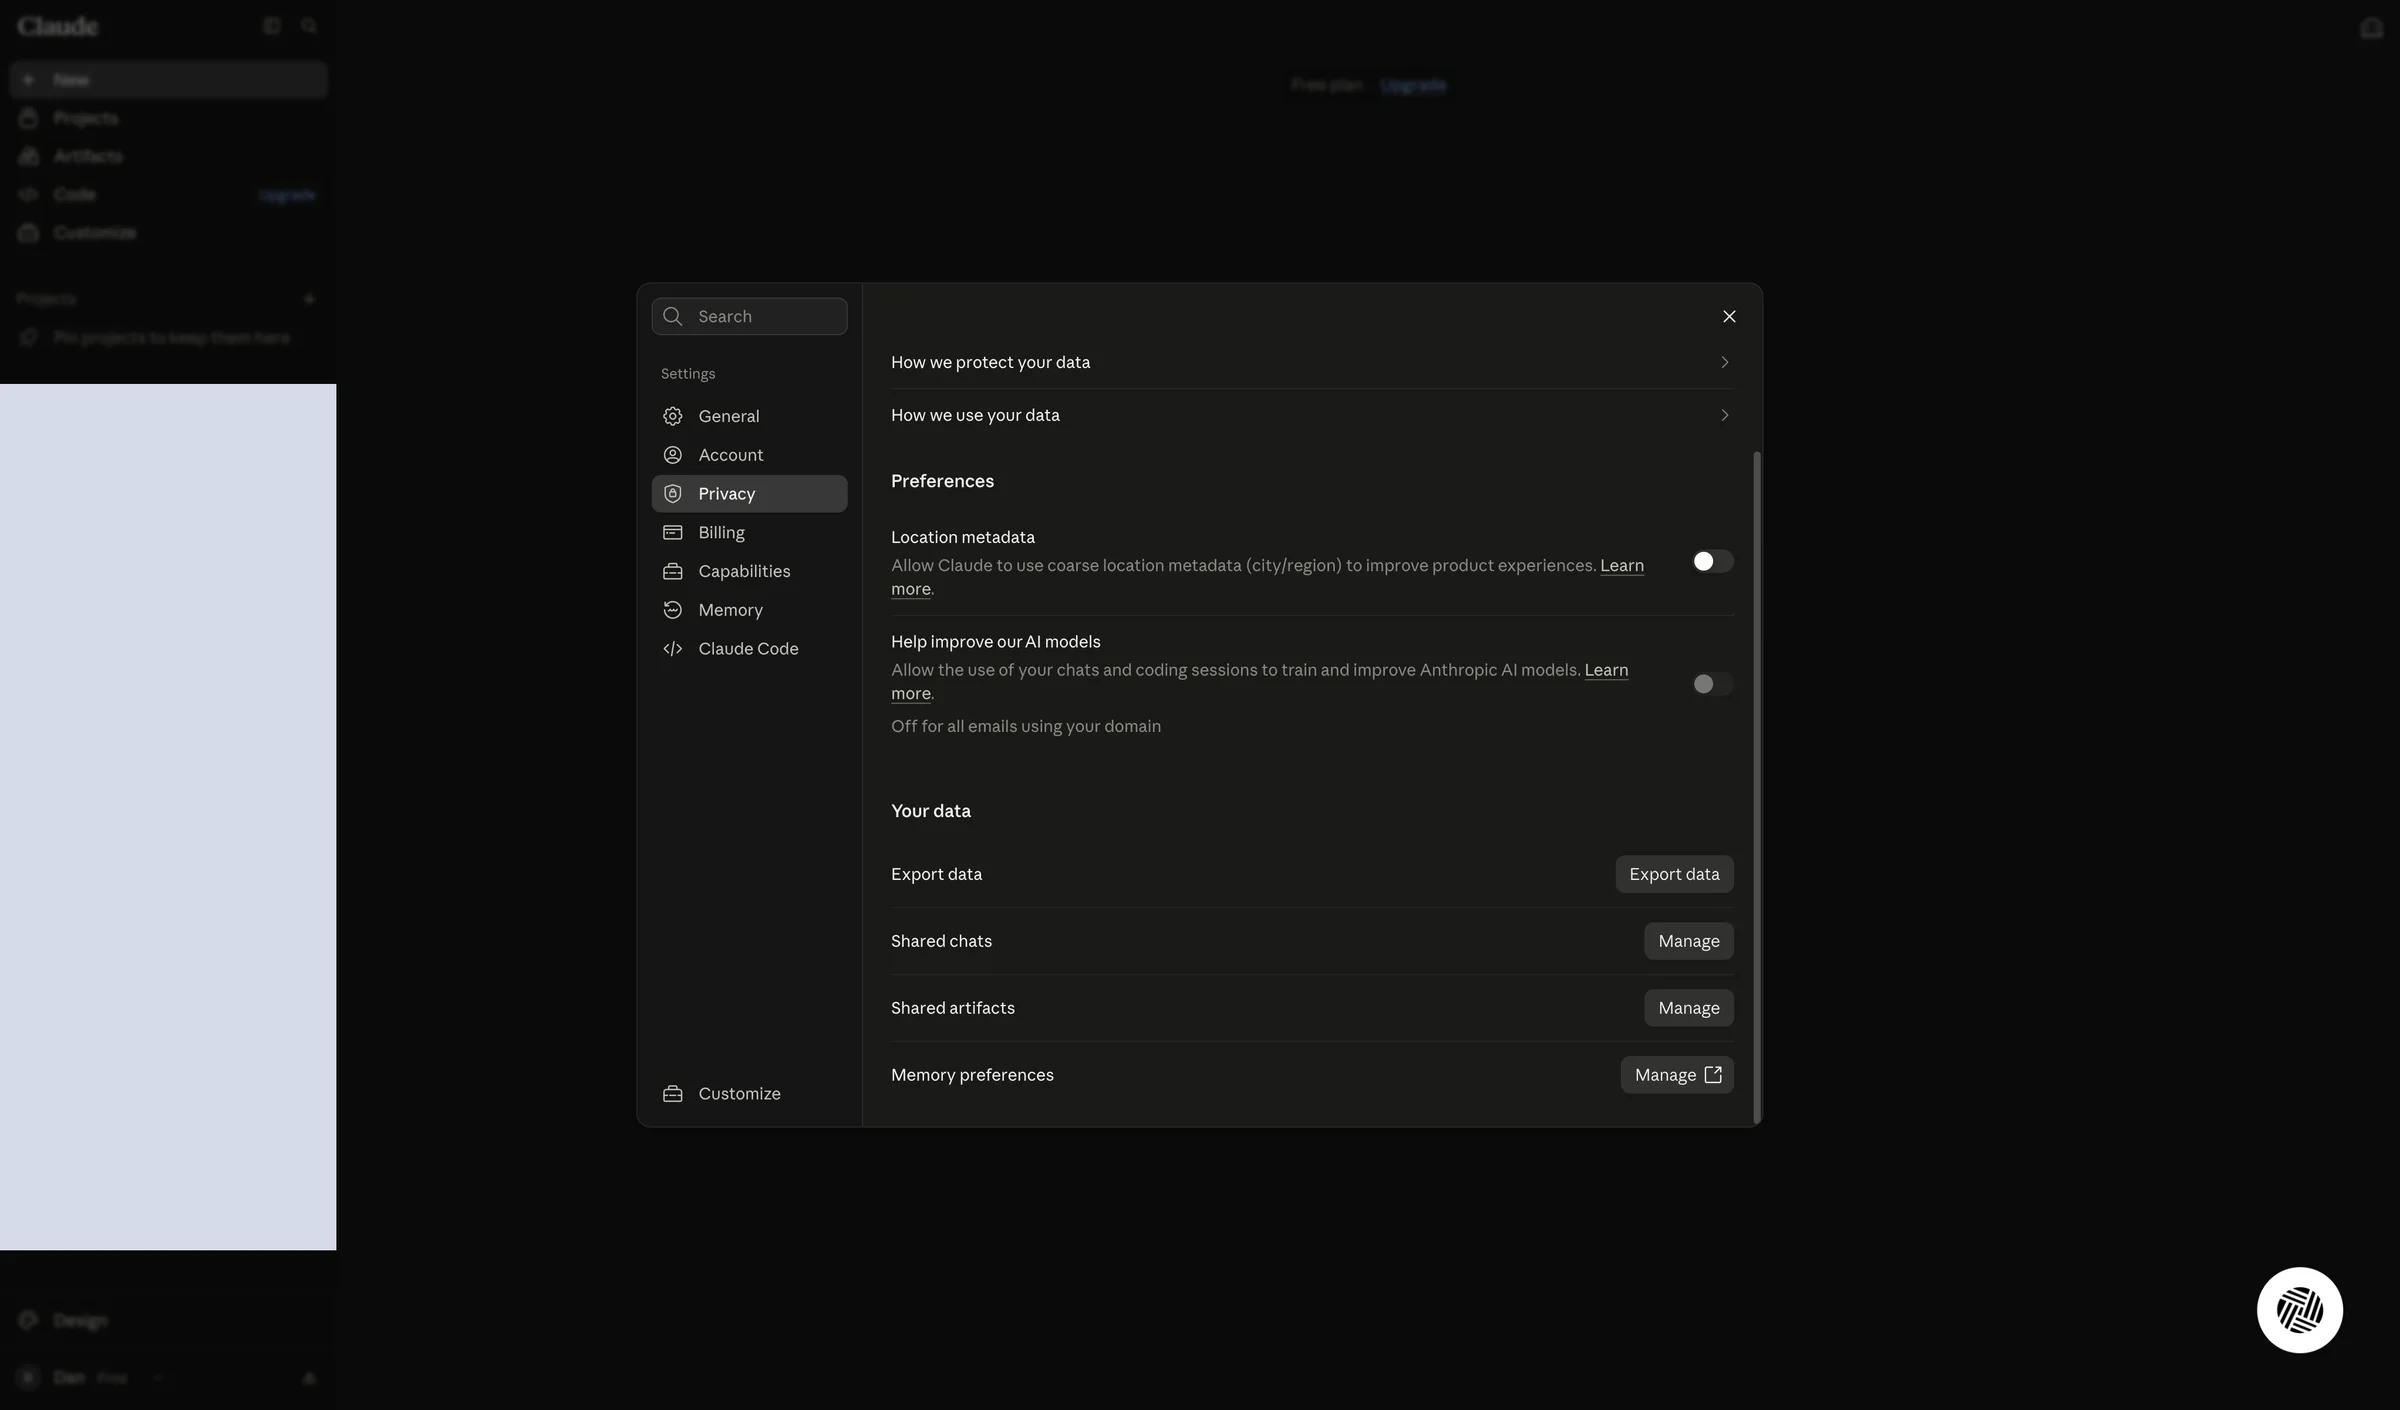
Both switches are off.
Click Capabilities and turn on the Allow network egress switch.
According to the description on screen, this lets Claude reach common package managers and install libraries for data analysis, visualizations and file processing. The screen notes that this carries security risks and recommends monitoring your chats.
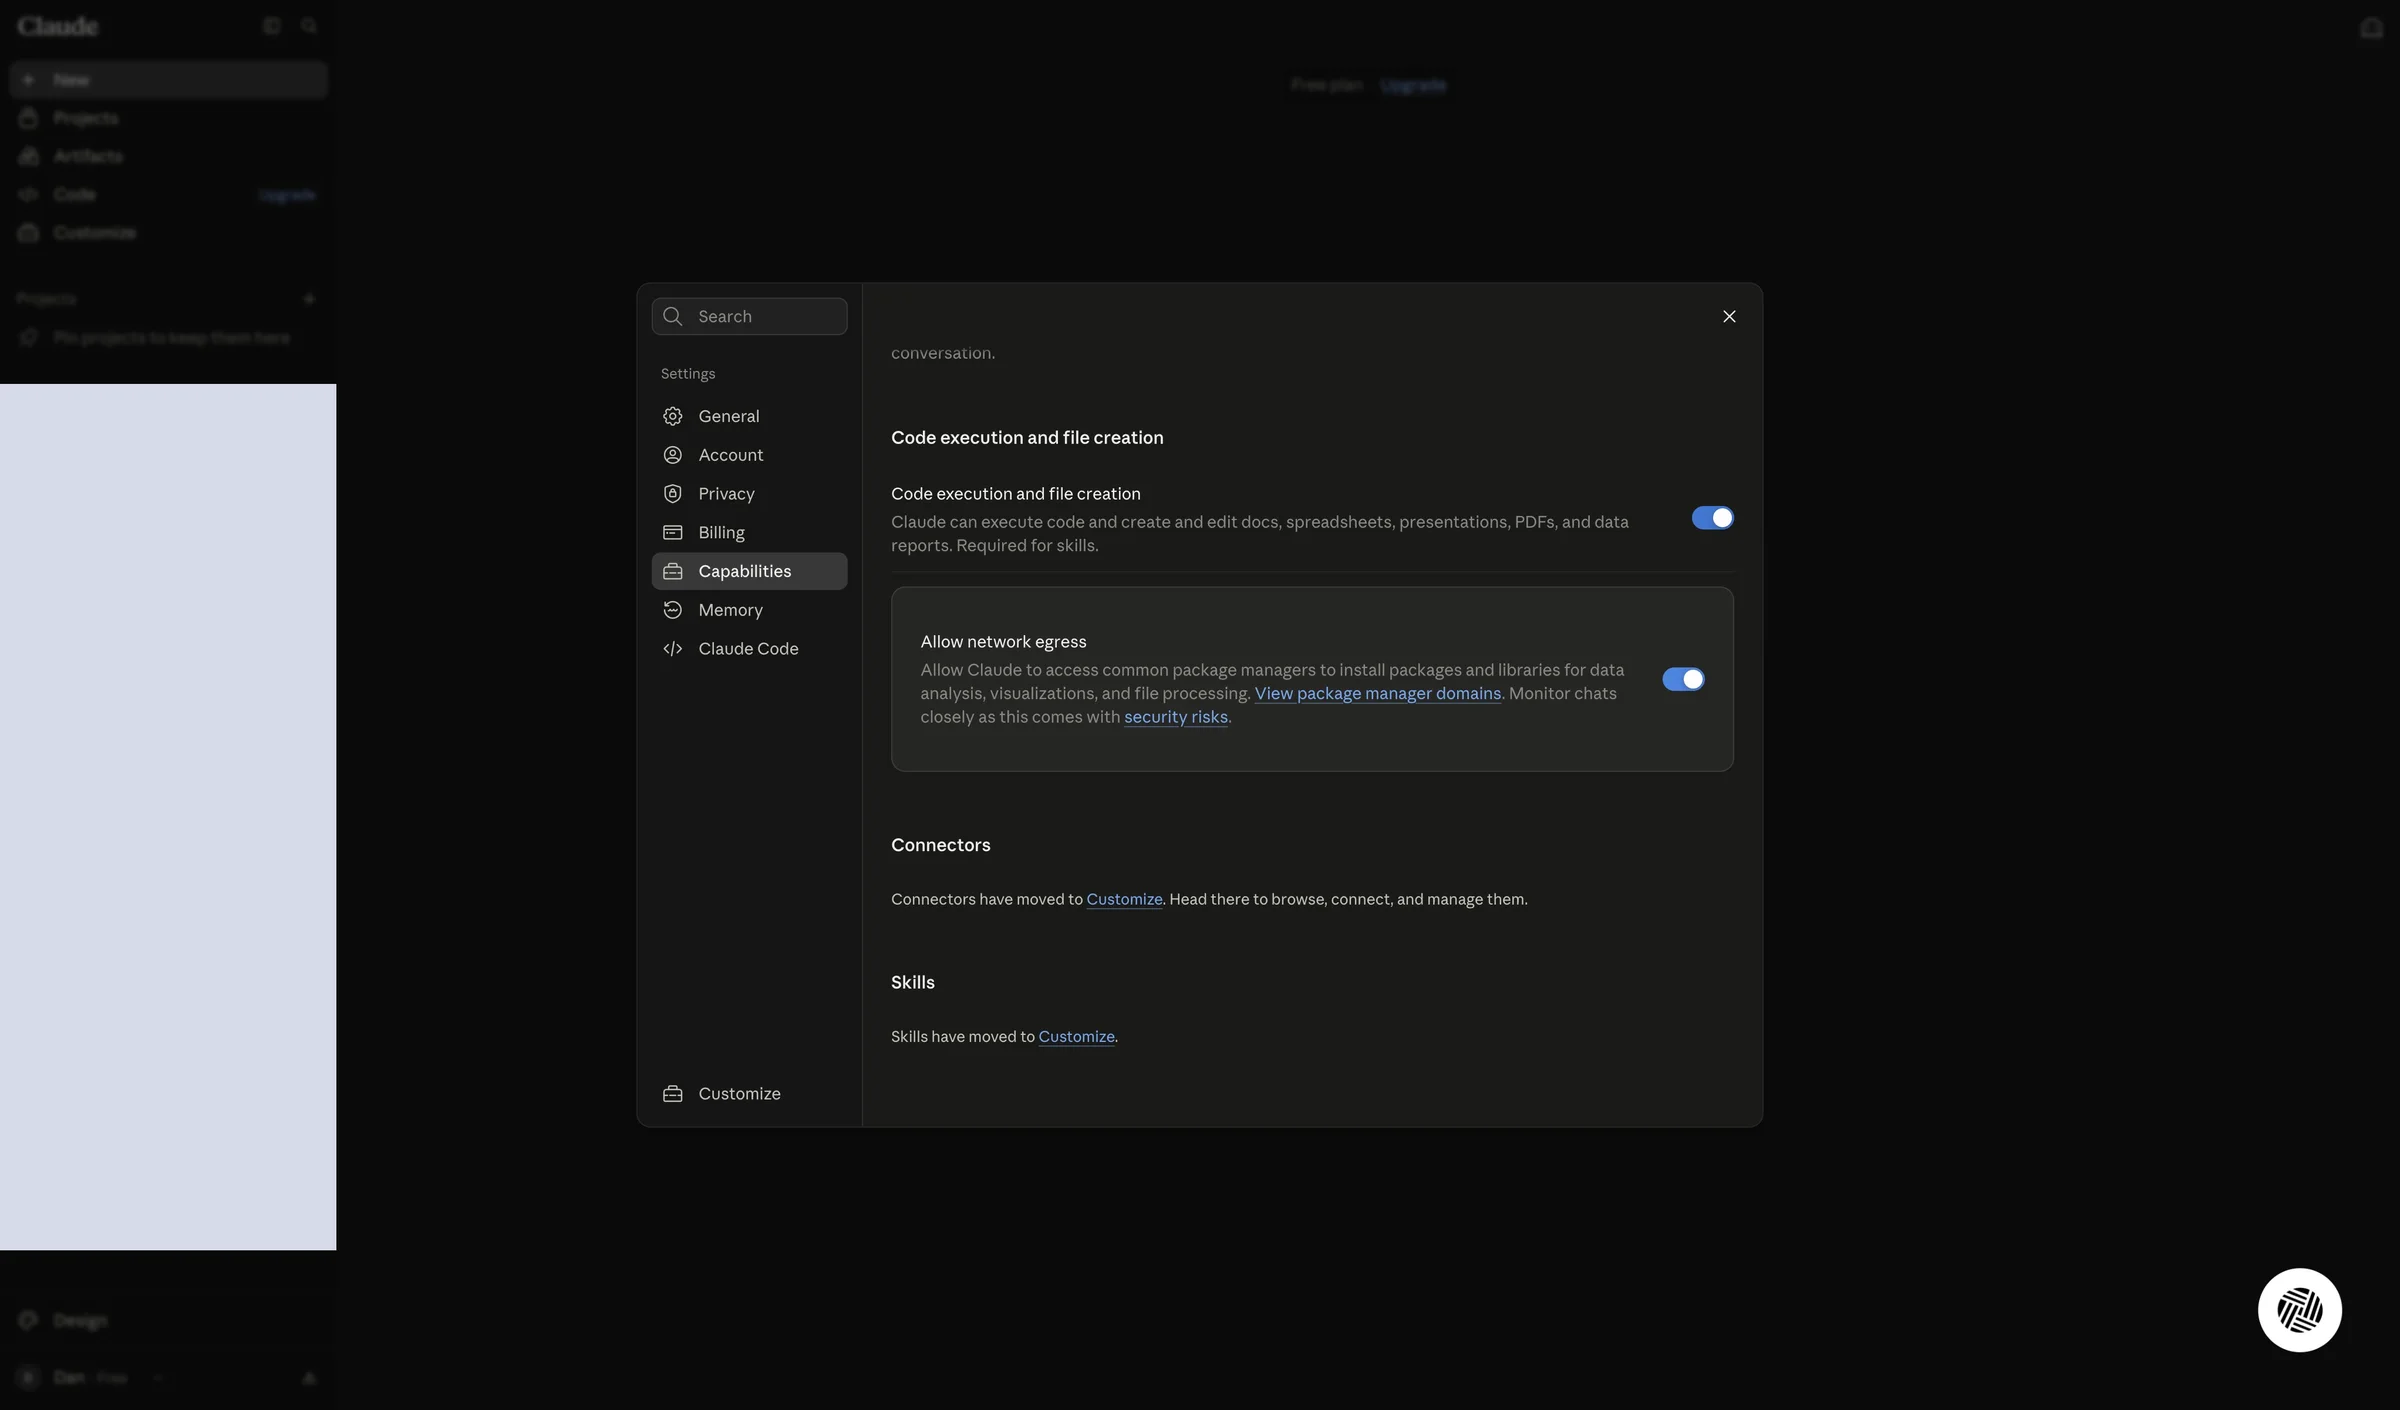
The Allow network egress switch is on.
Below the switch, in Additional allowed domains, type priority-mcp.leonai.io and click Add.
You can leave Domain allowlist on Package managers only.
Without this domain, Claude cannot reach the LeonAI server from its code environment.
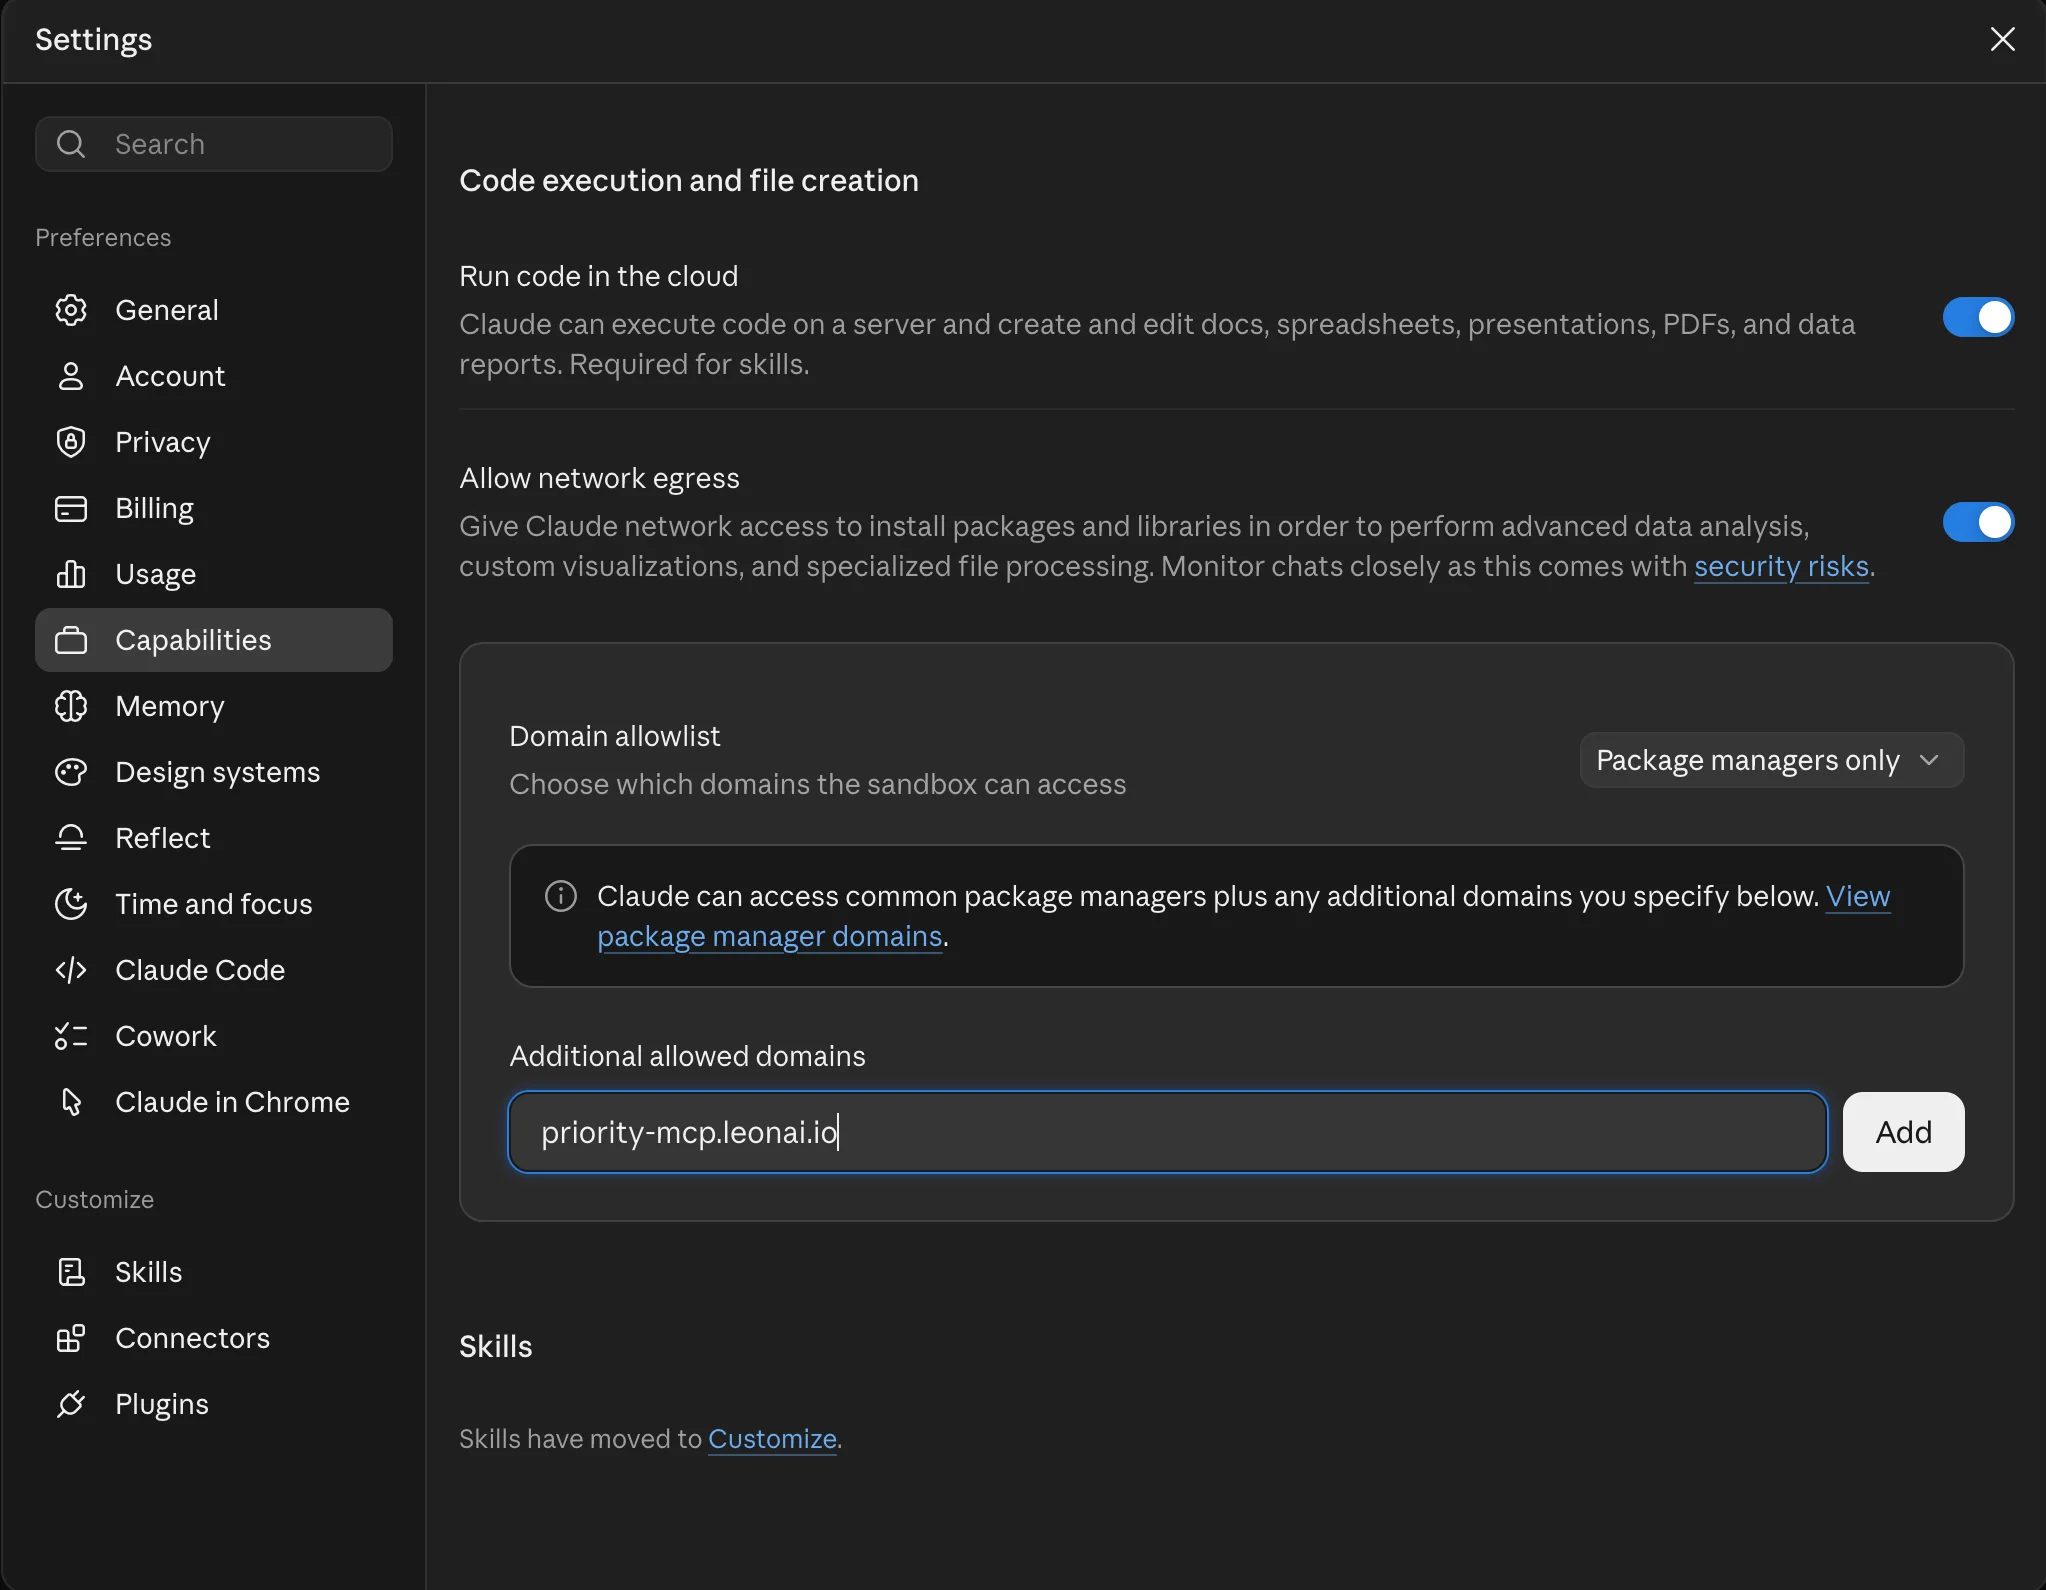
The domain priority-mcp.leonai.io appears in the list of allowed domains.
In Capabilities turn on the AI-powered artifacts switch.
According to the description on screen, this lets you build interactive apps and documents that use Claude inside the artifact.
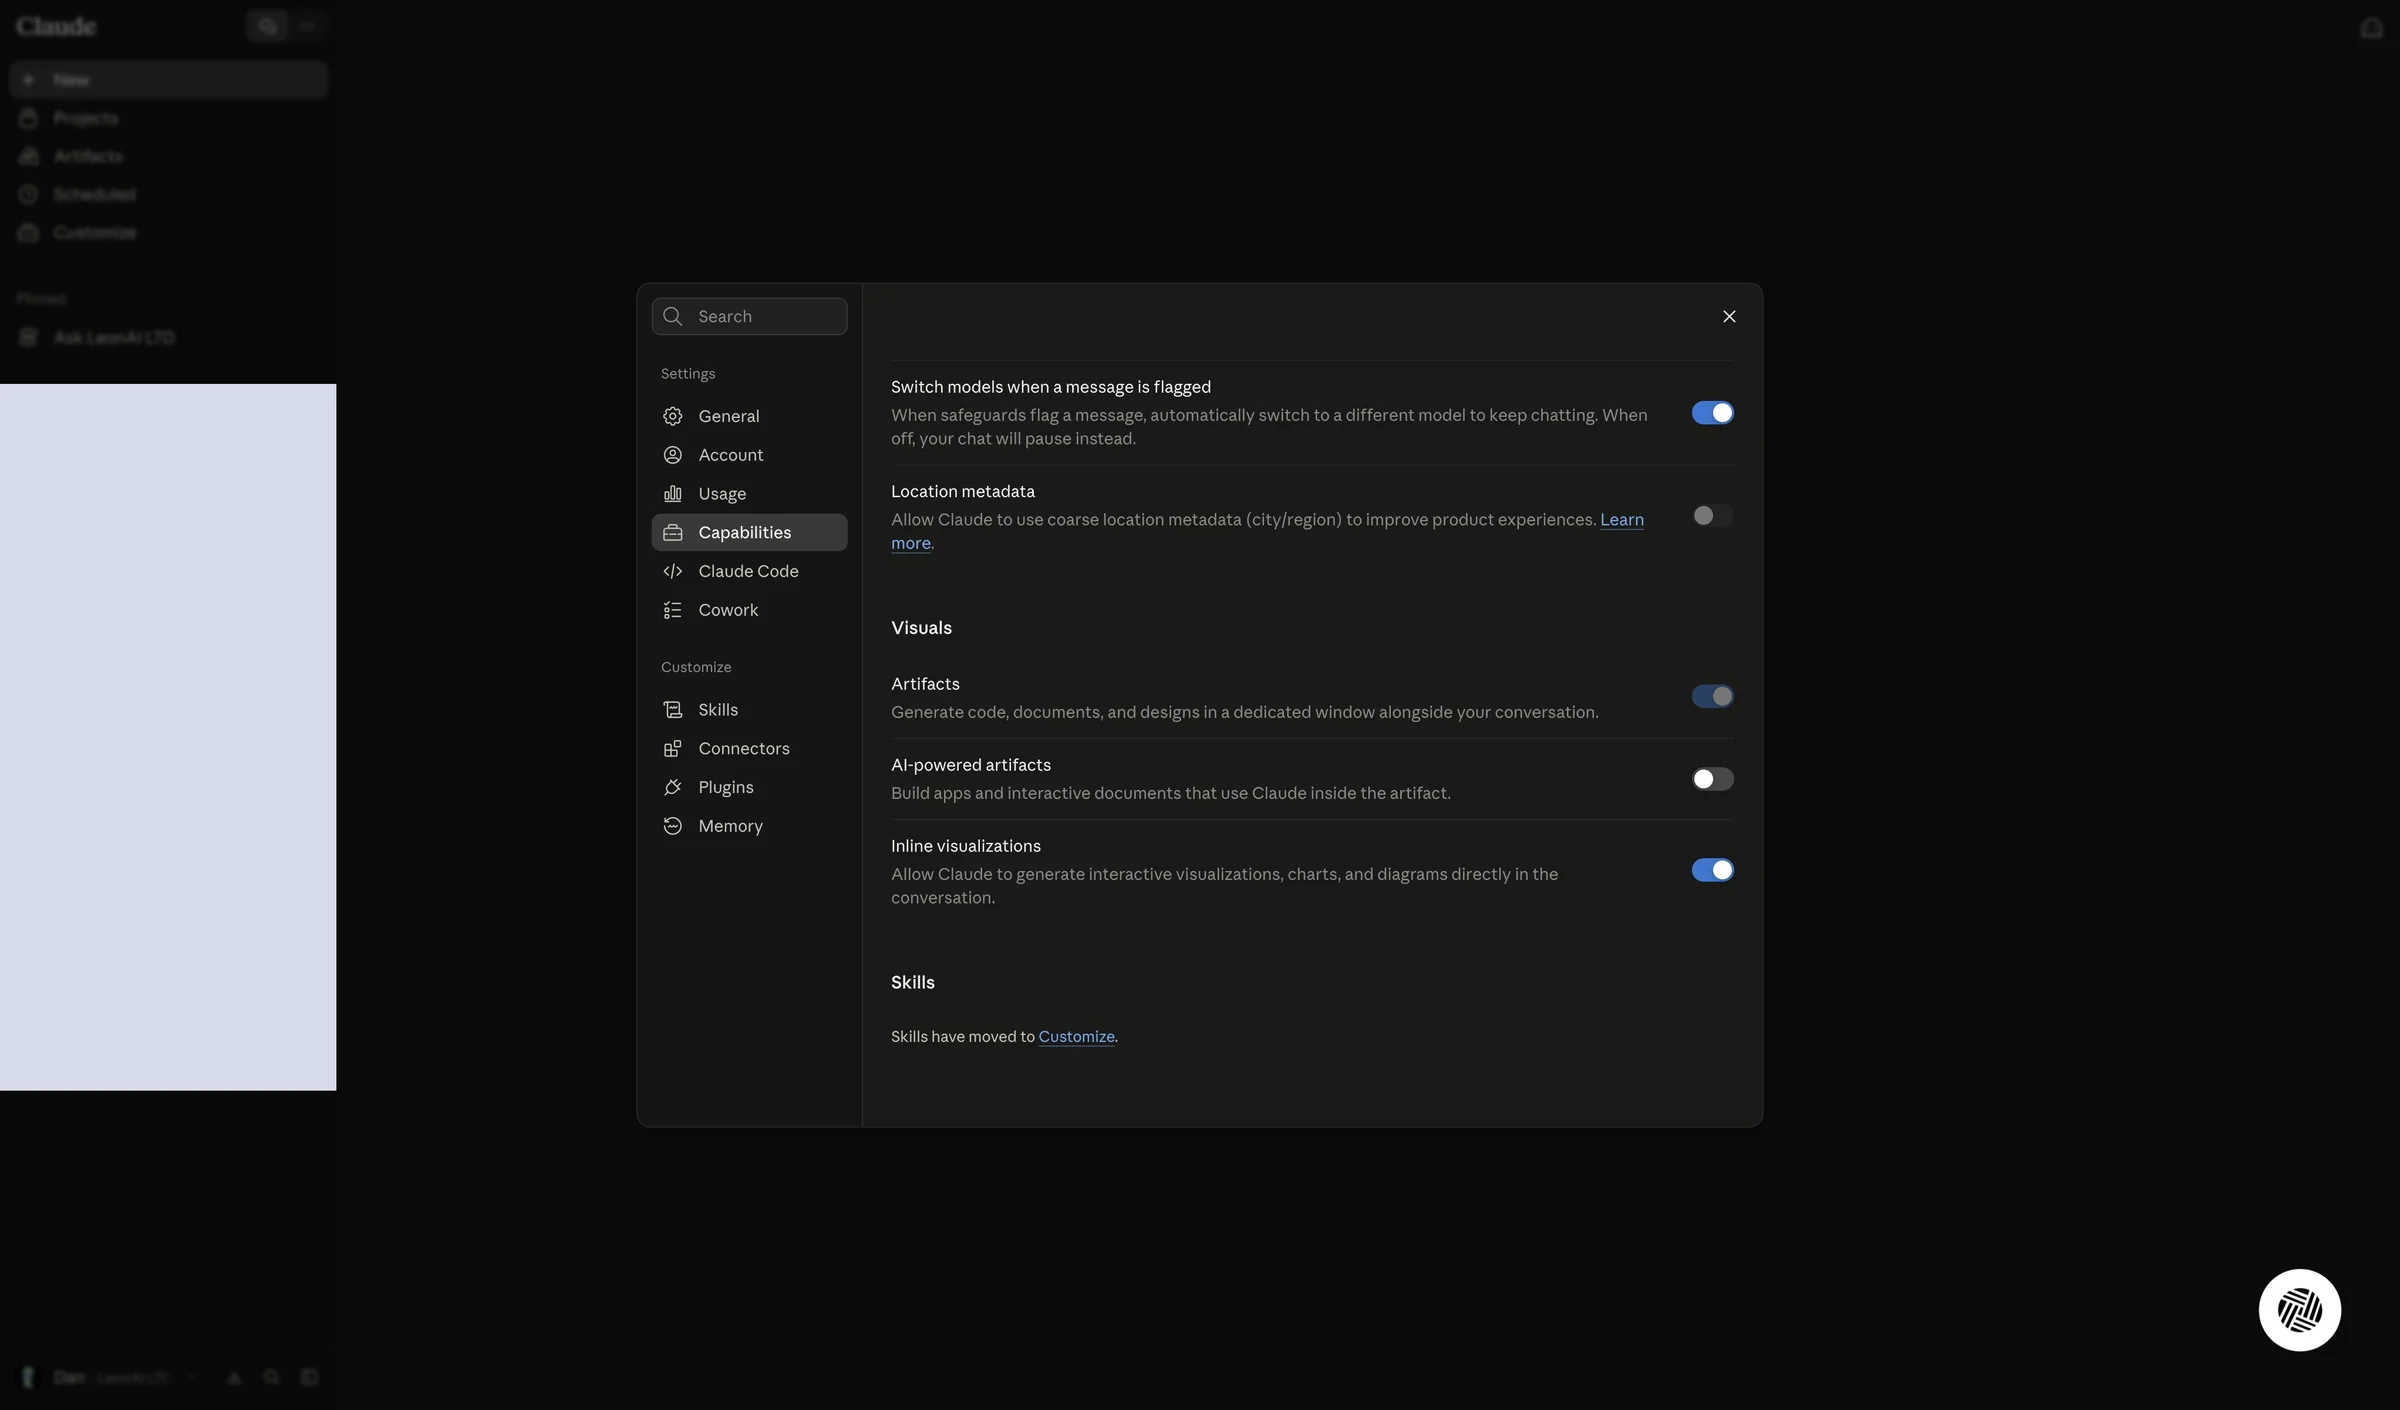
The AI-powered artifacts switch is on.
Ask Claude about your Priority data, approve the tool, and decide in advance what it may do without asking.
Start a new chat and ask about your data, for example:
Claude looks for the right LeonAI tools and runs them — for example Query Table to fetch and filter records.
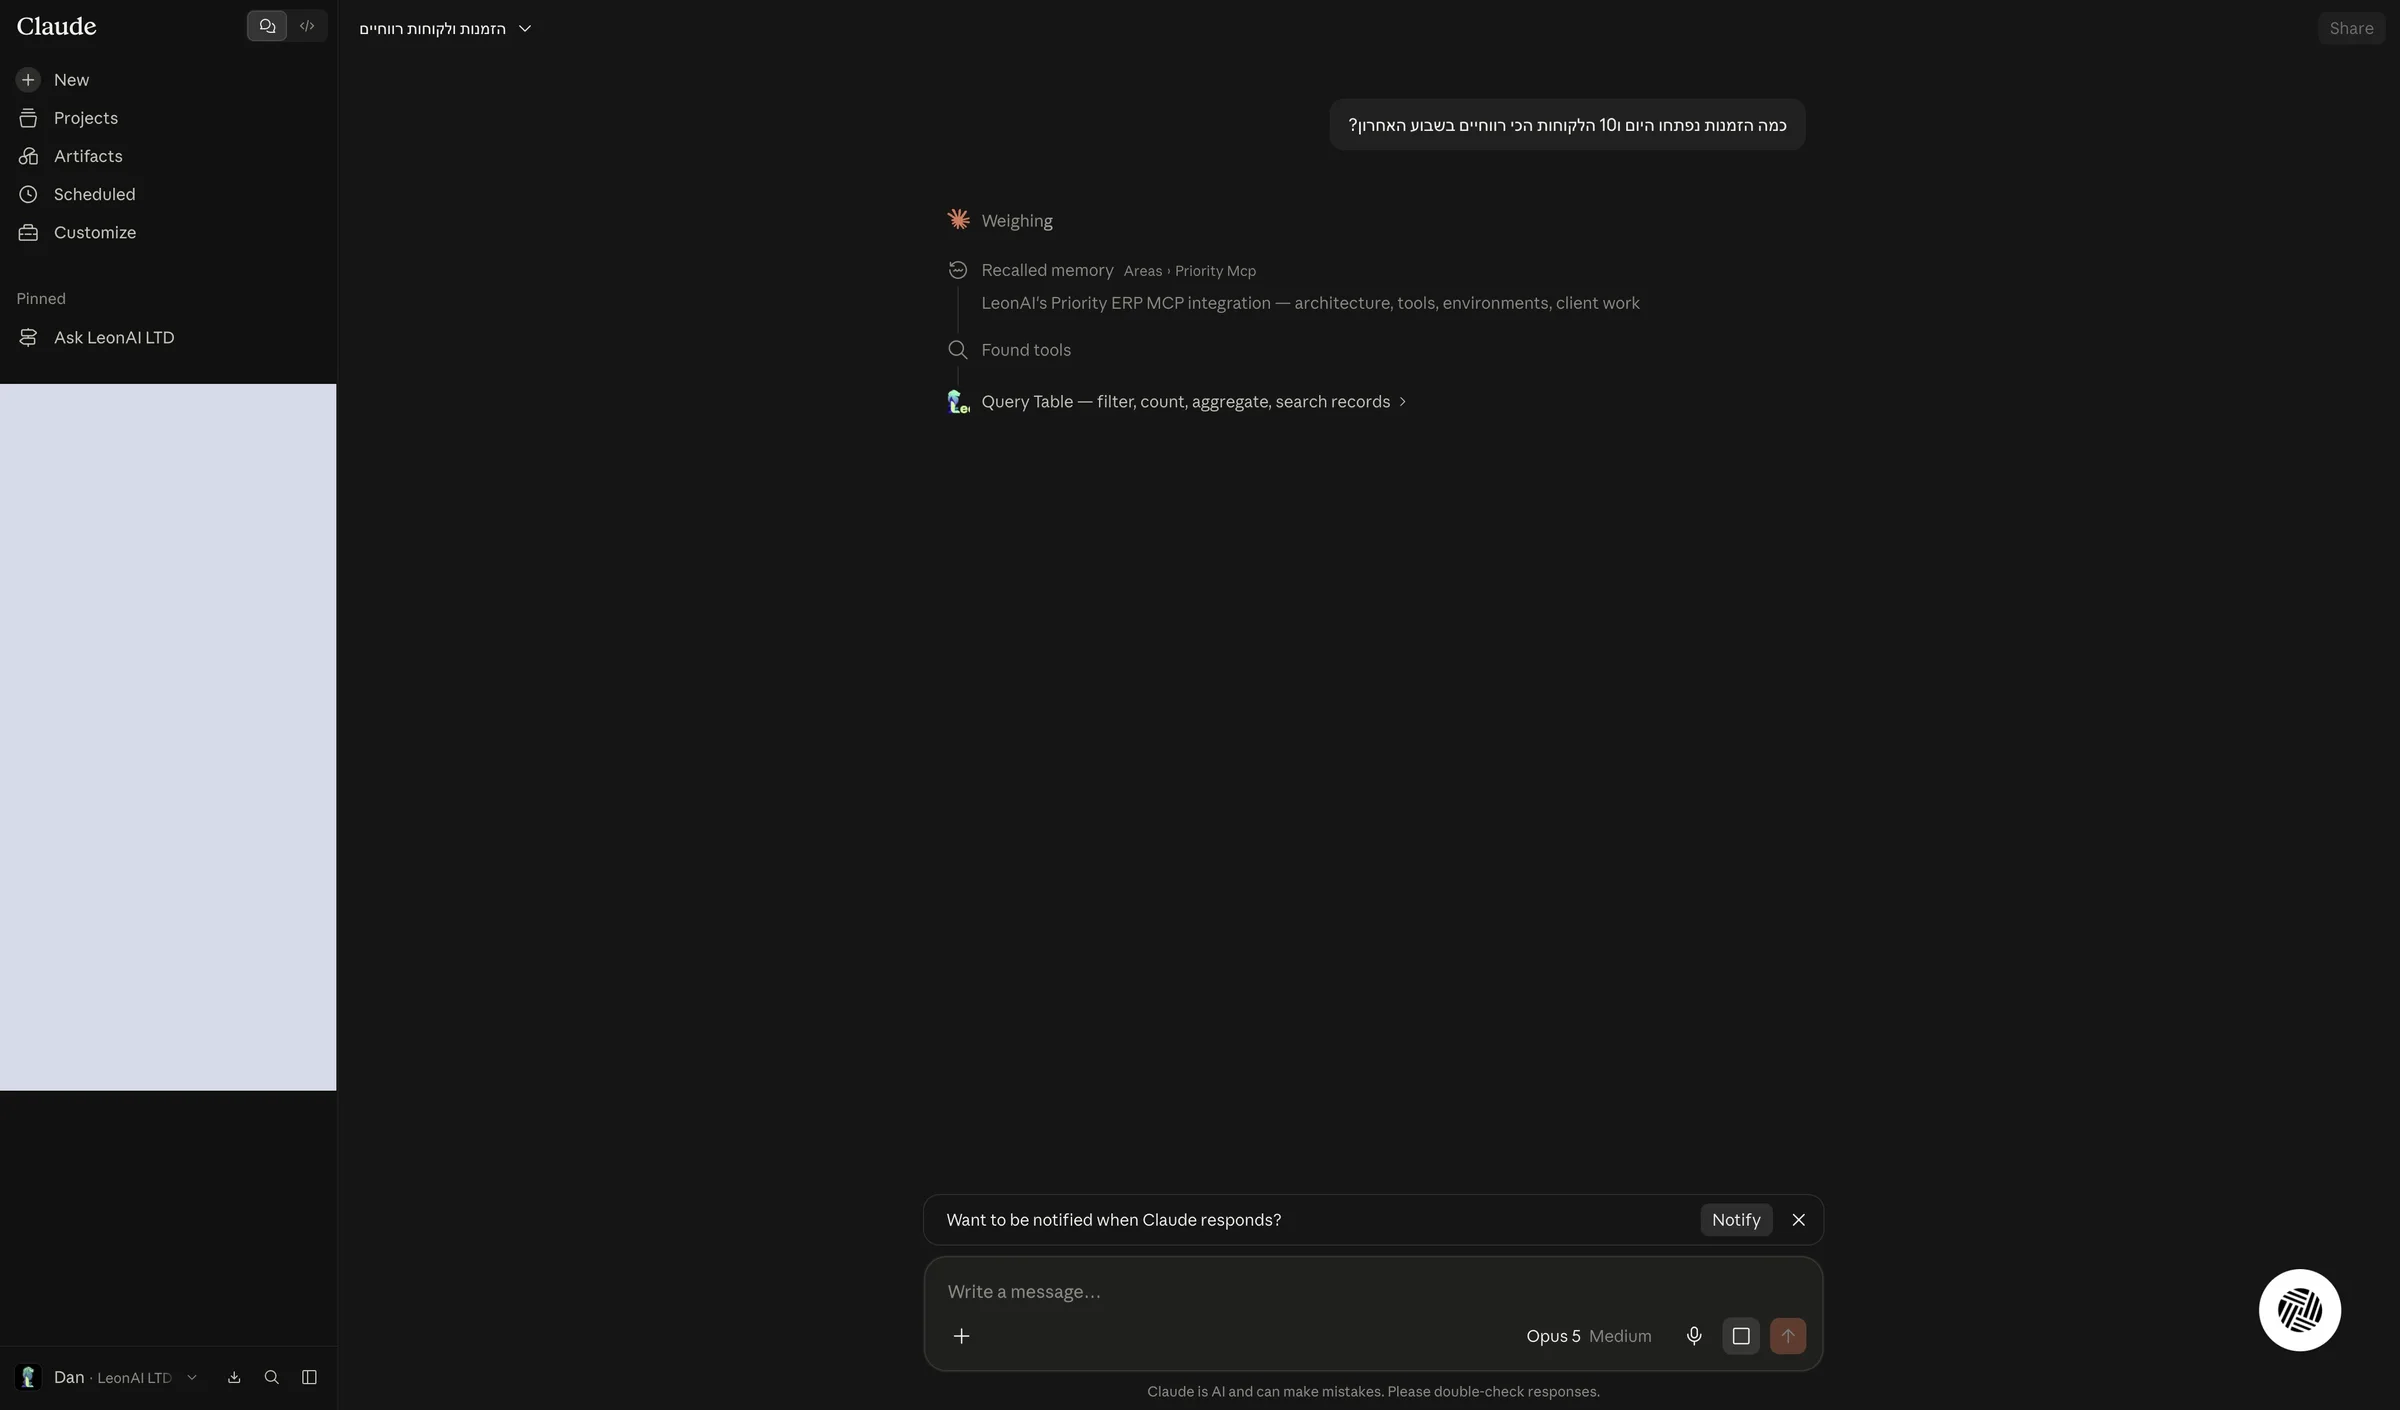
Claude shows that it is using a LeonAI Priority tool.
When a permission request for a LeonAI tool appears, choose Always allow or Allow once.
Claude asks for approval the first time it uses each tool. Always allow skips the question next time; Allow once approves only the current action.
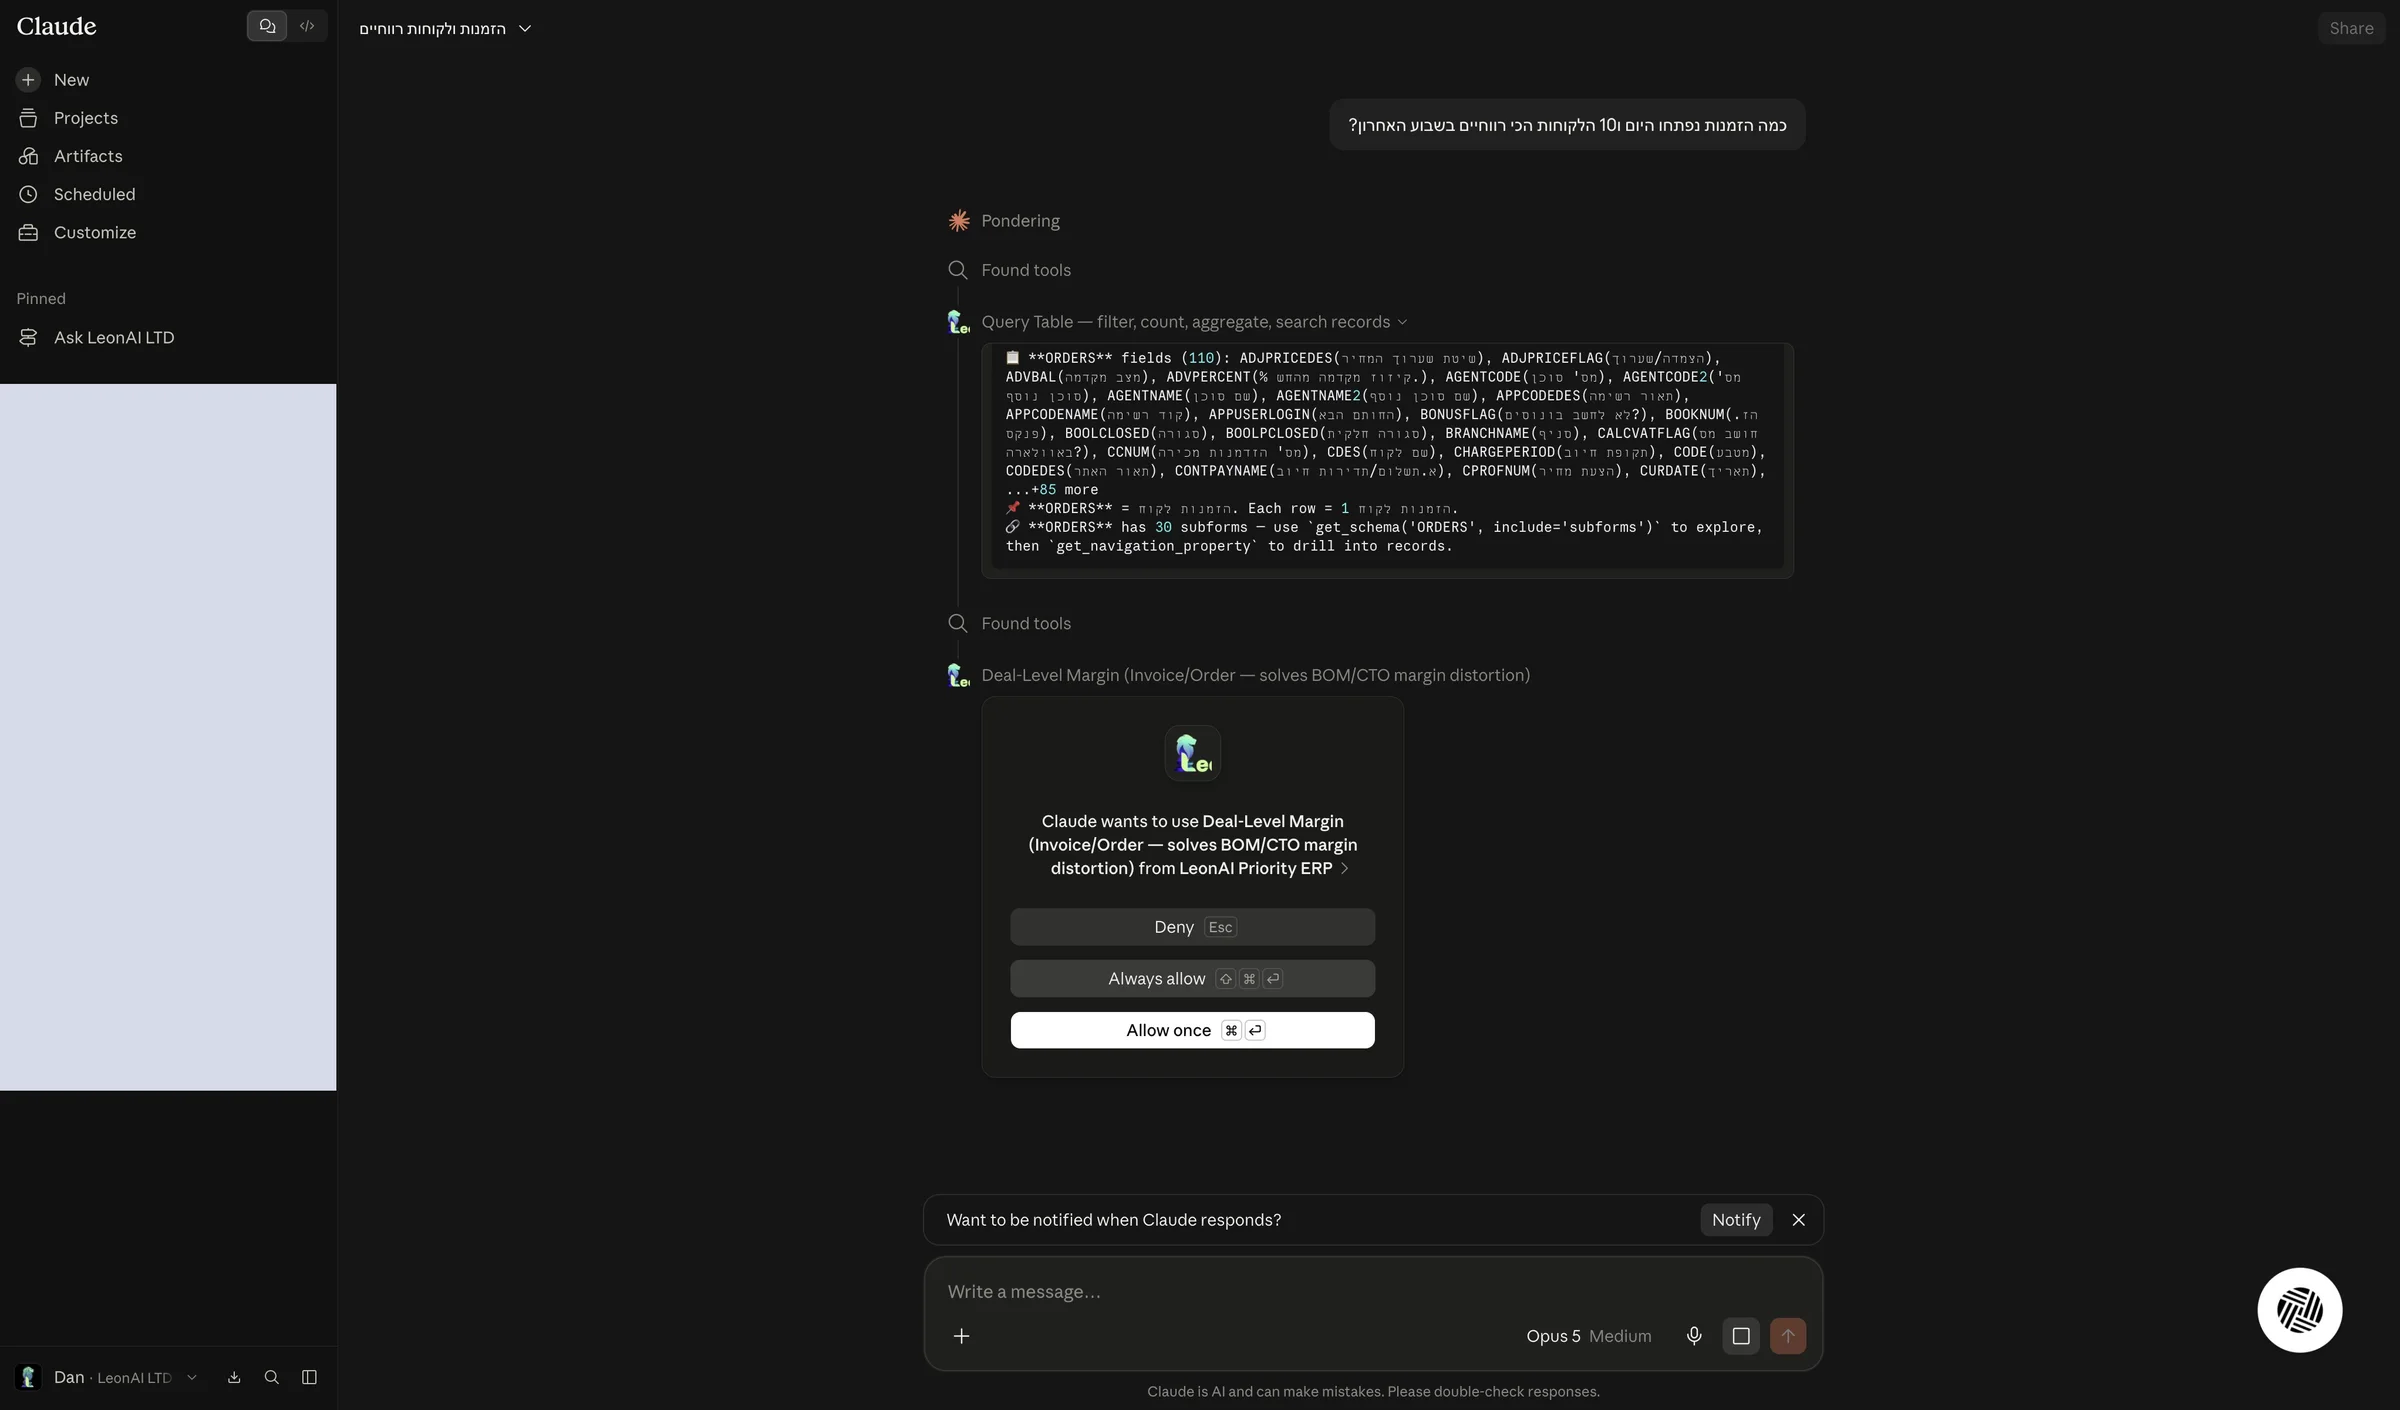
Claude ran a LeonAI Priority tool and returned data from Priority.
In Settings › Connectors, on the LeonAI connector, click the selector next to Read-only tools and choose Always allow.
The read tools only fetch data, so approving the whole group in advance saves repeated permission requests. Each tool has three options: always allow (✓), ask for approval (✋) or block (⊘), and you can still set a different permission for each tool.
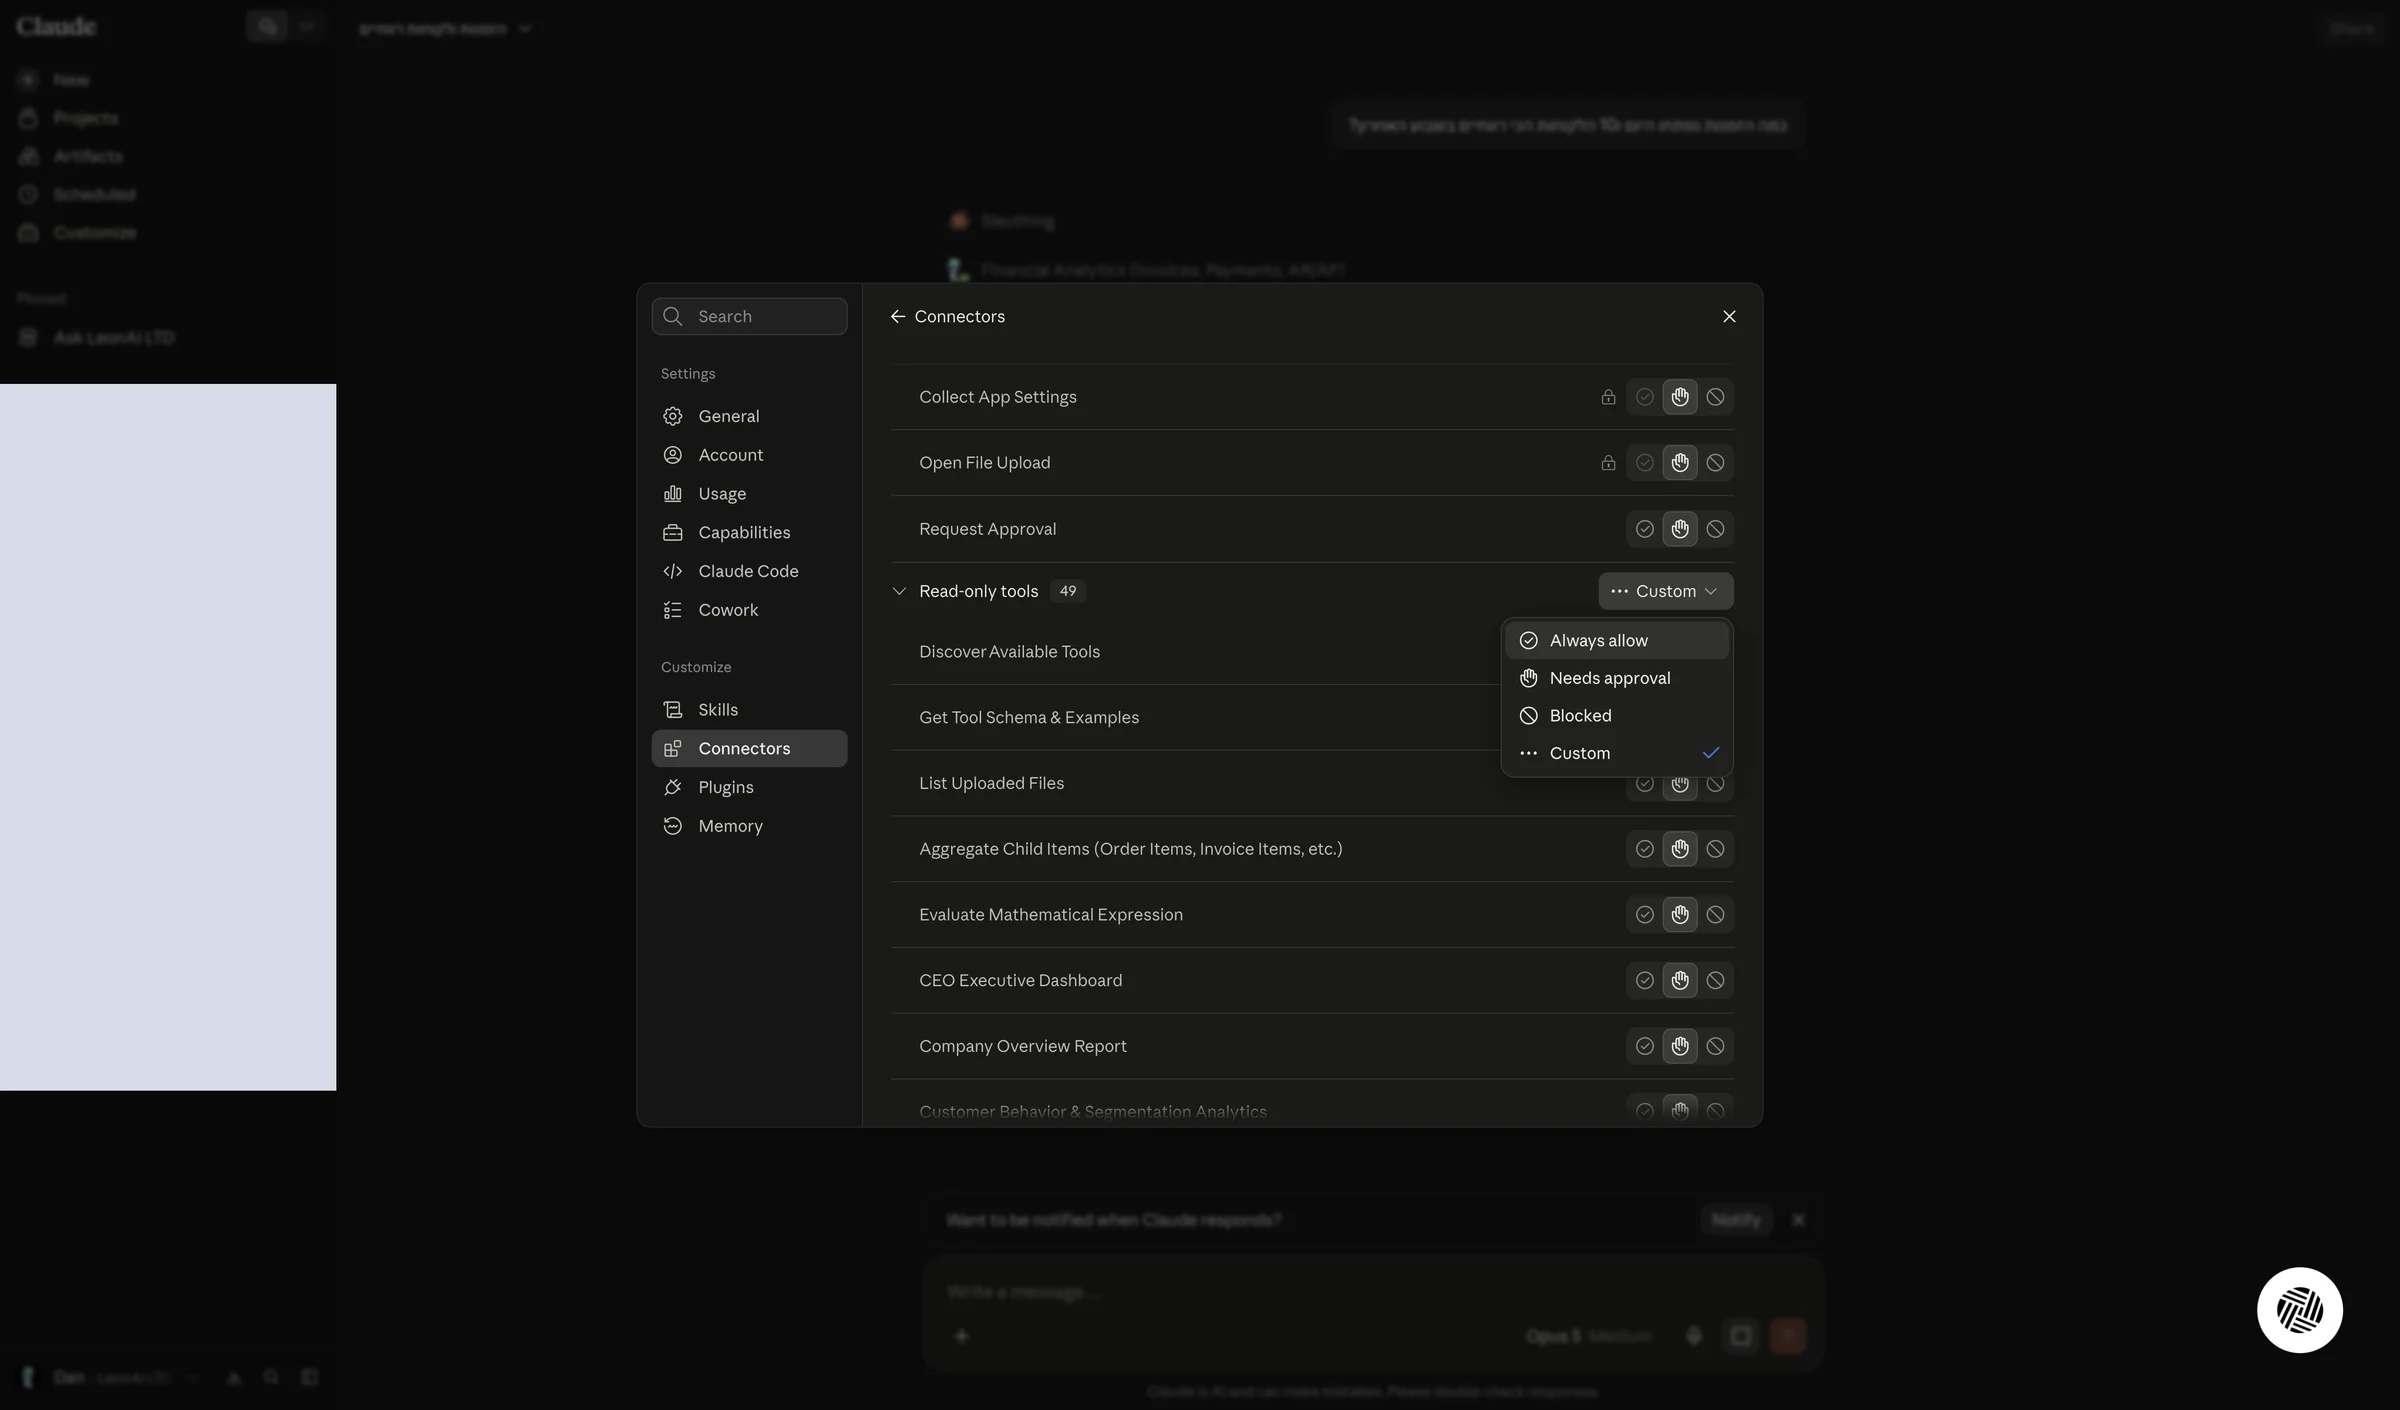
The Read-only tools group is set to Always allow.
On the same screen, the Write/delete tools group is set to Needs approval. Some of its tools are marked with a lock.
The tools in this group can create or update data in Priority, for example Create Priority ERP Entity or Execute a Procedure on a Record. With Needs approval, Claude asks for your approval before every such action. A locked tool's permission cannot be changed.
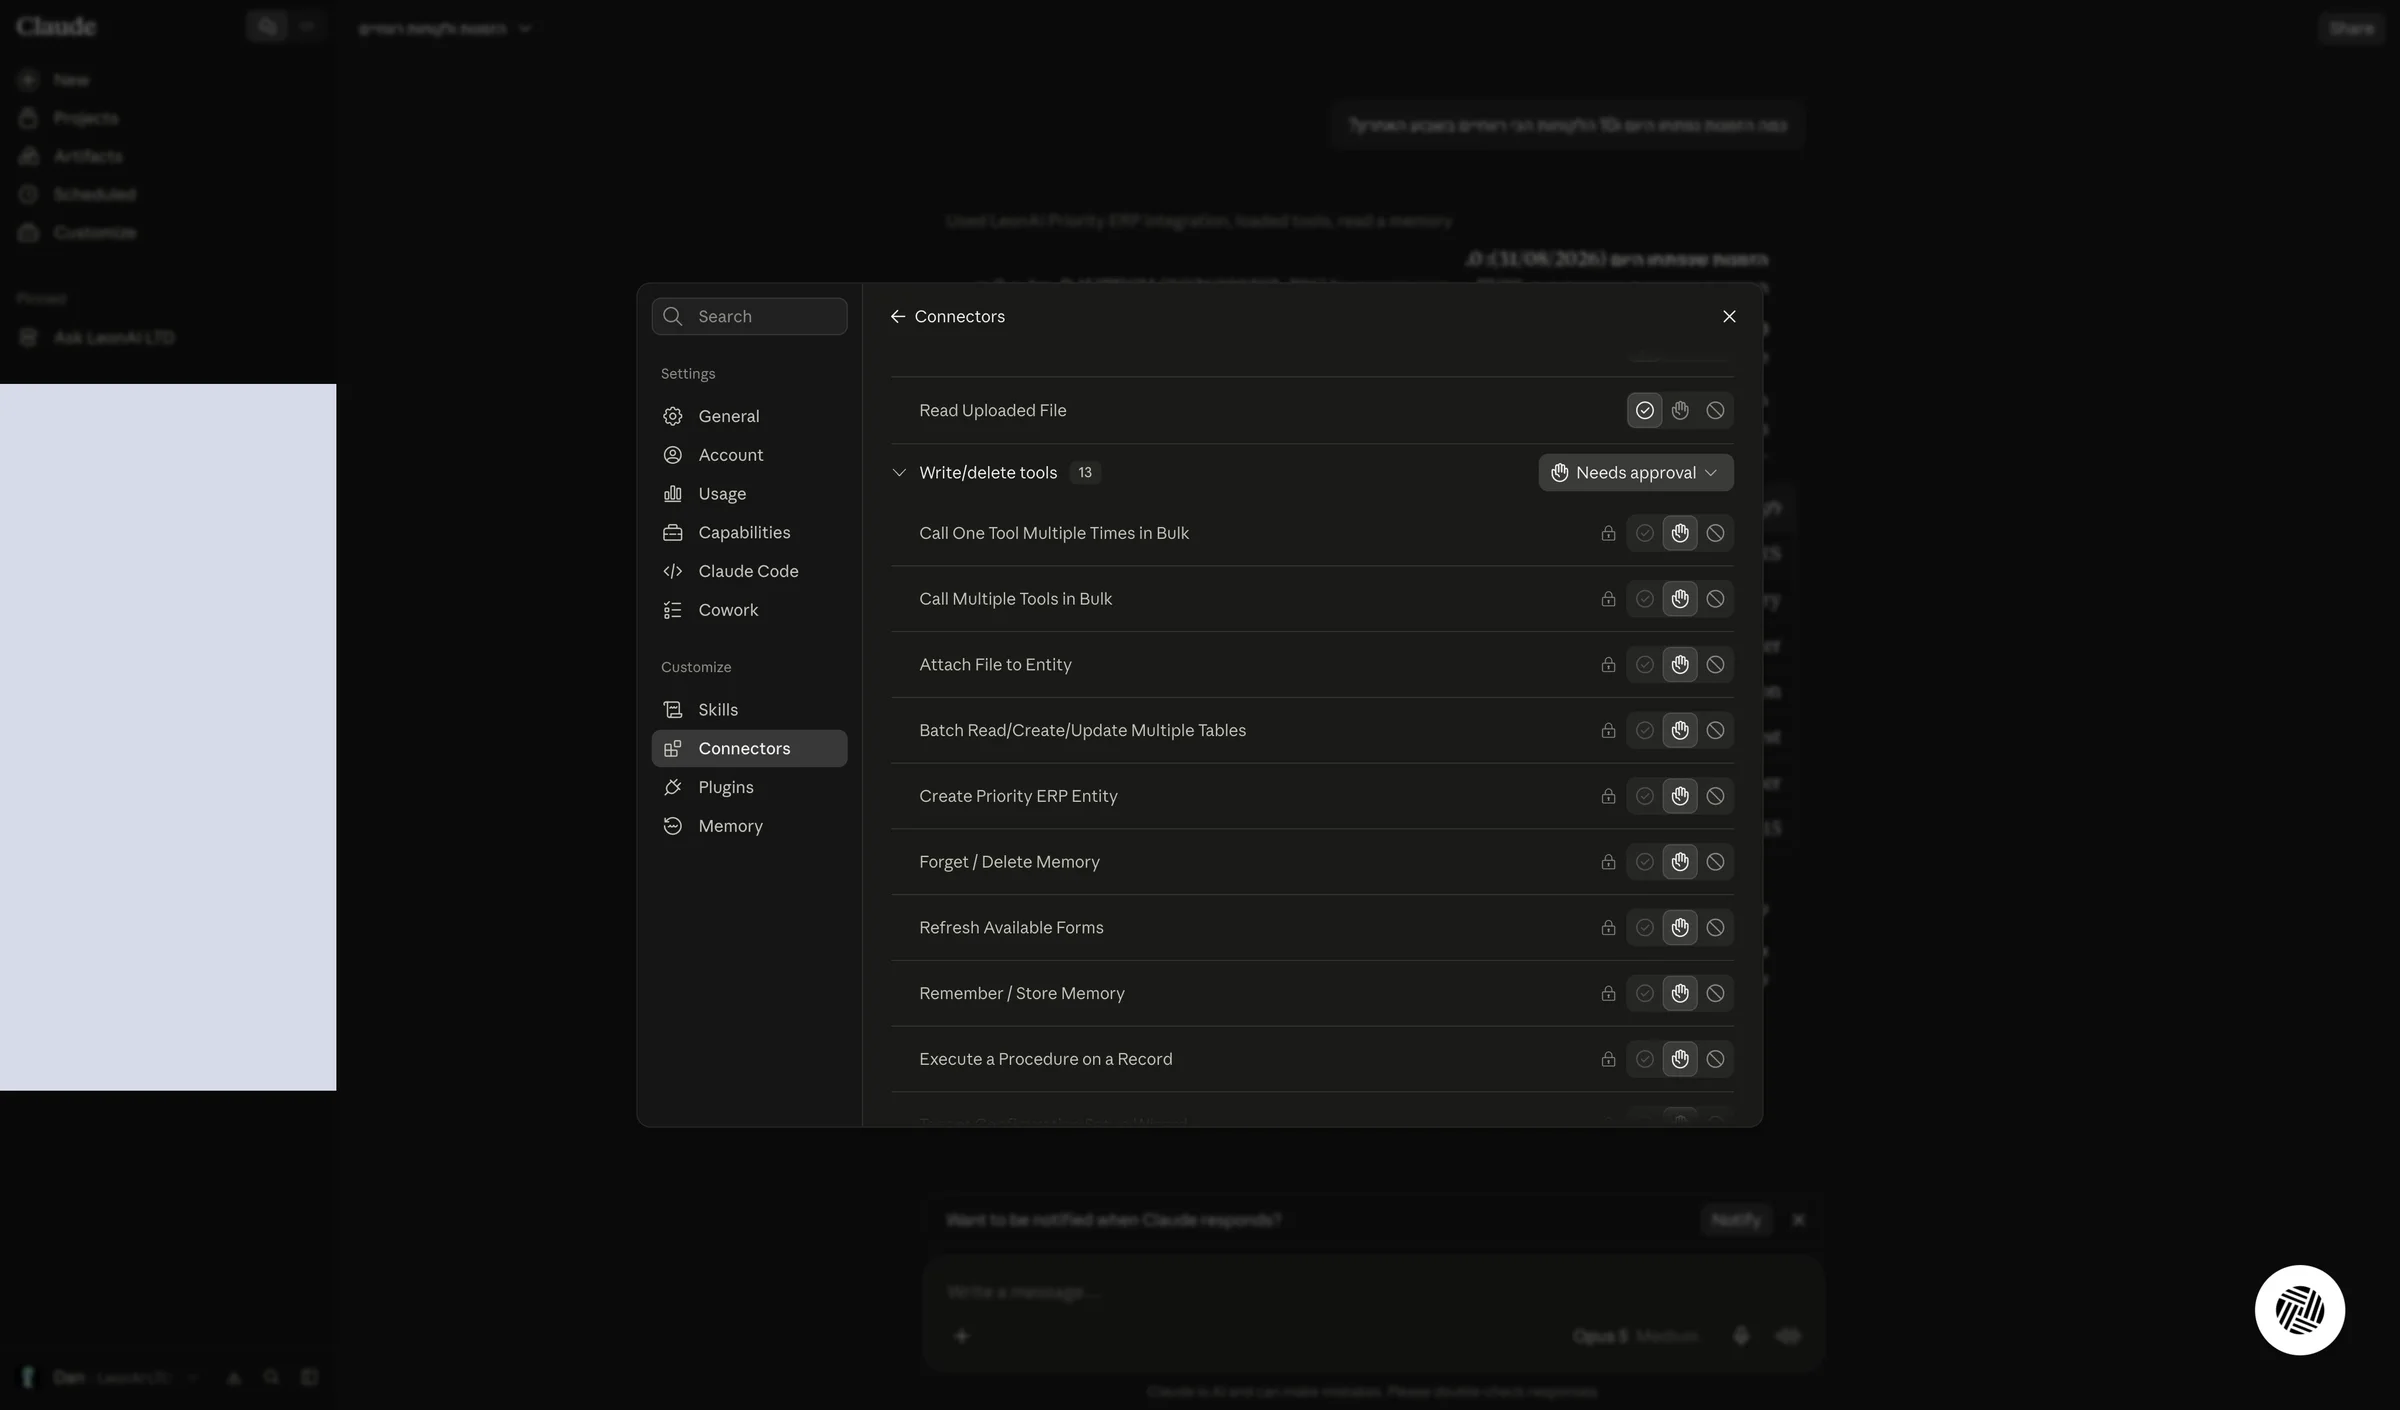
You checked which permission is set for the write tools, and what it means.
Open the admin portal from the welcome email, go through the getting-started list, and move to a paid plan when you are ready.
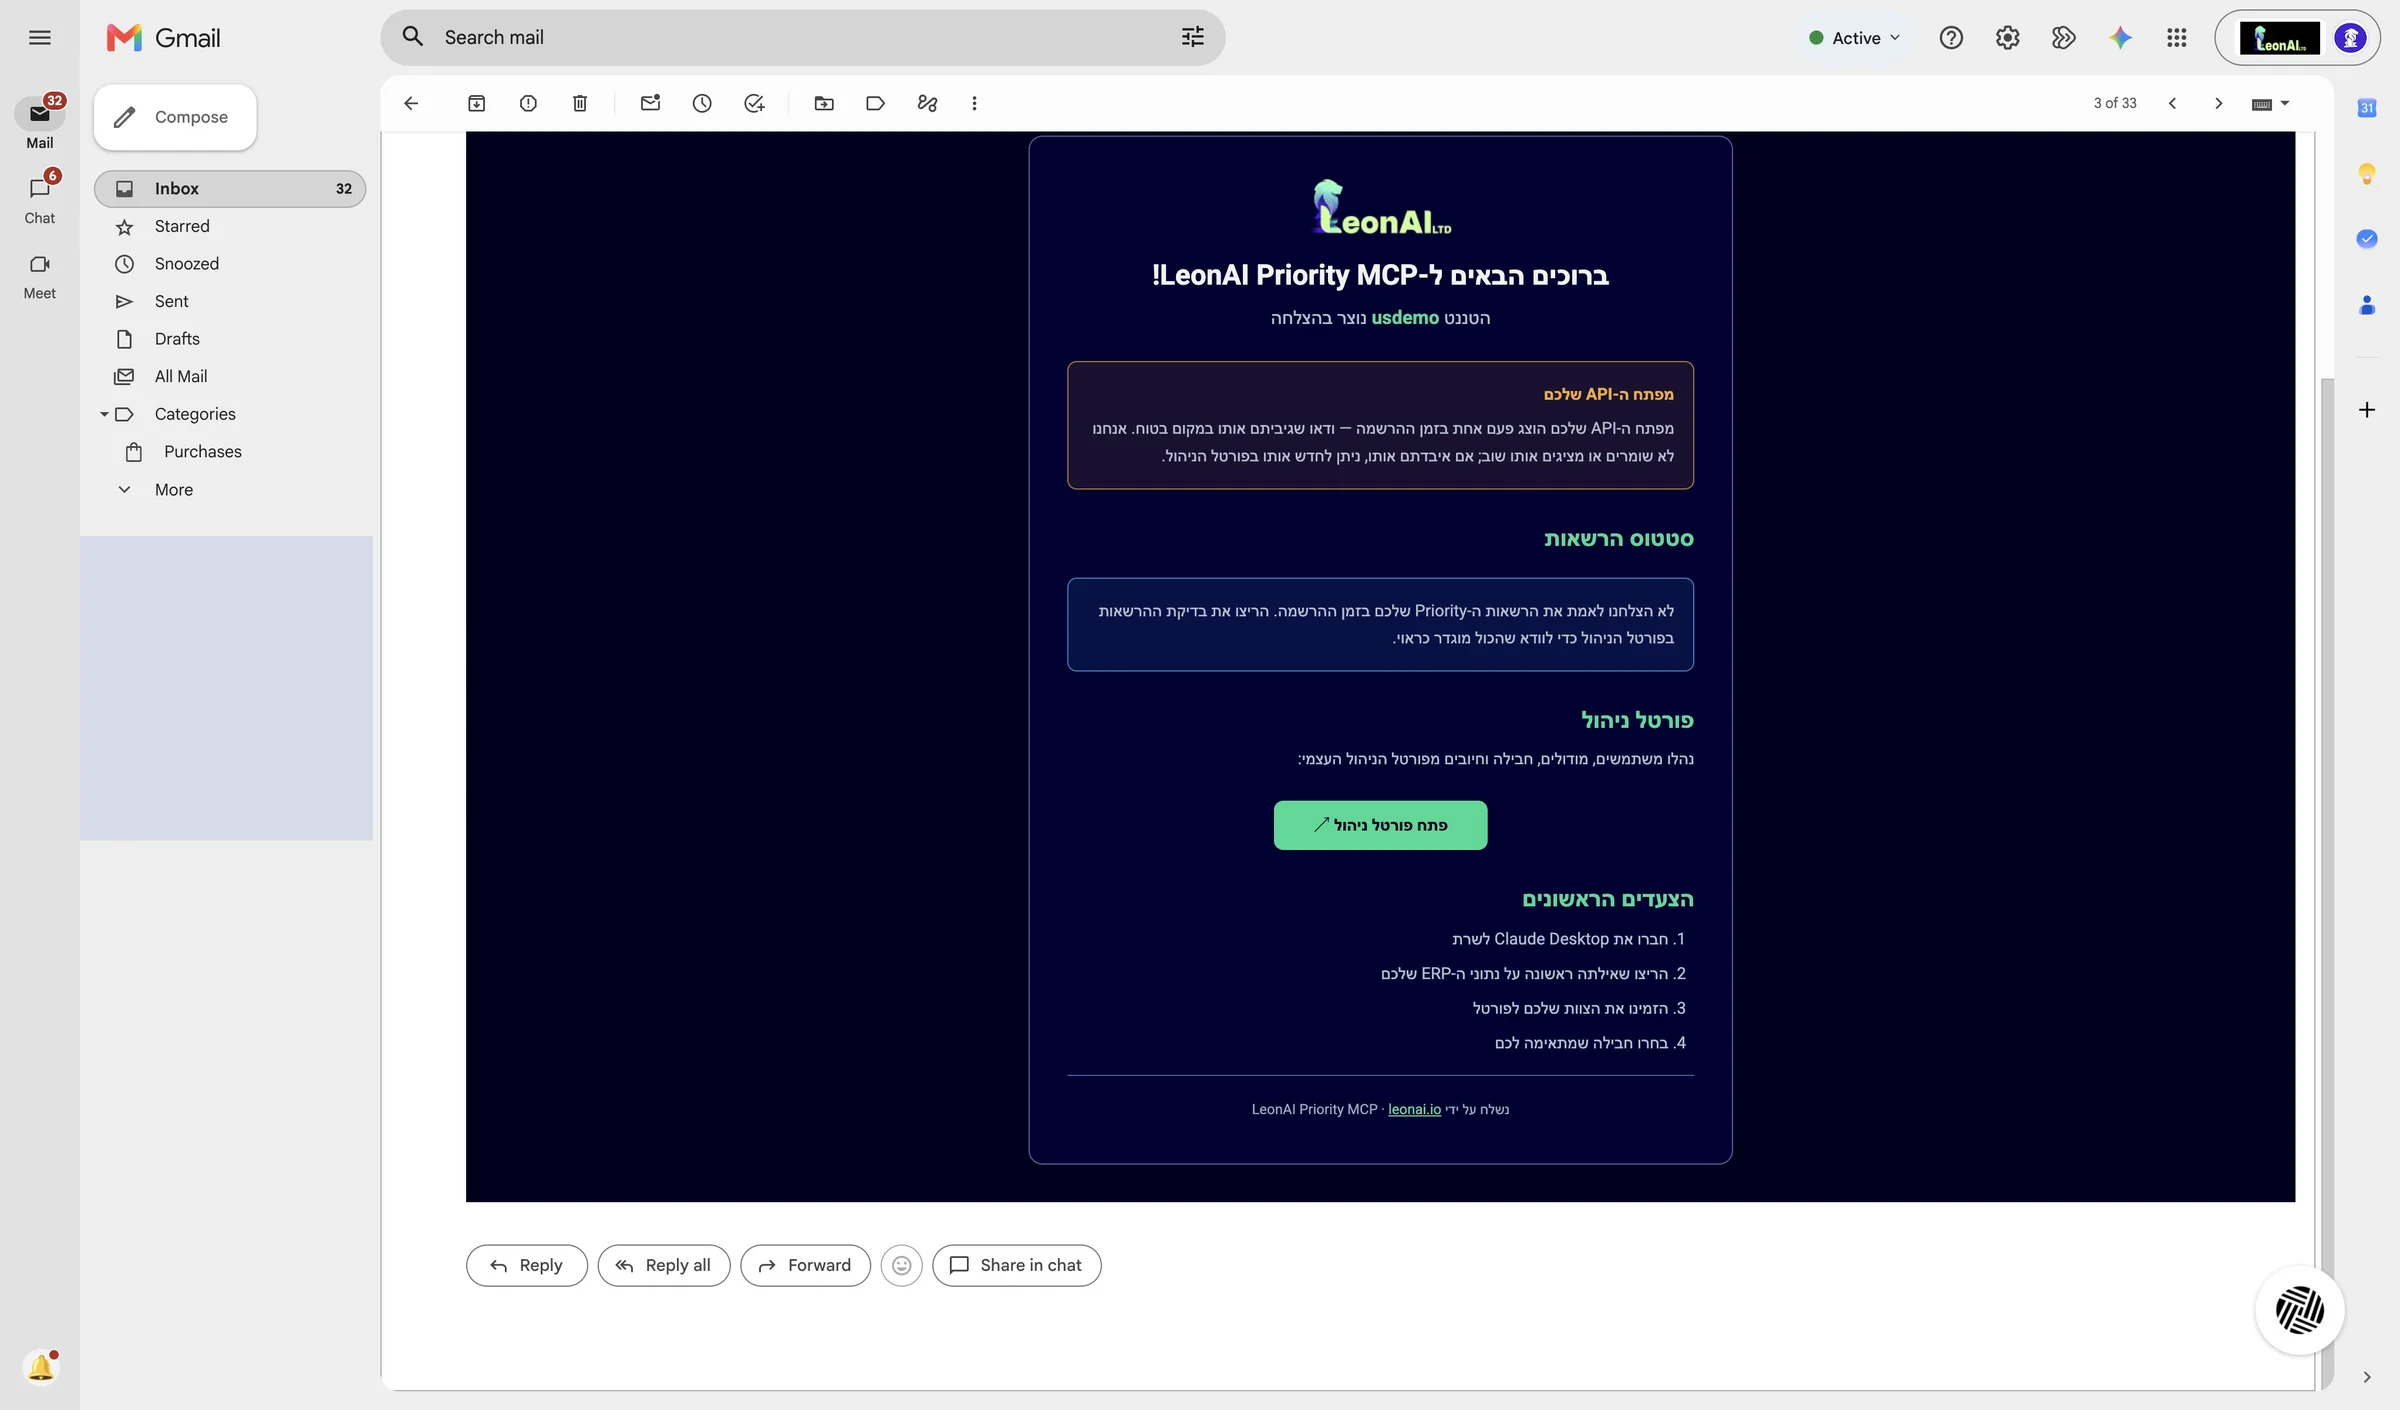
In your inbox, open the email Welcome to LeonAI Priority MCP and click Open admin portal.
In the portal you manage users, modules, your plan and billing. The email also has a “First steps” list: connect Claude, run a first query, invite your team and choose a plan.
The admin portal is open on the Overview screen.
On the Overview screen, check the Getting started list and the trial end date. If you like, turn on Enable AI-powered capabilities (optional).
AI capabilities are off by default. Turning them on sends some of the data to Google's Gemini service for processing, outside Israel, for example to summarize long results. The rest of the service stays in Israel.
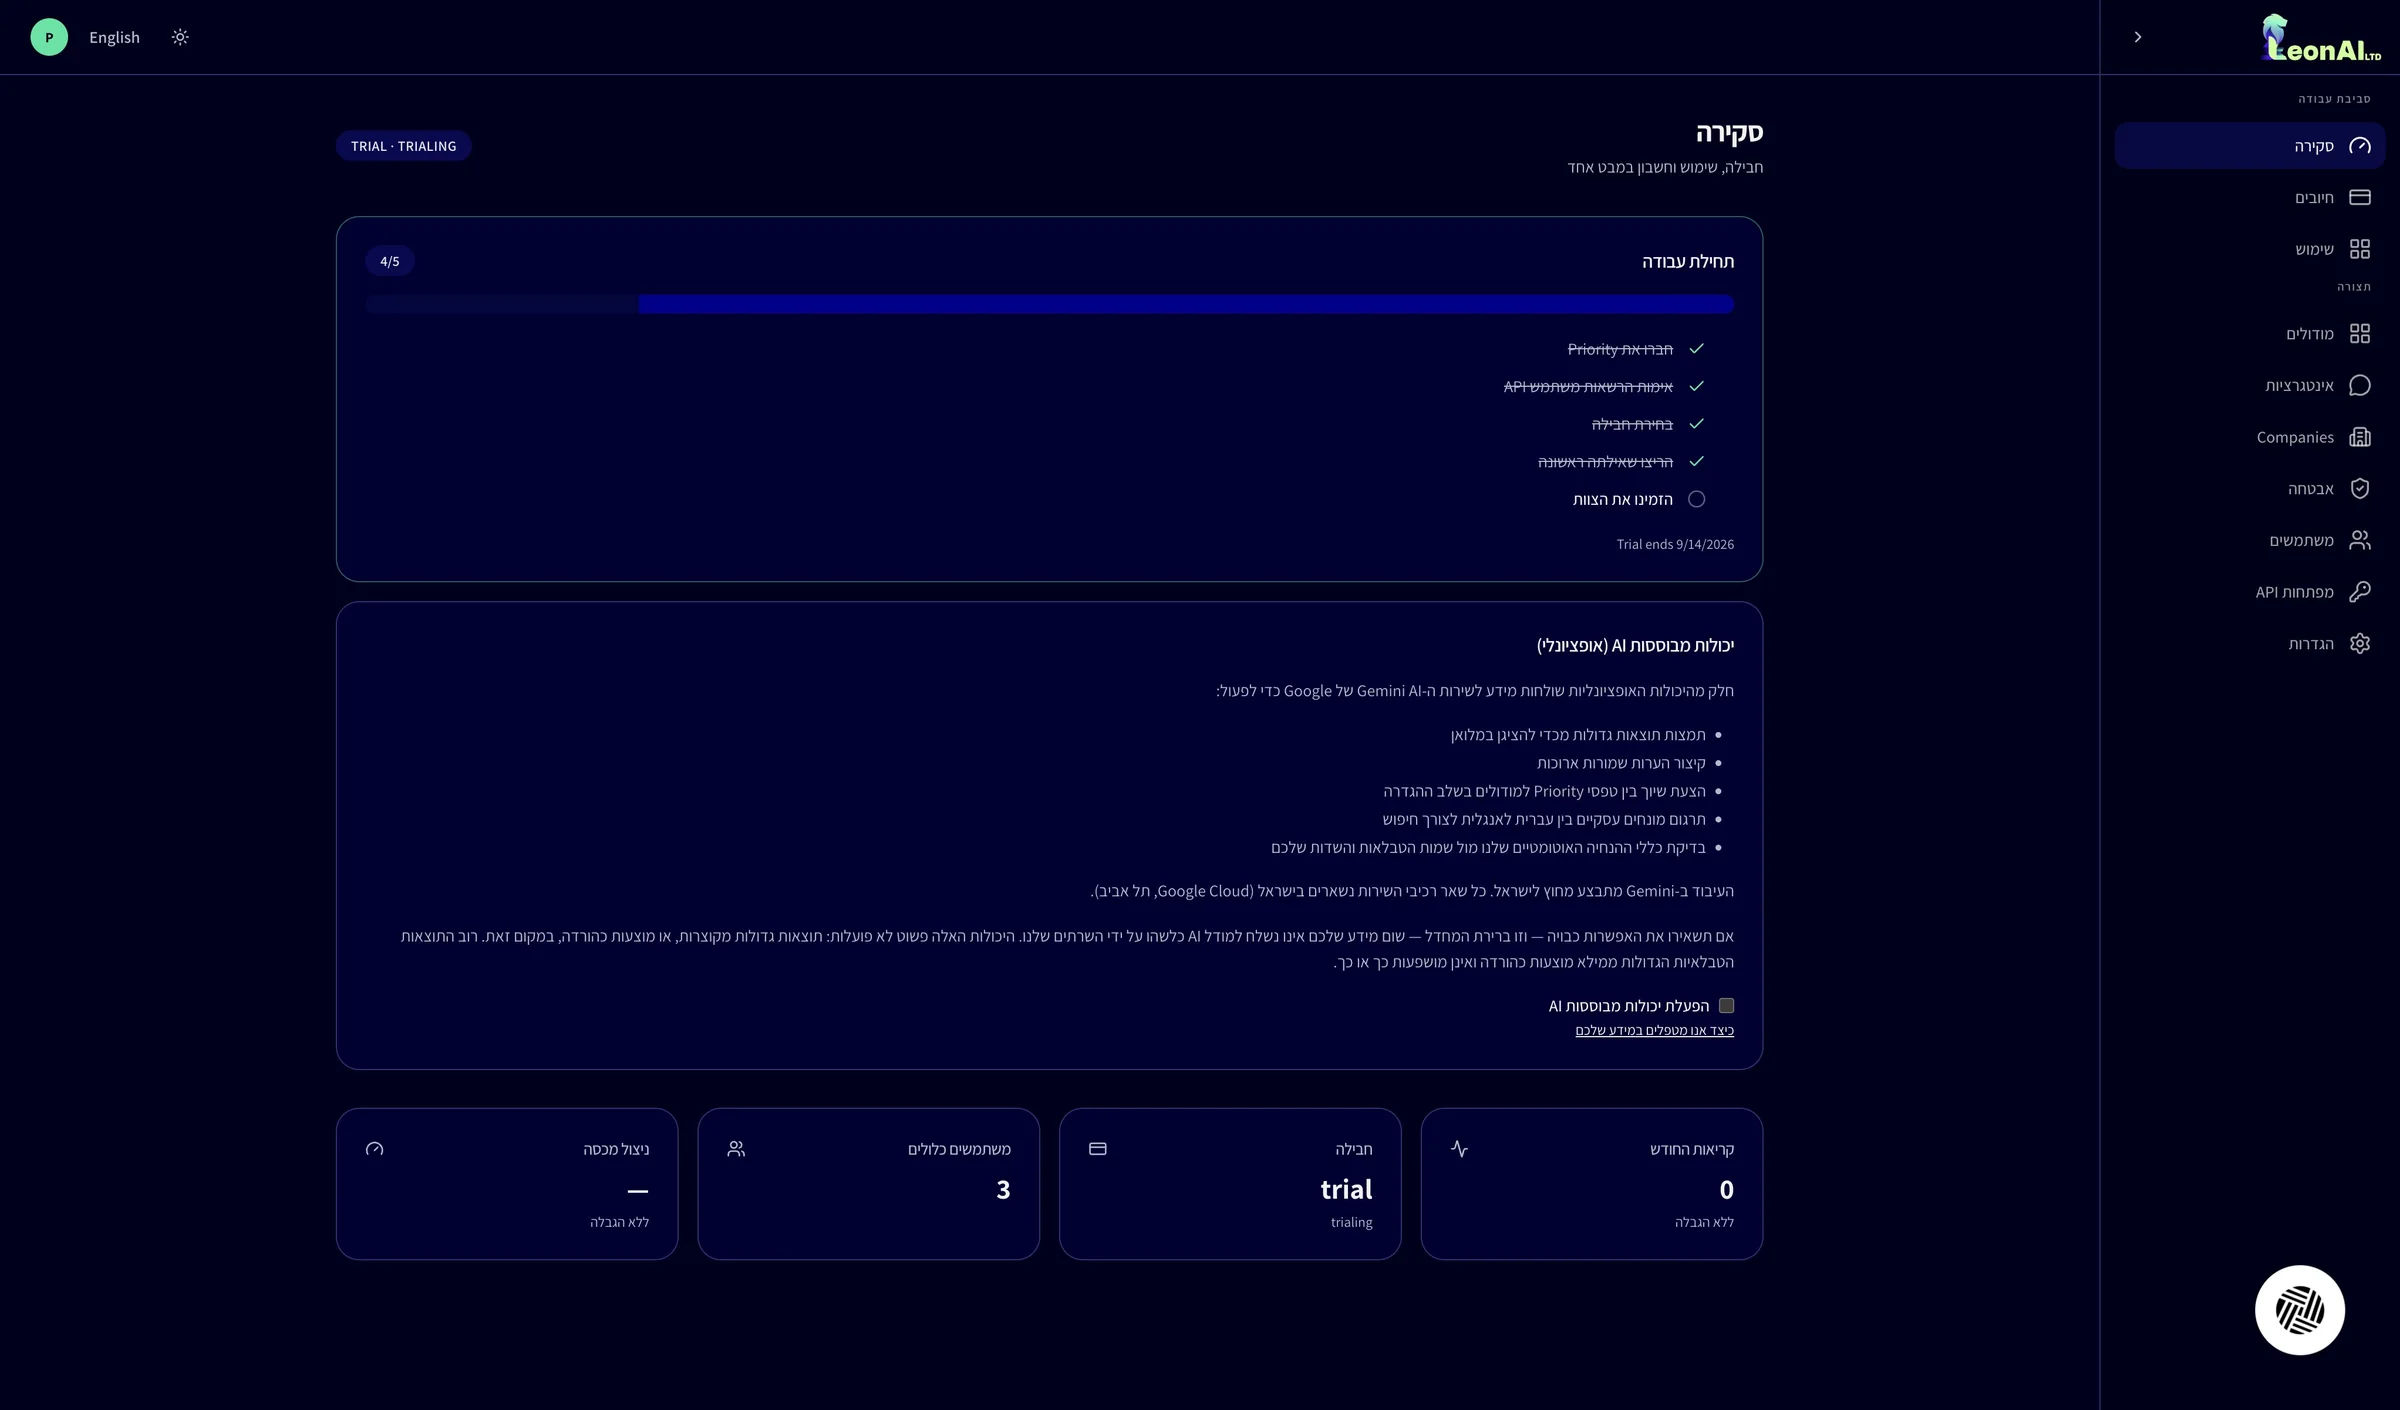
You saw what is left on the getting-started list and when the trial ends.
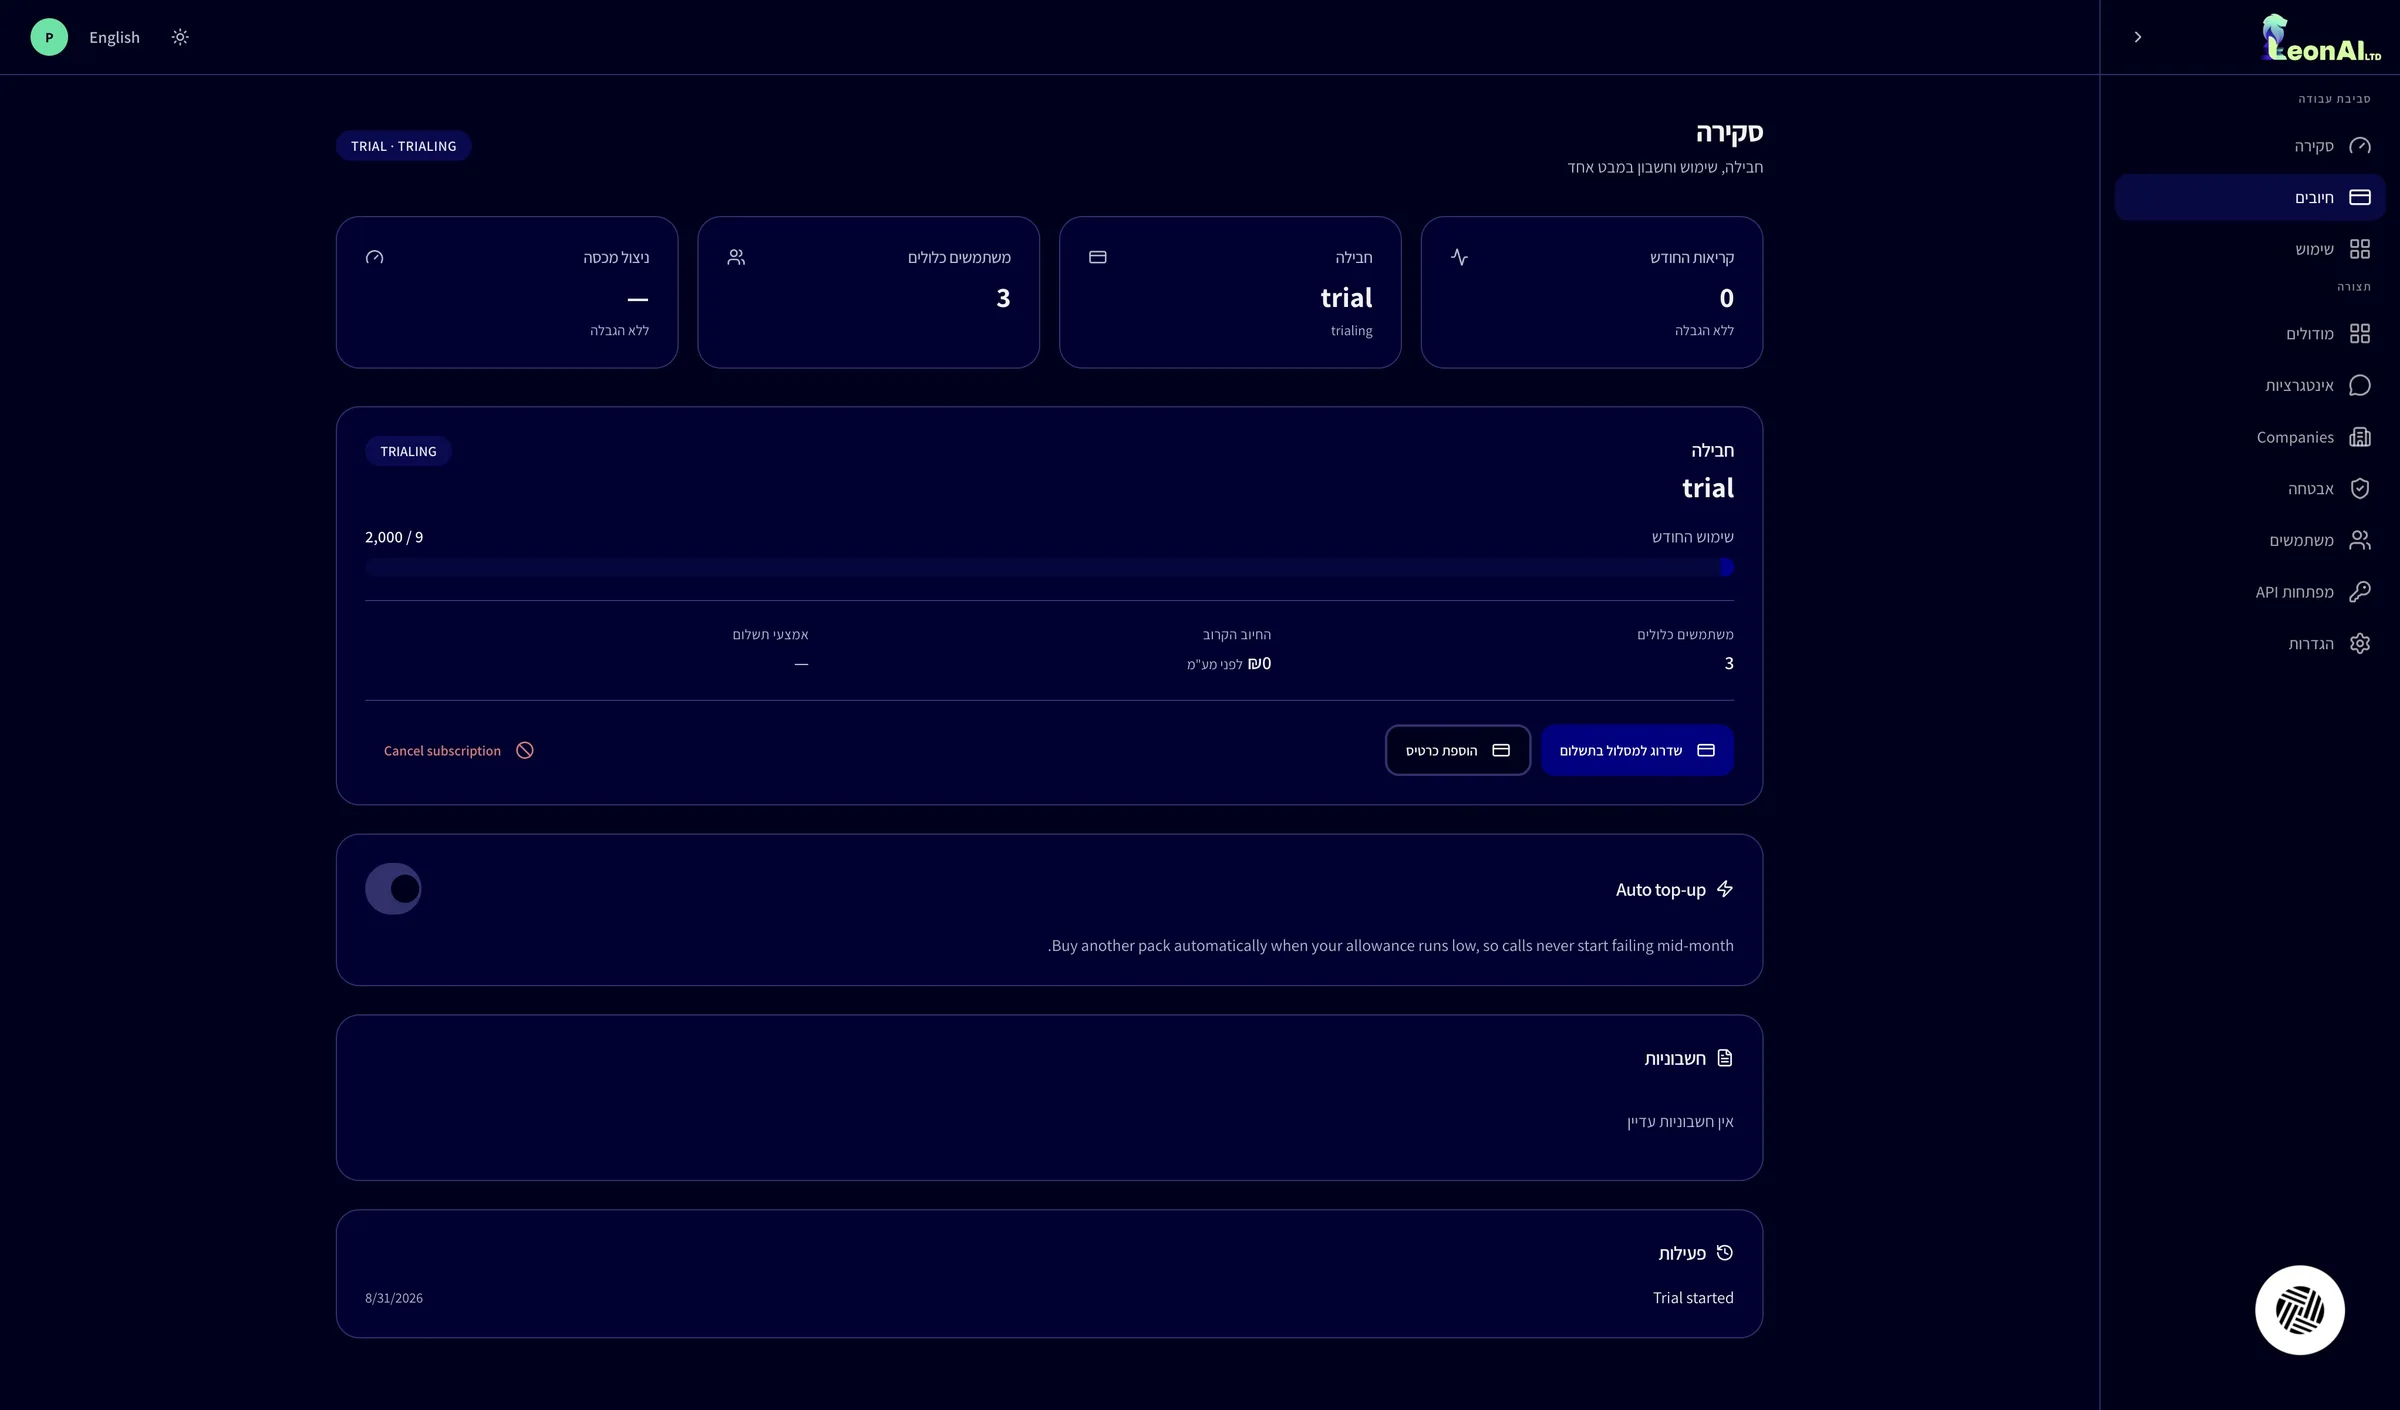
In the side menu click Billing, then Upgrade to a paid plan.
The Billing screen shows your plan, monthly usage, upcoming charge and invoices. This is also where you add a card and turn on Auto top-up, which buys an extra package automatically when your quota is about to run out.
A “Subscribe” window opens.
In the Subscribe window click the Plan field, and choose between Basic, Basic Plus and Unlimited.
Basic Plus removes the user limit, and Unlimited removes the call limit — both at the same price. Choose by the limit you will reach first. Prices exclude VAT.
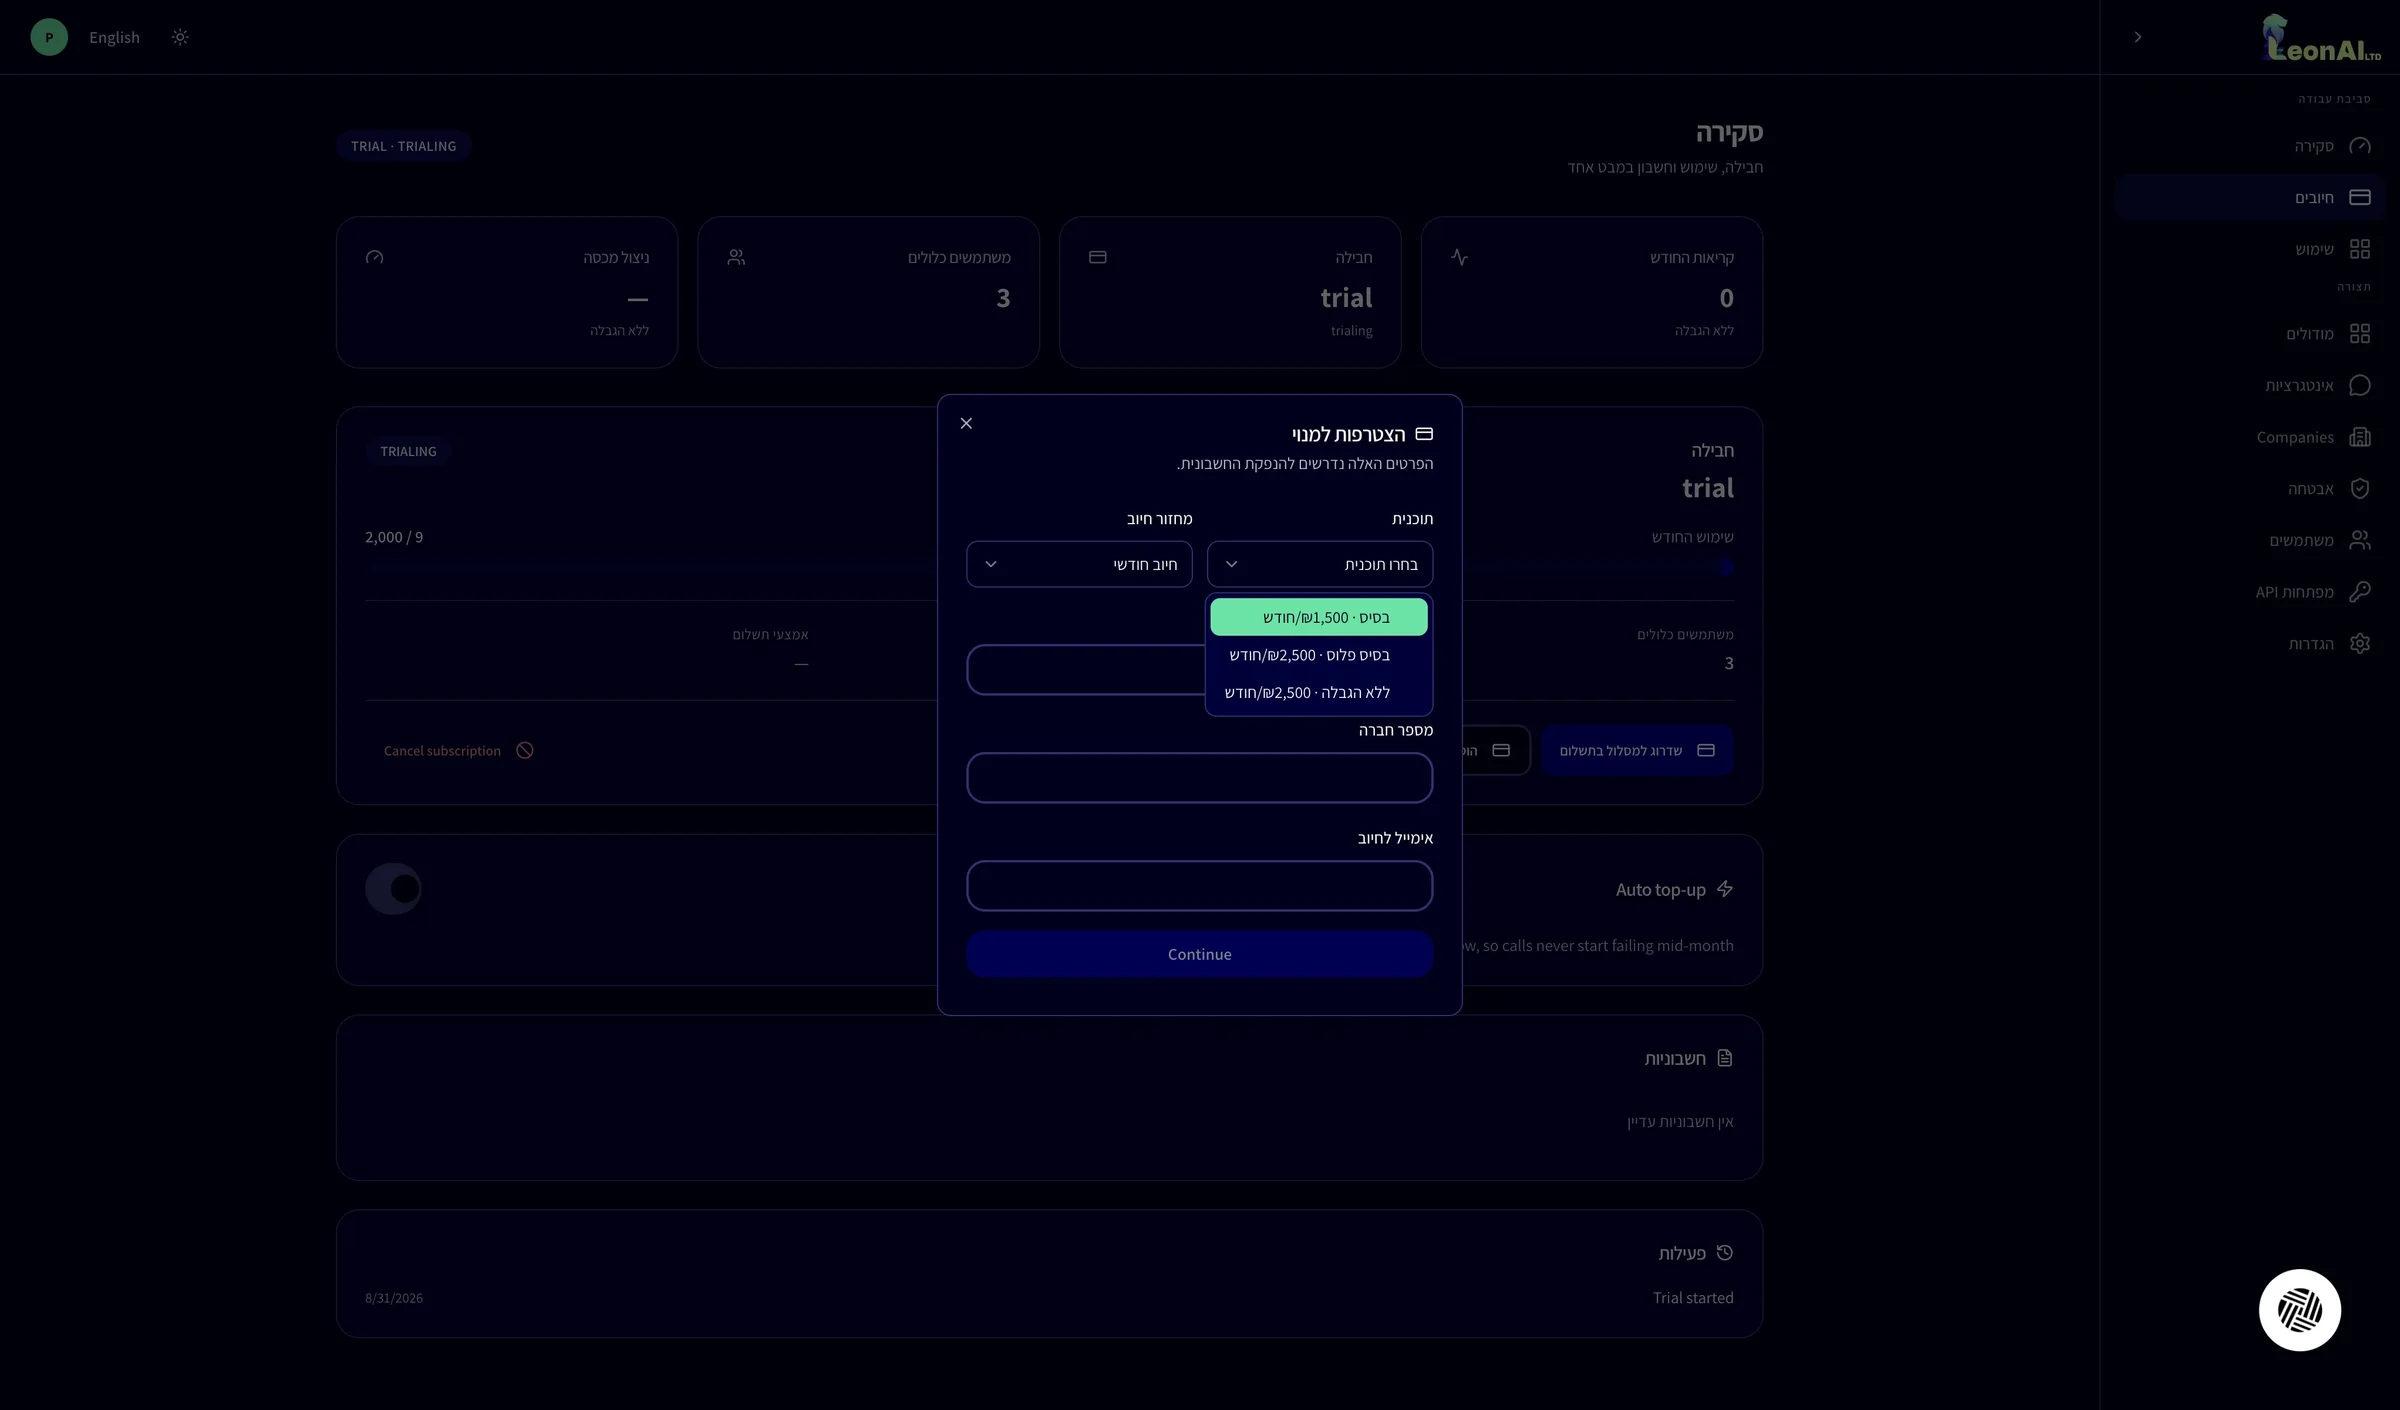
The plan you chose appears in the field.
Choose a billing cycle, fill in Registered company name, Company number and Billing email, and click Continue.
You can choose monthly billing, or yearly billing with two months free. The details are needed for the invoice, so make sure they match your company registration.
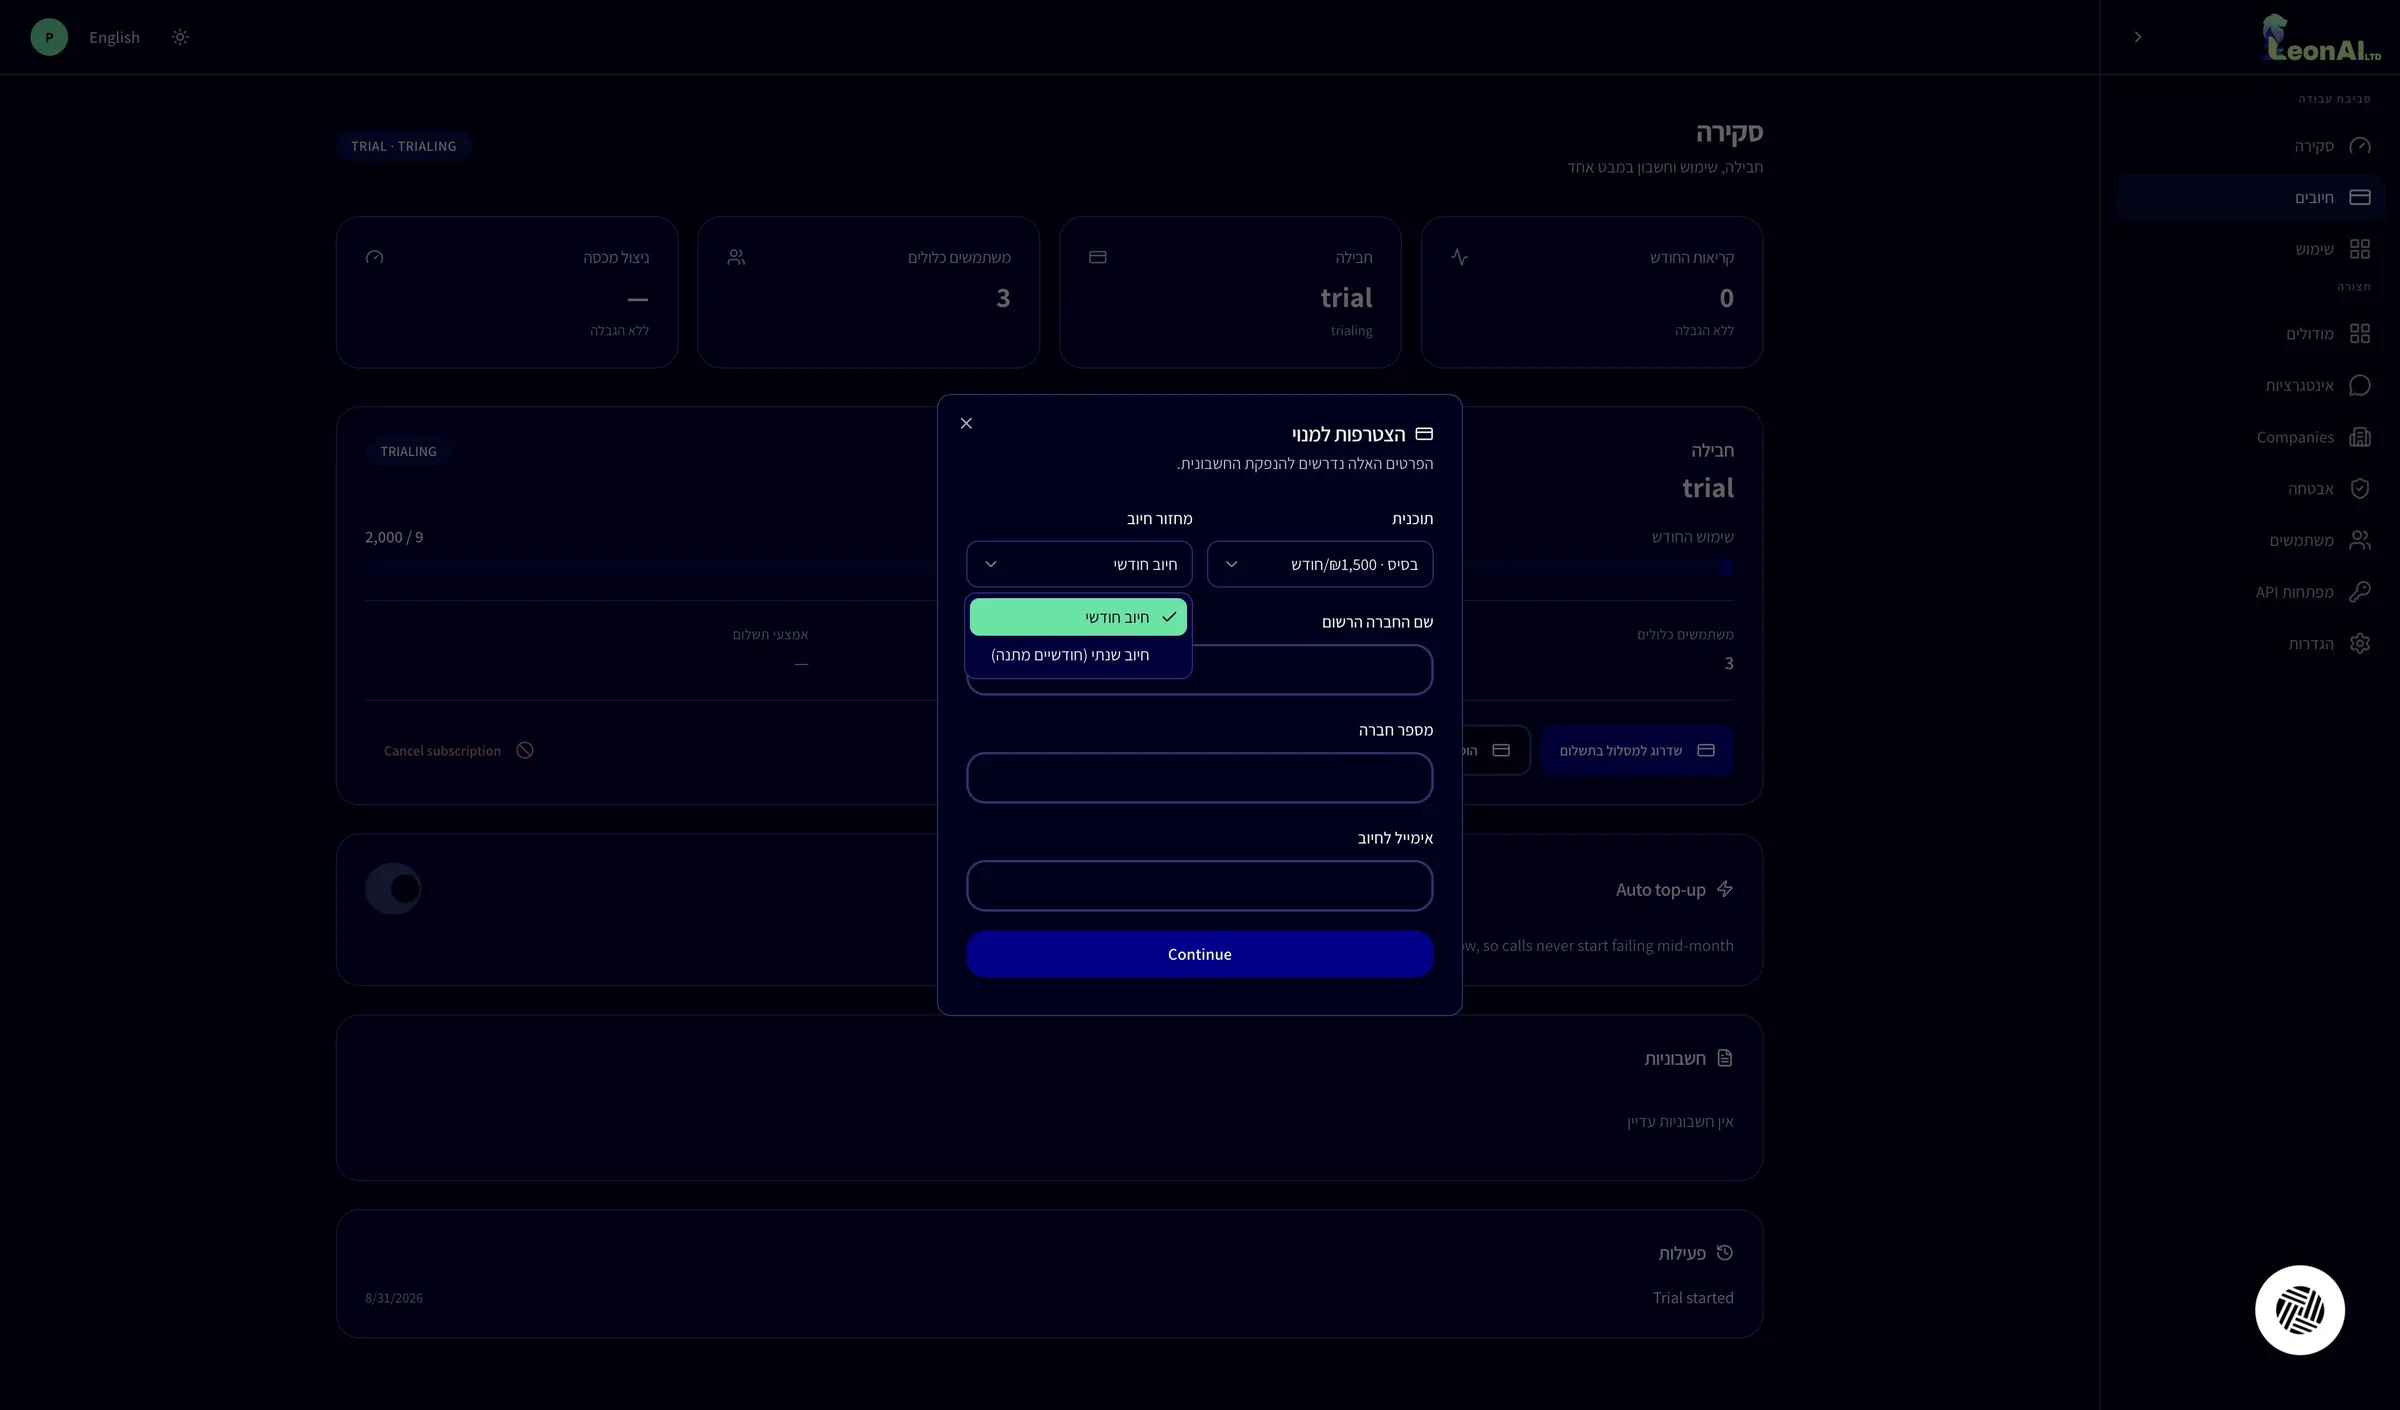
All the fields in the window are filled in, and you clicked Continue.
You can ask Claude about your customers, orders, stock and finances. Users, modules and your plan are managed in the admin portal. If something does not work, see Troubleshooting.